Wood pallets are everywhere. From behind supermarkets to warehouses and construction sites, these humble wooden structures are often discarded as waste. But for DIY enthusiasts and woodworkers, pallets represent one of the most versatile, affordable, and exciting building materials available.
In fact, pallet wood projects have exploded in popularity in recent years. Why? Because they’re cheap, creative, and environmentally friendly. Whether you’re furnishing your home, decorating your backyard, or even starting a small side business, pallet wood projects can save you money while giving you stylish, rustic, and functional results.
In this detailed guide, you’ll discover 15 pallet wood projects anyone can build — from coffee tables to outdoor bars. We’ll cover:
- Why pallet wood is so great for DIY projects
- Safety considerations (not all pallets are safe!)
- Tools and supplies you’ll need
- Step-by-step instructions for each project
- Pro finishing tips to make pallet furniture look professional
- How to sell pallet projects for profit
This isn’t just a quick list — it’s a comprehensive resource (4,500+ words) that will inspire and guide you through every stage of working with pallet wood.
Why Pallet Wood Is Perfect for DIY Projects
Pallets are often overlooked as scrap, but they’re actually a goldmine for DIY woodworkers. Here’s why they’re so popular:
1. Pallets Are Cheap (or Free)
Most businesses receive deliveries on pallets and then throw them away. If you ask politely, many places will gladly let you take them off their hands. Free wood = endless possibilities.
2. Rustic & Stylish
Pallet wood naturally has a weathered, rustic character. Sand and finish it, and you’ve got beautiful farmhouse-style material.
3. Eco-Friendly
Recycling pallets keeps them out of landfills and reduces demand for new lumber. Every pallet you repurpose is a small win for the planet.
4. Durable & Strong
Pallets are designed to carry heavy loads. That means pallet wood is usually tough and capable of withstanding years of use.
Safety Tips for Working With Pallets
Before diving into your first build, keep in mind that not all pallets are safe. Some are treated with chemicals, while others may be contaminated.
- Check the Stamp: Look for the stamp on the side. “HT” = heat-treated (safe). “MB” = methyl bromide (toxic, avoid). “DB” = debarked (safe).
- Avoid Contaminated Pallets: Stay away from pallets that are oily, moldy, or have chemical spills.
- Disassemble Safely: Always remove nails carefully. Hidden nails can damage your tools or cause injury.
- Sand Thoroughly: Pallet wood is rough and splintery. Sanding is essential before use.
Essential Tools for Pallet Wood Projects
You don’t need a high-end workshop to start working with pallet wood. Here are the basics:
- Hammer & Pry Bar – For breaking down pallets.
- Circular Saw / Handsaw – For cutting boards to size.
- Jigsaw – Useful for curves and details.
- Power Drill – For screws and joinery.
- Orbital Sander – To smooth rough wood.
- Clamps – To hold boards while assembling.
- Safety Gear – Gloves, goggles, dust mask.
Optional but recommended: Kreg Jig (pocket hole joinery), miter saw, and wood glue.
15 Creative Pallet Wood Projects (Step-by-Step)
Let’s jump into the 15 builds. Each project includes a materials list, steps, and finishing tips.
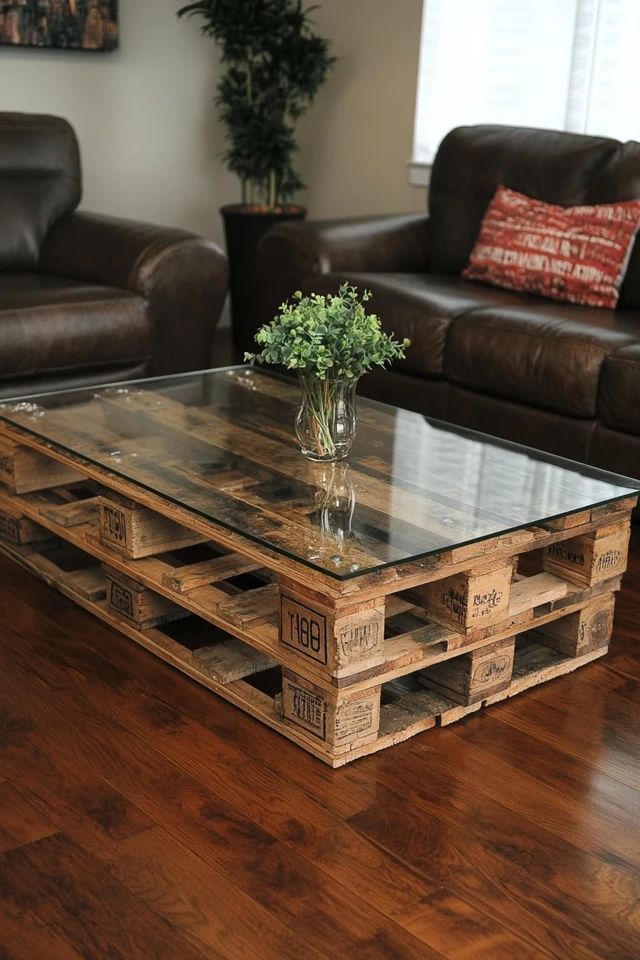
1. Pallet Wood Coffee Table
Skill Level: Beginner
Time Required: 2–3 hours
Materials:
- 2–3 pallets
- Screws & drill
- Hairpin legs (optional)
- Sandpaper & stain
Steps:
- Disassemble 2 pallets, keeping long planks intact.
- Build a rectangular top by aligning planks side by side.
- Attach support boards underneath.
- Sand thoroughly.
- Add legs (hairpin, caster wheels, or pallet blocks).
- Stain or paint to match your décor.
Pro Tip: A glass top adds a modern touch while protecting the wood.
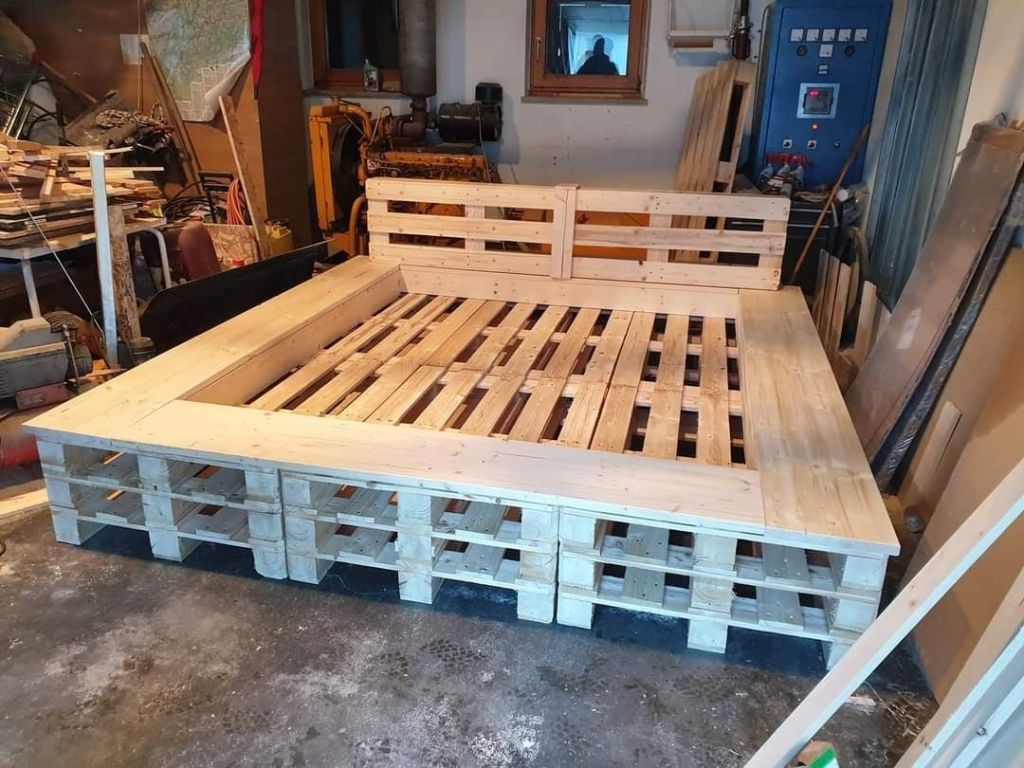
2. Rustic Pallet Bed Frame
Skill Level: Intermediate
Time Required: 1 day
Materials:
- 6–8 pallets
- Screws & brackets
- Sandpaper & finish
Steps:
- Lay pallets flat to form a bed base (queen = 6, king = 8).
- Secure pallets together with brackets.
- Add extra boards for reinforcement.
- Sand edges to avoid splinters.
- Finish with a headboard (optional).
Variation: Add caster wheels for mobility.
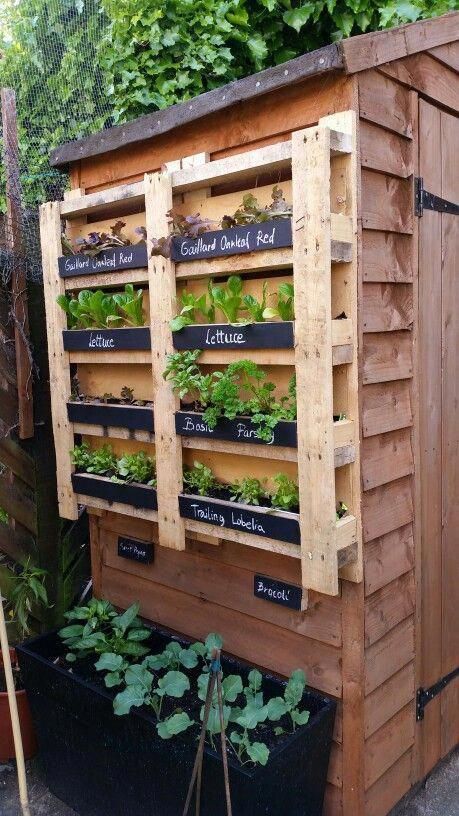
3. Pallet Herb Garden
Skill Level: Beginner
Time Required: 2–3 hours
Steps:
- Stand pallet vertically.
- Line back with landscape fabric.
- Fill gaps with soil.
- Plant herbs in rows.
Tip: Use chalkboard paint on slats to label each herb.
4. Pallet Shoe Rack
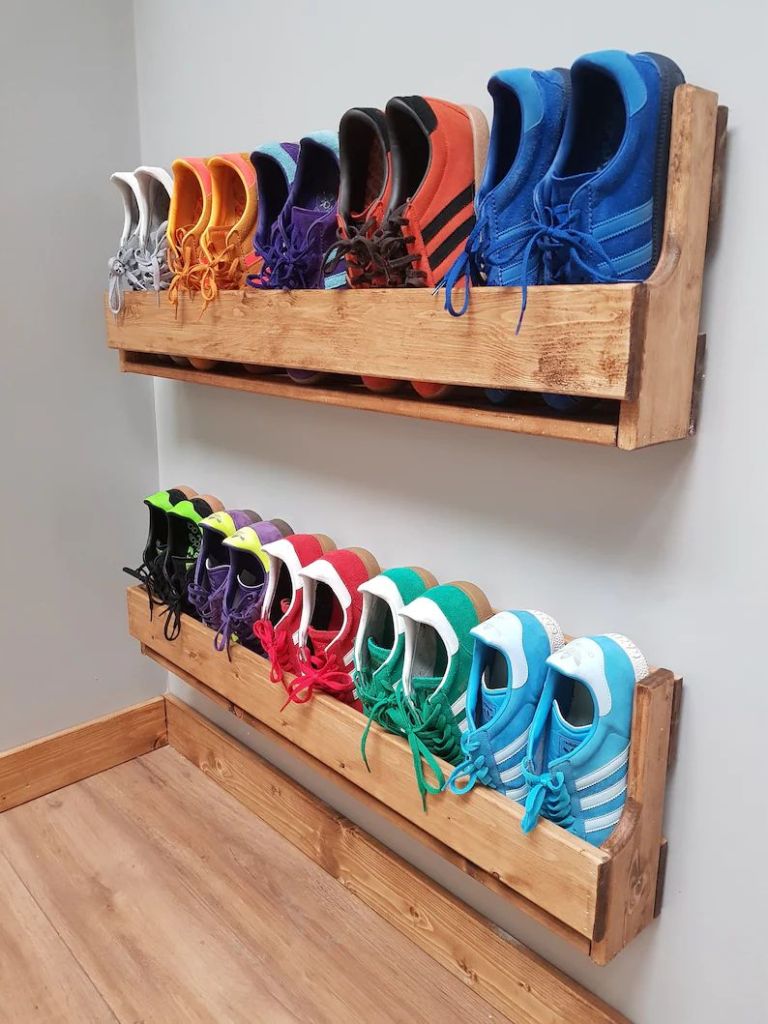
Perfect for small spaces.
Steps:
- Stand pallet upright.
- Secure to the wall.
- Slide shoes between slats.
Extra Touch: Paint in bold colors for a playful look.
5. Pallet Bookshelf
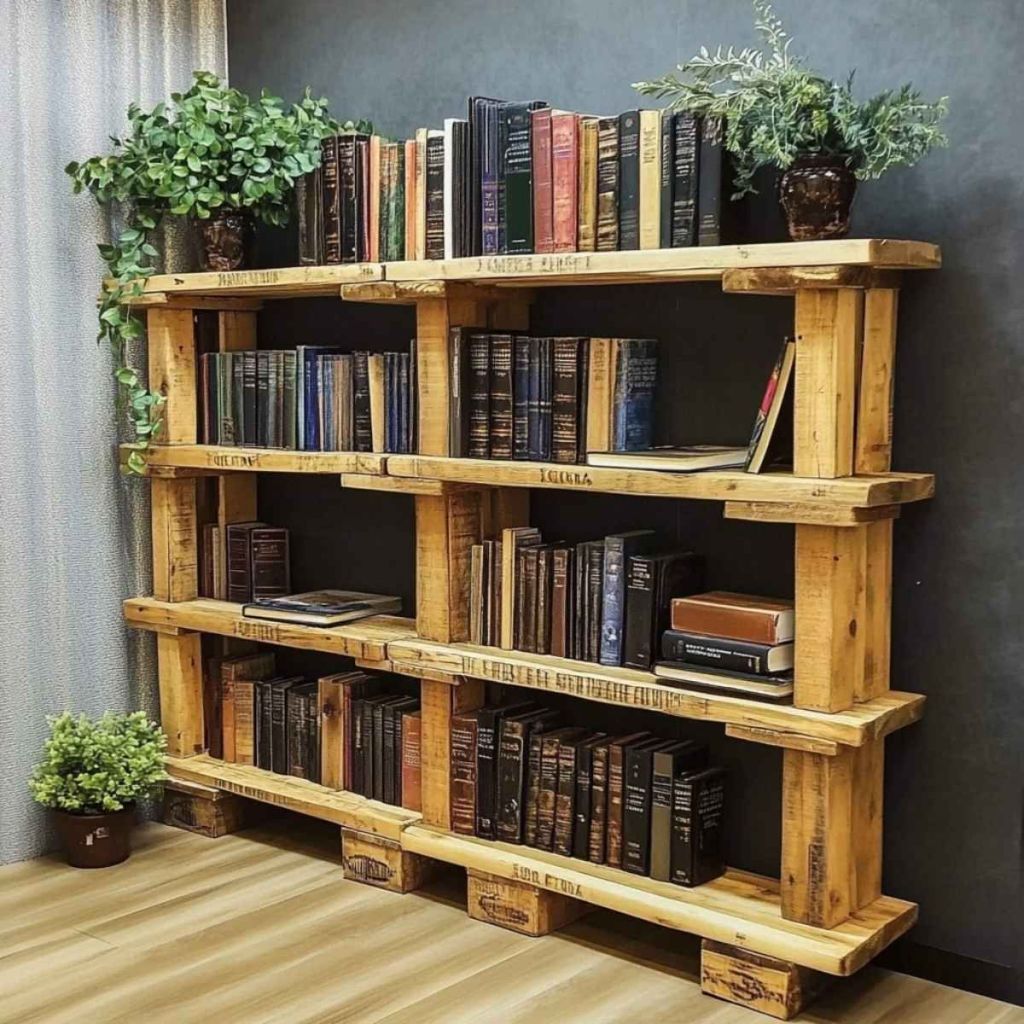
Steps:
- Disassemble pallets into planks.
- Build a rectangular frame.
- Add shelves inside.
- Sand & finish.
Pro Tip: Leave nail holes exposed for rustic charm.
6. Pallet Outdoor Sofa
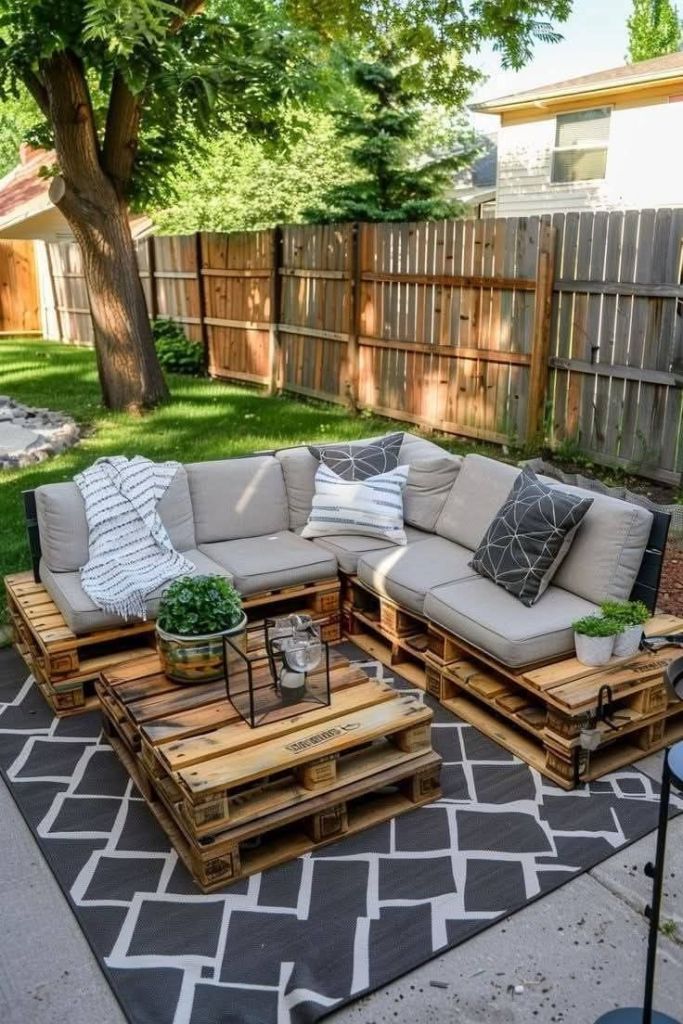
Steps:
- Stack pallets to form seating base.
- Attach backrest boards.
- Add outdoor cushions.
Variation: Create a sectional by arranging pallets in an L-shape.
7. Pallet Wine Rack
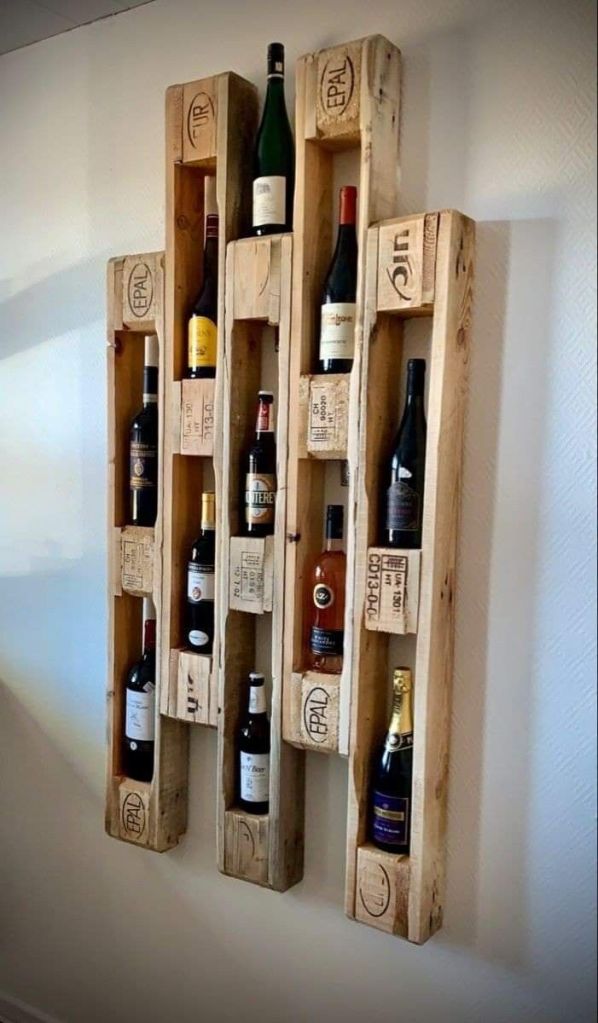
Steps:
- Cut pallet slats into a rectangular frame.
- Add bottom support for bottles.
- Install a stemware holder under the shelf.
- Mount on wall.
Finishing Touch: Dark walnut stain = classy look.
8. Pallet Kitchen Island
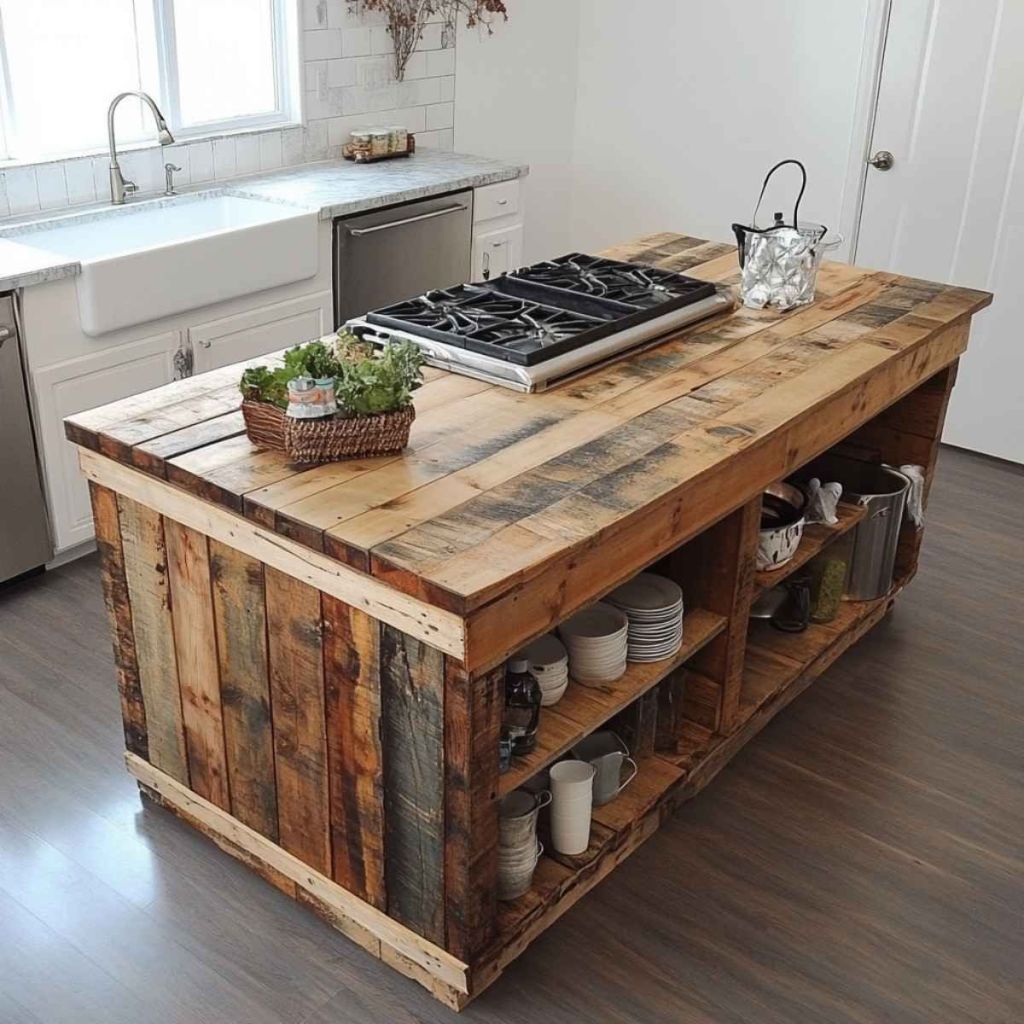
Steps:
- Use 2–3 pallets as a base.
- Add countertop (butcher block or pallet planks).
- Sand thoroughly.
- Optional: Add wheels for mobility.
9. Pallet Swing Chair
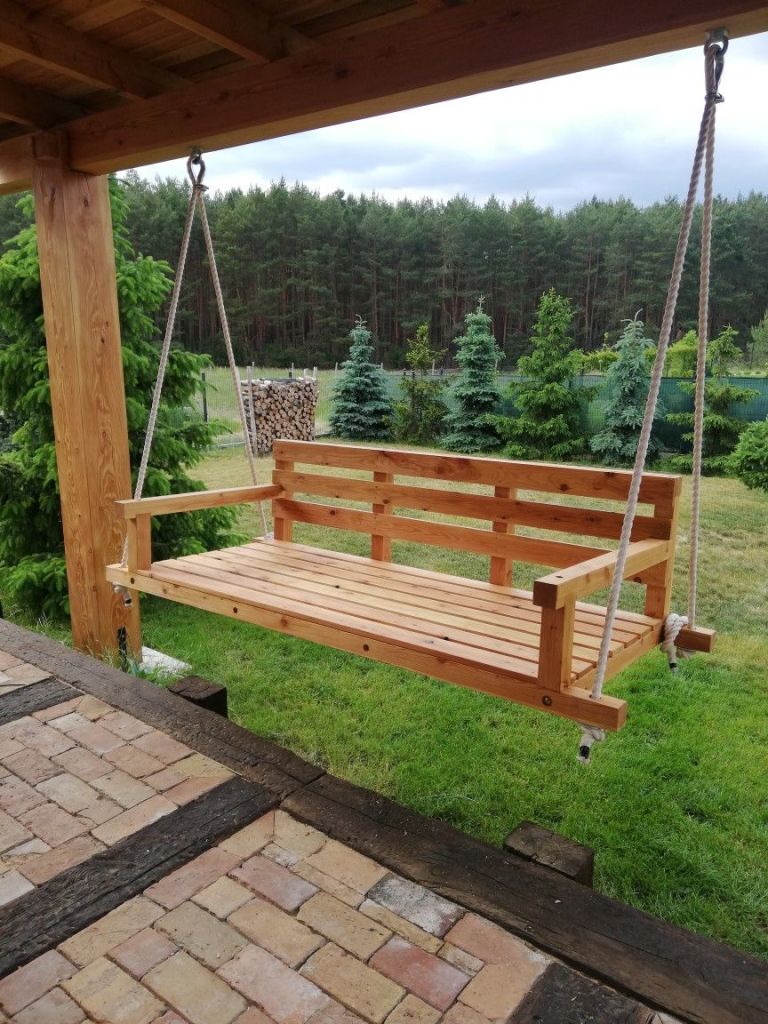
Steps:
- Use pallet base as seat.
- Reinforce with extra planks.
- Drill holes & attach rope/chain.
- Hang securely from a beam or tree.
Safety Note: Always use heavy-duty hardware.
10. Pallet Desk
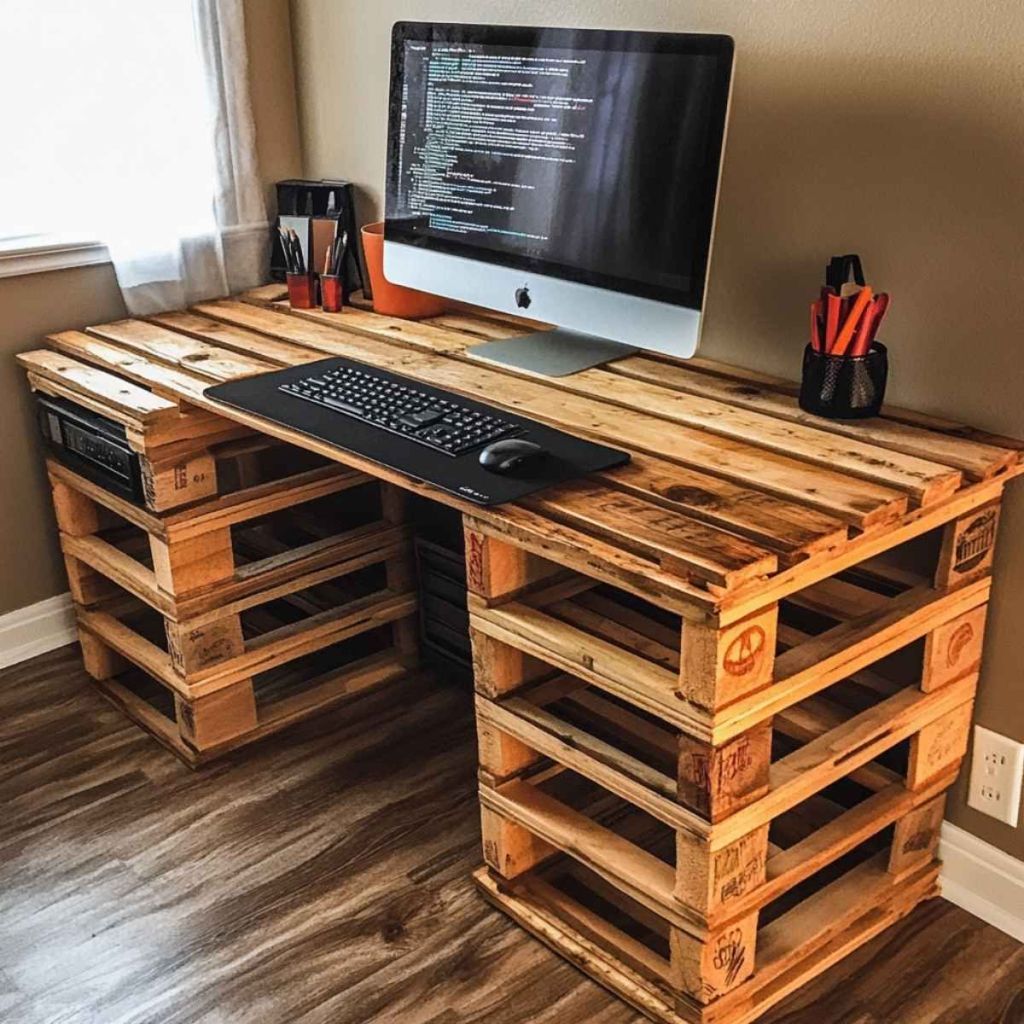
Steps:
- Build tabletop from pallet planks.
- Attach legs (metal or wood).
- Sand & finish.
Extra: Add shelves on one side for storage.
11. Pallet Wall Art
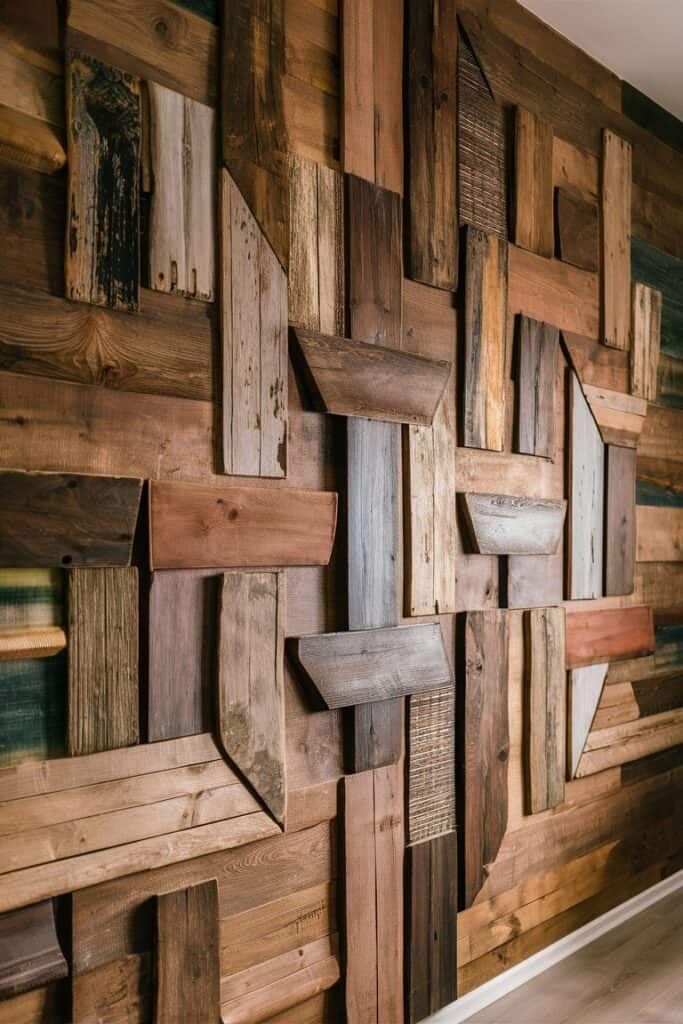
Steps:
- Cut planks into shapes (arrows, chevrons, world map).
- Arrange on backing board.
- Stain in different shades for contrast.
12. Pallet Dog Bed
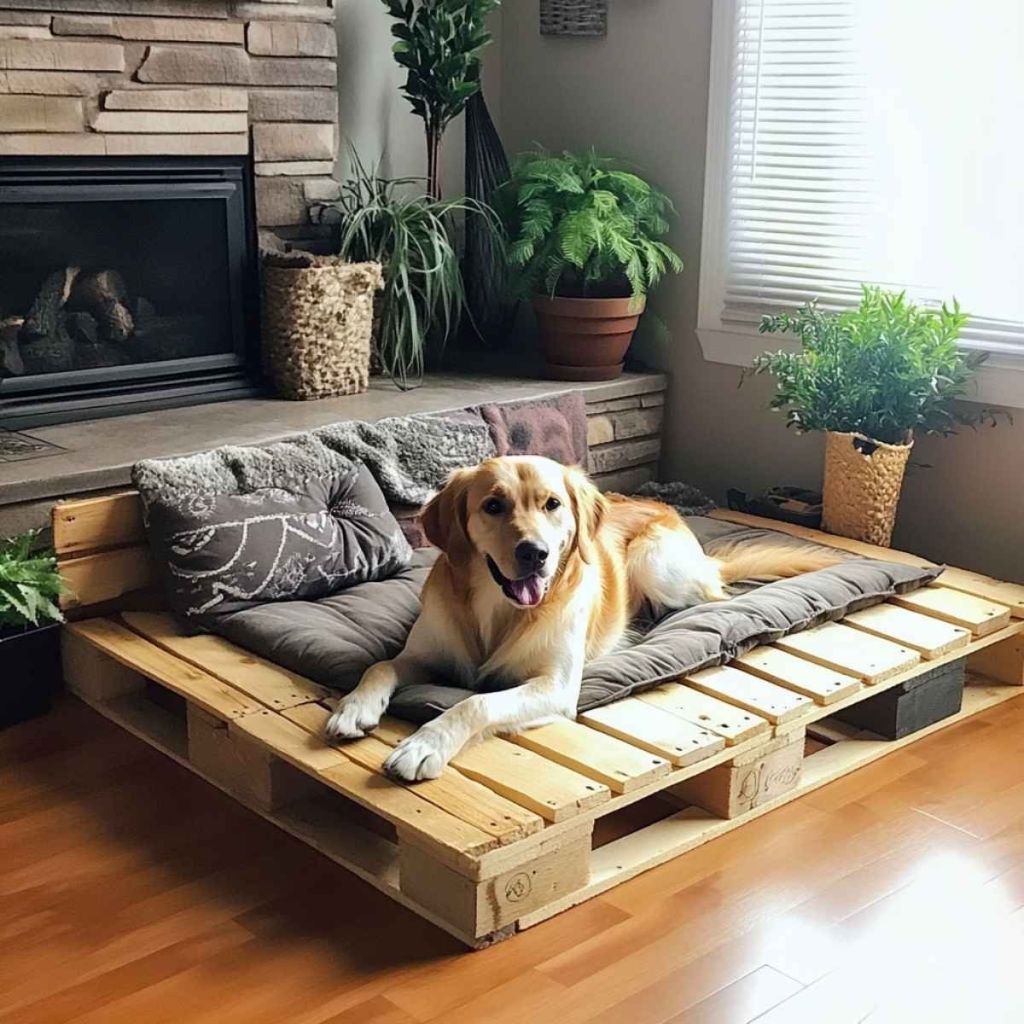
Steps:
- Cut pallet down to size.
- Add short legs.
- Sand edges.
- Insert cushion.
13. Pallet Garden Fence
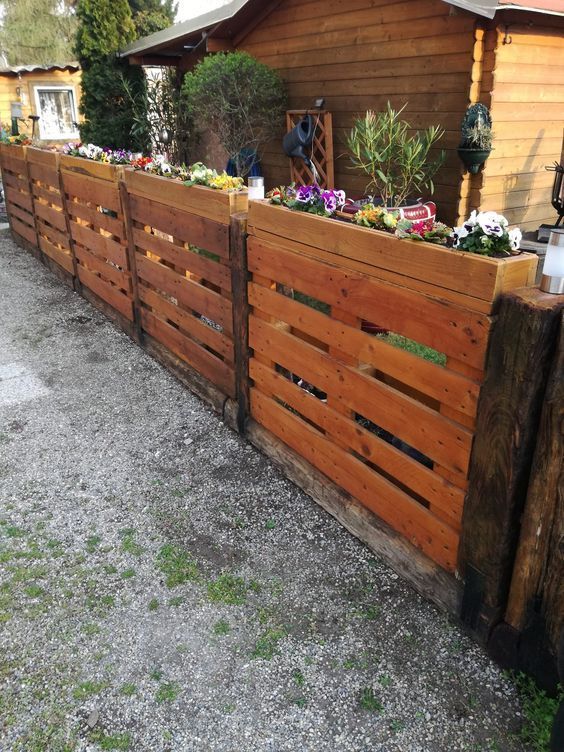
Steps:
- Stand pallets vertically.
- Secure together with screws.
- Anchor posts into ground.
14. Pallet Compost Bin
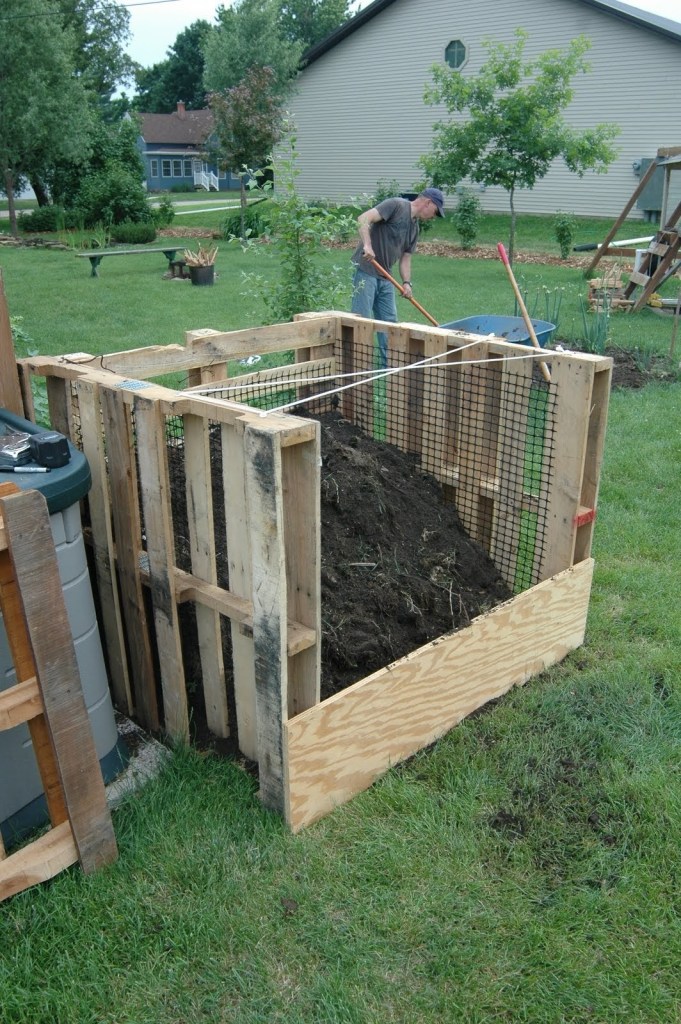
Steps:
- Use 3 pallets for sides.
- Secure into U-shape.
- Add a 4th pallet for a door (optional).
15. Pallet Bar / Entertainment Unit
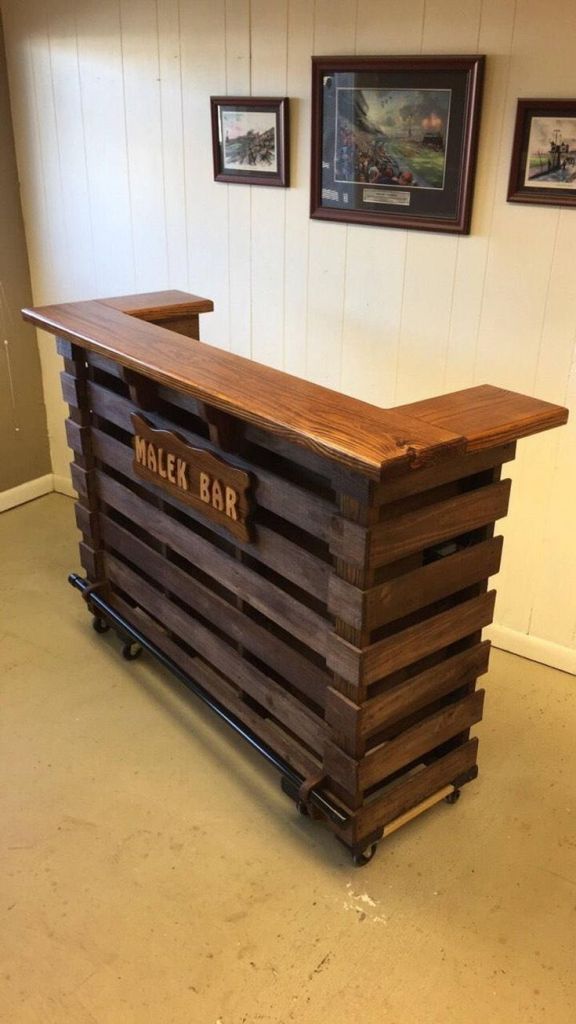
Steps:
- Stack pallets for bar base.
- Cut top counter surface.
- Add shelves inside.
- Finish with paint or stain.
Tip: Add LED lights under the counter for a modern touch.
Pro Tips for Working with Pallet Wood
- Sanding is everything – Don’t skip it. Smooth surfaces = pro finish.
- Mix materials – Pair pallet wood with glass or metal for modern designs.
- Seal for durability – Use polyurethane if projects will be outdoors.
- Think modular – Many pallet builds are stackable and expandable.
Common Mistakes to Avoid
- Using chemically treated pallets.
- Forgetting to check for hidden nails.
- Skipping sanding and finishing.
- Overbuilding (pallets are heavy — keep projects practical).
Can You Make Money with Pallet Projects?
Yes! Many people turn pallet projects into side businesses. Popular selling items include:
- Wine racks
- Coffee tables
- Garden planters
- Shelves and signs
Sell them locally, at farmer’s markets, or online on Etsy, Facebook Marketplace, and eBay.
👉 For serious builders, I recommend Ted’s Woodworking Plans. It contains over 16,000 detailed woodworking plans, including pallet projects, furniture, sheds, and more. Having step-by-step diagrams makes projects faster, easier, and more professional-looking.
Pallet Wood Projects FAQs
Are pallet projects good for beginners?
Yes! Pallets are cheap and forgiving. Mistakes don’t cost much.
Do pallet projects last long?
With proper sanding, finishing, and sealing, pallet furniture can last for years.
What’s the easiest pallet project?
A vertical garden or shoe rack is the simplest for beginners.
How do I finish pallet wood?
Sand, stain or paint, and seal with polyurethane for durability.
Conclusion
Pallet wood is one of the most budget-friendly, eco-friendly, and creative materials for DIY furniture and décor. From rustic coffee tables to stylish outdoor lounges, the possibilities are endless. With a bit of sanding and imagination, you can transform free scrap wood into professional-looking projects that add value to your home — or even make you money.
If you’re excited to explore more, don’t forget to check out Ted’s Woodworking Plans. It’s one of the most comprehensive resources for woodworking, with thousands of detailed instructions to help you build anything from a birdhouse to a backyard shed.
Affiliate Disclosure
This article contains affiliate links. If you click on a link and make a purchase, I may earn a commission at no extra cost to you. This helps support the site and allows me to continue sharing free woodworking tutorials and ideas.
Discover more from WoodReality
Subscribe to get the latest posts sent to your email.
