Organizing a small workshop can be a challenging task. Limited space often means compromising on functionality, but with careful planning and creative solutions, you can transform even the tightest areas into a productive and efficient workspace. This comprehensive guide will provide you with actionable tips and strategies to help you maximize your small workshop’s potential. Whether you’re into woodworking, carpentry, or general DIY, these ideas will help you stay organized and work smarter.
Why Workshop Organization Matters
A well-organized workshop isn’t just about aesthetics—it’s about efficiency and safety. When tools and materials are easy to find, you save time and reduce frustration. Additionally, a clean, clutter-free workspace minimizes the risk of accidents, allowing you to focus on your projects.
1. Assess Your Space
Start by evaluating your workshop’s dimensions and layout. This is a crucial step in creating an organizational plan that works for your unique needs.
- Measure the Area: Take accurate measurements of your workshop, noting the length, width, and height of the space.
- Identify Obstructions: Note any windows, doors, or structural elements that might limit where you can place furniture or storage.
- Determine Workflow Needs: Think about how you move around the workshop and ensure that frequently used tools and materials are within easy reach.
2. Prioritize Essential Tools
In a small workshop, every square foot counts. Prioritize the tools and equipment you use most often and find storage solutions tailored to these items.
- Inventory Your Tools: Make a list of all your tools and categorize them by frequency of use. For example, place power tools and hand tools in separate groups.
- Declutter: Get rid of duplicate or rarely used tools. Consider selling, donating, or storing them elsewhere.
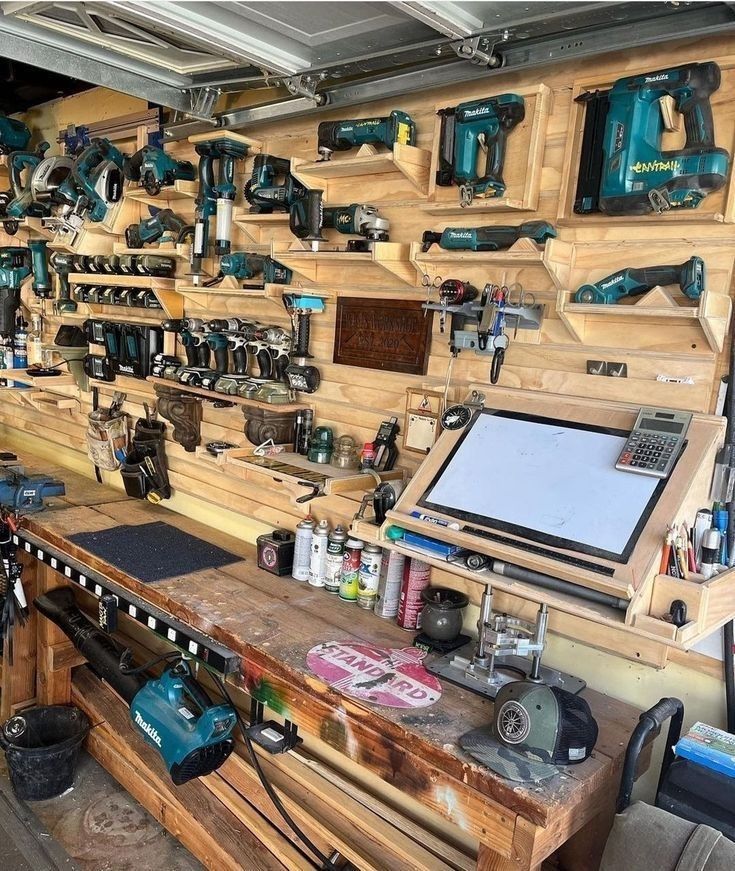
3. Utilize Vertical Storage Solutions
When floor space is limited, vertical storage becomes your best friend. Maximize your wall space with these creative ideas:
- Pegboards: Use pegboards to hang hand tools, clamps, and accessories. Pegboards are versatile, allowing you to rearrange items as needed.
- Wall-Mounted Shelves: Install sturdy shelves to store lightweight items like paint cans, glue, and other supplies.
- Magnetic Strips: Use magnetic strips to keep metal tools such as screwdrivers, wrenches, and drill bits organized.
- Overhead Storage: Ceiling-mounted racks are excellent for storing lumber, pipes, and other bulky materials.
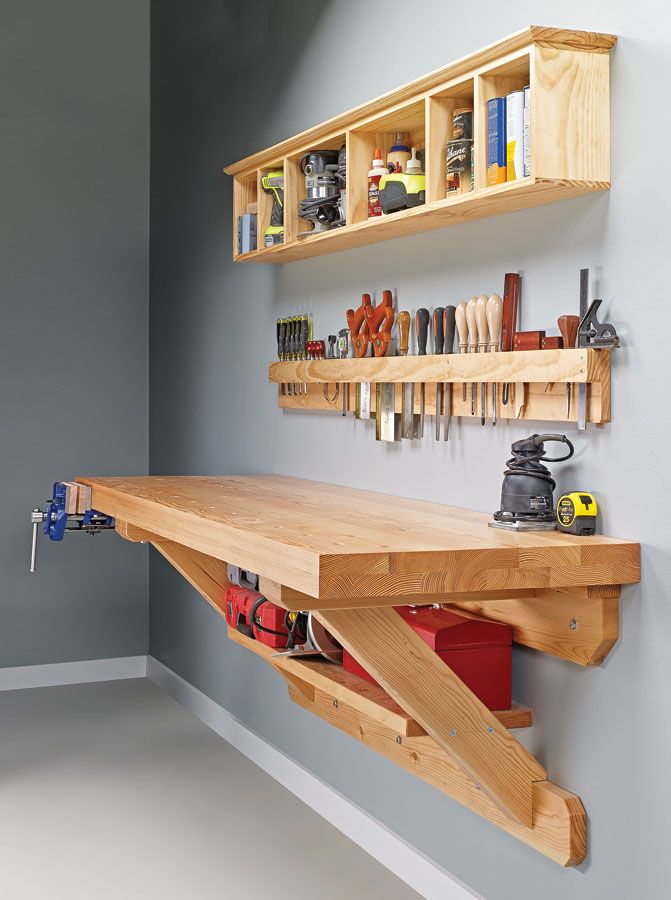
4. Optimize Your Workbench
Your workbench is the centerpiece of your workshop. A well-designed workbench not only provides a surface to work on but also doubles as a storage unit.
- Foldable Workbench: Consider a wall-mounted, foldable workbench that can be stowed away when not in use.
- Under-Bench Storage: Add drawers or shelves beneath your workbench to store frequently used tools and materials.
- Custom Workbench Features: Install built-in clamps, power strips, or tool racks to enhance functionality.
5. Create Mobile Workstations
Flexibility is key in a small workshop. Mobile workstations allow you to adapt your workspace as needed.
- Rolling Tool Carts: Equip carts with wheels to move tools and supplies around the workshop.
- Portable Workbenches: Lightweight, collapsible workbenches can be set up and moved as needed.
- Mobile Storage Cabinets: Store heavy tools or equipment in rolling cabinets for easy repositioning.
6. Improve Lighting
Proper lighting is essential for precision and safety in a workshop. A combination of general and task-specific lighting works best.
- LED Strip Lights: Install under-shelf or cabinet LED lights to illuminate work areas.
- Task Lighting: Use adjustable lamps to provide focused lighting for detailed tasks.
- Natural Light: If possible, position your workspace near windows to take advantage of natural light.
7. Manage Cables and Cords
Loose cables and cords can clutter your workspace and pose safety risks. Keep them organized with these solutions:
- Cable Clips: Secure cords along walls or under workbenches using clips or adhesive mounts.
- Retractable Cord Reels: Install retractable reels for extension cords and air hoses to keep them off the floor.
- Label Cables: Use color-coded labels to identify different power tools and their cords.
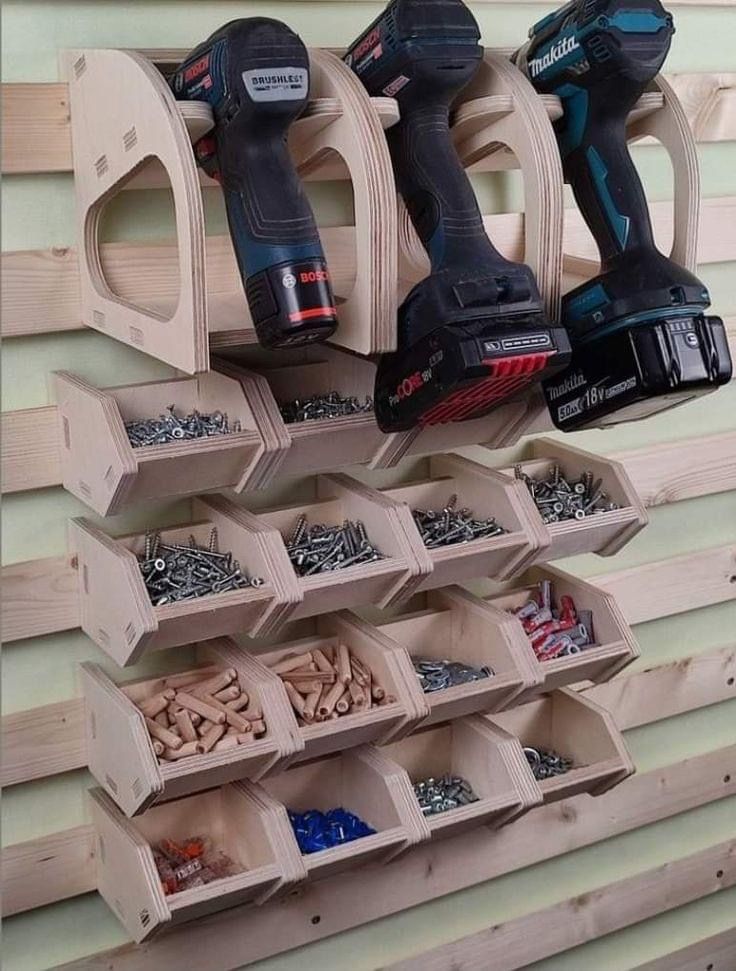
8. Label and Categorize Everything
An organized workshop relies on clear labeling and categorization to ensure you can find items quickly.
- Label Makers: Clearly label drawers, bins, and shelves for easy identification.
- Color-Coded Systems: Assign specific colors to categories like hardware, fasteners, and adhesives.
- Transparent Storage Bins: Use clear bins to quickly identify contents without opening them.

9. Include Safety Features
A safe workshop is a productive workshop. Make safety a priority by incorporating these features:
- Fire Extinguishers: Ensure you have an appropriate fire extinguisher accessible and maintained.
- Ventilation: Install proper ventilation to remove dust, fumes, and other contaminants.
- Protective Gear Storage: Dedicate a spot for safety glasses, gloves, masks, and ear protection.
10. Regular Maintenance and Cleanup
Keeping your workshop organized requires consistent effort. Develop a routine for maintenance and cleanup to prevent clutter from building up.
- Daily Cleanup: Spend a few minutes at the end of each work session returning tools to their designated places.
- Weekly Inspections: Check your organization systems regularly to see if they’re still meeting your needs.
- Seasonal Overhauls: Go through your workshop seasonally to declutter and reorganize as needed.
Bonus Tips for Small Workshop Owners
- Multi-Purpose Furniture: Invest in furniture or tools that serve multiple functions.
- Compact Tools: Consider buying smaller, space-saving versions of tools where possible.
- DIY Storage Solutions: Build custom storage tailored to your unique needs and space constraints.
Take Your Woodworking to the Next Level with Ted’s Woodworking Plans
Looking for detailed plans to create your dream projects? Ted’s Woodworking Plans offer over 16,000 step-by-step guides for every skill level. From workshop organization to advanced carpentry, these plans have everything you need to succeed.
⬇️ Check Out Ted’s Woodworking Plans Now
Affiliate Disclosure: This article contains affiliate links. If you make a purchase through these links, we may earn a commission at no additional cost to you. This helps support our work and allows us to continue providing valuable content.
Discover more from WoodReality
Subscribe to get the latest posts sent to your email.
