Floating shelves have become a staple in modern interior design, offering a perfect blend of functionality and style. These minimalist storage solutions are not only practical but also add an elegant touch to any room. Whether you’re a seasoned DIY enthusiast or a beginner, building your own floating shelves can be a fun and rewarding project. This comprehensive guide will walk you through everything you need to know about DIY floating shelves, from planning and materials to installation and maintenance.

What Are Floating Shelves?
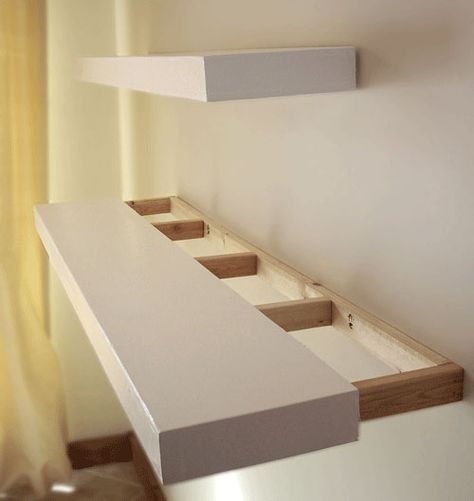
Floating shelves are wall-mounted units that appear to defy gravity. Unlike traditional shelves, they lack visible brackets or supports, creating a sleek and seamless look. This is achieved by using concealed brackets or mounting hardware hidden within the shelf itself.
These versatile shelves can be used in various spaces, including:
- Living Rooms: To display books, plants, or decorative items.
- Kitchens: For organizing dishes, spices, or small appliances.
- Bathrooms: As storage for toiletries and towels.
- Offices: For holding books, files, and office supplies.
Why Build DIY Floating Shelves?
Building your own floating shelves has several advantages:
- Cost-Effective: Pre-made shelves can be expensive. DIY projects often cost a fraction of the price.
- Customizable: You can tailor the size, style, and finish to perfectly match your home décor.
- Skill Development: DIY projects are a great way to improve your woodworking and carpentry skills.
- Personal Satisfaction: There’s a unique joy in creating something with your own hands.

Planning Your DIY Floating Shelves
Before starting your project, proper planning is essential:
1. Choose the Location
Decide where you want to install the shelves. Ensure the wall is sturdy enough to support the weight of the shelves and their contents.
2. Measure the Space
Measure the length, width, and height of the space where the shelves will be installed. This will help you determine the dimensions of your shelves.
3. Select the Design
Floating shelves come in various designs, from simple rectangular boards to elaborate pieces with live edges or integrated lighting. Choose a design that suits your space and skill level.
4. Determine Weight Capacity
Consider what you’ll be storing on the shelves. Heavy items like books or appliances will require stronger materials and secure mounting.
Materials and Tools You’ll Need
Materials:
- Wood boards (hardwood, plywood, or reclaimed wood)
- Concealed mounting brackets
- Wood screws
- Wall anchors (for drywall or plaster)
- Wood glue
- Sandpaper
- Paint, stain, or varnish
Tools:
- Measuring tape
- Level
- Stud finder
- Drill and drill bits
- Saw (circular or miter)
- Screwdriver
- Paintbrush or cloth
Step-by-Step Guide to Building DIY Floating Shelves
Step 1: Cut the Wood
Measure and cut the wood boards to your desired shelf dimensions. If you’re new to woodworking, consider using pre-cut boards to save time and ensure precision.
Step 2: Sand the Boards
Smooth the edges and surfaces of the wood using sandpaper. This step is crucial for achieving a polished finish.
Step 3: Apply the Finish
If you’re painting or staining the wood, apply the finish now and allow it to dry completely. This step not only enhances the appearance but also protects the wood from wear and tear.
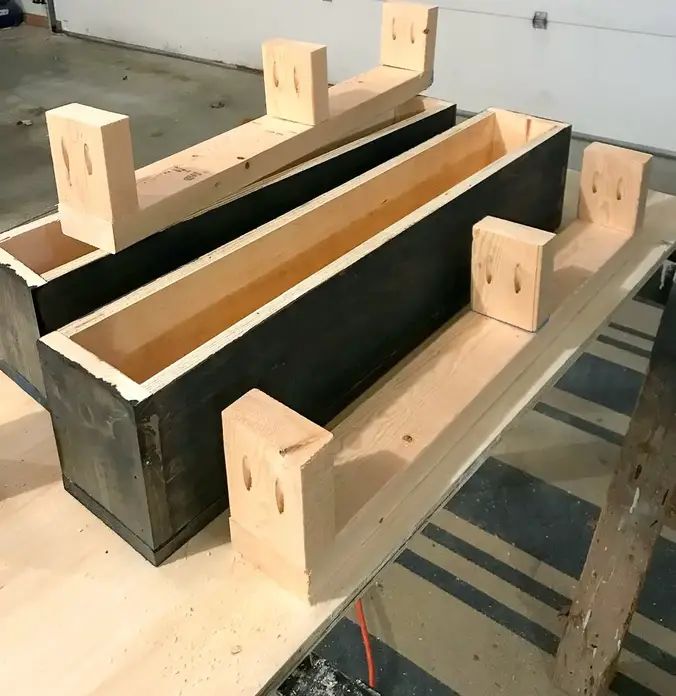
Step 4: Install the Brackets
Use a stud finder to locate wall studs and mark their positions. Secure the concealed brackets to the wall using screws and wall anchors. Ensure the brackets are level for a professional look.
Step 5: Attach the Shelves
Slide the shelves onto the brackets and secure them in place with screws. Check that the shelves are level and sturdy.
Tips for a Successful DIY Project
- Choose Quality Materials: High-quality wood and brackets ensure durability and stability.
- Measure Twice, Cut Once: Precise measurements are critical for a professional finish.
- Test for Stability: After installation, test the shelves by placing a moderate weight on them before adding heavier items.
Creative Floating Shelf Ideas
1. Live Edge Shelves
Live edge wood retains the natural contours of the tree, adding a rustic and organic touch to your space.
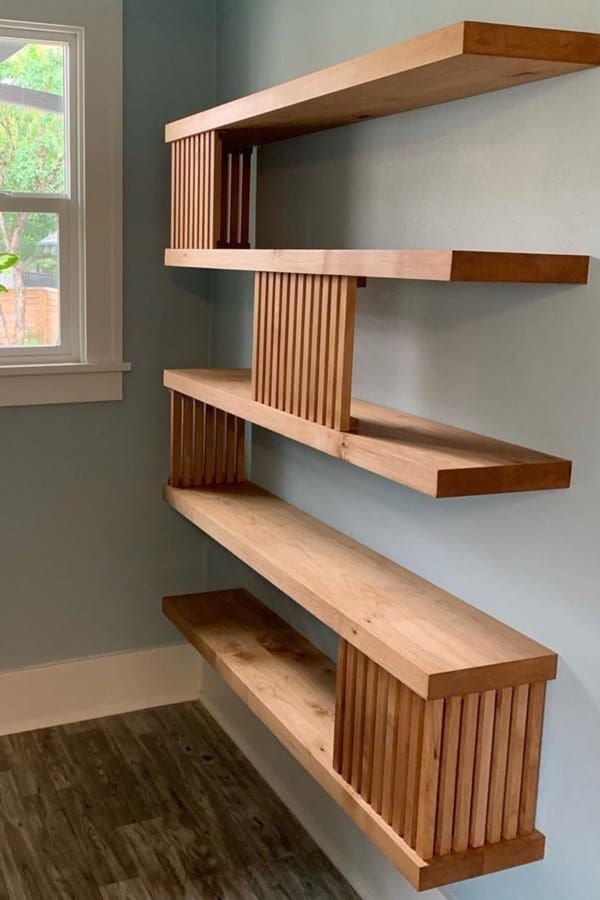
2. Corner Floating Shelves
Maximize unused corners by installing floating shelves. These are great for displaying small items or plants.
3. Integrated Lighting
Add LED strips to the underside of the shelves for a modern and functional design.
4. Reclaimed Wood Shelves
Eco-friendly and budget-friendly, reclaimed wood offers unique character and charm.
Common Mistakes to Avoid
- Skipping the Studs: Always anchor into wall studs for maximum stability.
- Overloading the Shelves: Avoid exceeding the weight capacity of your materials and brackets.
- Neglecting Maintenance: Regularly check the shelves for stability and clean them to maintain their appearance.
Maintenance and Care
- Cleaning: Dust the shelves regularly to prevent buildup.
- Inspecting: Check screws and brackets periodically to ensure they remain secure.
- Avoiding Moisture: Keep wooden shelves away from excessive humidity to prevent warping.
Conclusion
DIY floating shelves are an excellent addition to any home, offering both functionality and style. With the right tools and a bit of patience, you can create shelves that are not only practical but also a reflection of your personal taste.
Take Your Woodworking Skills to the Next Level!
Want to tackle more DIY woodworking projects? Discover over 16,000 detailed plans with Ted’s Woodworking Plans! From beginner to advanced designs, you’ll find everything you need to bring your creative ideas to life.
👉 Click Here to Get Ted’s Woodworking Plans Now!
Affiliate Disclosure: This article contains affiliate links. If you purchase through these links, we may earn a small commission at no additional cost to you.
Discover more from WoodReality
Subscribe to get the latest posts sent to your email.

Pingback: DIY Woodworking Projects for Small Spaces: Maximizing Functionality with Style – WoodReality
Pingback: Essential Woodworking Safety Tips for Beginners – WoodReality
Pingback: Finish Carpentry Techniques for Beginners: A Step-by-Step Guide – WoodReality