
I’ve always wanted a stylish, rustic-looking bar for my backyard gatherings, but buying one was out of my budget. That’s when I came up with the idea of building my own wood pallet bar. Pallets are not only affordable (often free), but they also give the bar a unique, handcrafted charm. If you’ve been thinking about making your own, I’m here to guide you through the entire process based on my experience.
Why Build a Wood Pallet Bar?
I chose to work with pallets because they’re budget-friendly, easy to find, and surprisingly sturdy. With a little sanding, staining, and some creativity, you can turn them into a beautiful, functional piece of furniture. Here’s why you should consider this project:
- Low-Cost or Free Materials – Many businesses give away pallets for free.
- Customization – You can adjust the size, add shelves, and modify the design to fit your space.
- Sustainability – Reusing wood pallets reduces waste and supports eco-friendly building.
- Beginner-Friendly – You don’t need to be an expert woodworker to pull this off.
Materials and Tools Needed
Before getting started, I gathered everything I needed. Here’s a checklist:
Materials:
- 3-5 wooden pallets (depending on bar size)
- Wood screws and nails
- Wood glue (for extra stability)
- Sandpaper (80 and 120 grit)
- Wood stain or paint (optional)
- Polyurethane or weatherproof sealant (for outdoor use)
- Hinges (if adding doors)
- L-brackets (for reinforcement)
- Wooden countertop (or extra pallet planks)
Tools:
- Circular saw or handsaw
- Electric drill and screwdriver
- Hammer
- Measuring tape
- Clamps
- Paintbrushes or rags (for staining)
Step 1: Choosing and Prepping the Pallets
I started by selecting high-quality pallets. Not all pallets are the same, so here’s what I looked for:
- Check the Stamps – I made sure my pallets were HT (Heat Treated) rather than MB (Methyl Bromide), which contains harmful chemicals.
- Look for Structural Integrity – I avoided pallets with excessive cracks, warping, or missing slats.
- Clean the Wood – Before doing anything, I cleaned the pallets with a brush and mild soap, then let them dry.
Once they were dry, I disassembled some of the pallets to use for additional wood planks. I used a pry bar and hammer to carefully remove the boards without splitting them.
Step 2: Designing the Bar Layout
Since I wanted my pallet bar to be sturdy and functional, I sketched out a simple plan:
- Front Panel: One or two full pallets stacked vertically.
- Side Panels: One pallet cut in half.
- Back Storage Area: I left space for shelves and storage.
- Bar Top: A solid wooden board or additional pallet planks.
Once I had my design in mind, I measured everything twice before cutting anything.
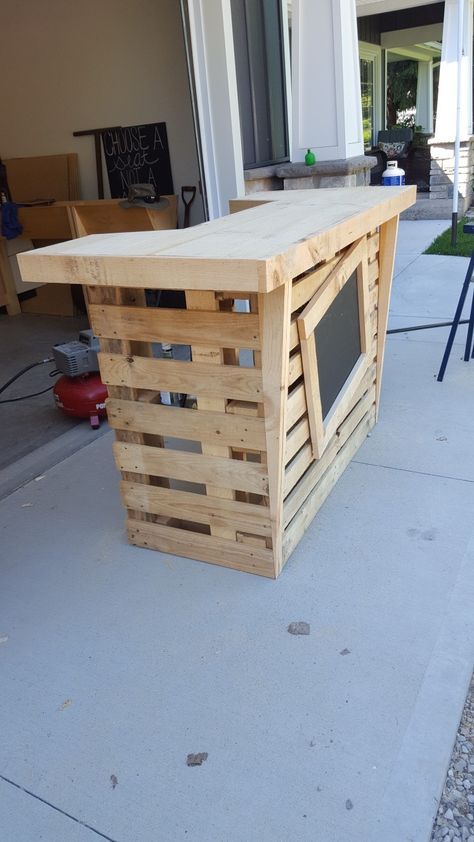
Step 3: Assembling the Base
I positioned the front and side panels and secured them together using wood screws and L-brackets for extra stability. To reinforce the corners, I used additional planks from my spare pallet wood. If you want to make your bar even sturdier, you can attach it to a wooden frame.
Step 4: Building the Countertop
For the bar top, I had two options: either using a solid wood board or aligning pallet planks together. I chose the latter to maintain the rustic style.
Here’s how I made my countertop:
- I arranged pallet planks side by side.
- I cut them to match the bar’s width and length.
- I sanded them down to create a smooth surface.
- I secured them onto the bar frame with screws and wood glue.
For a more professional look, I used a router to round off the edges of the top.
Step 5: Sanding and Finishing
Sanding is crucial when working with pallets, as the wood tends to be rough. I followed these steps:
- Started with 80-grit sandpaper to remove splinters and imperfections.
- Finished with 120-grit sandpaper for a smooth surface.
- Stained the wood using a dark walnut stain to bring out the grain.
- Applied two coats of polyurethane for protection.
If you prefer a painted finish, you can use high-quality outdoor paint for durability.
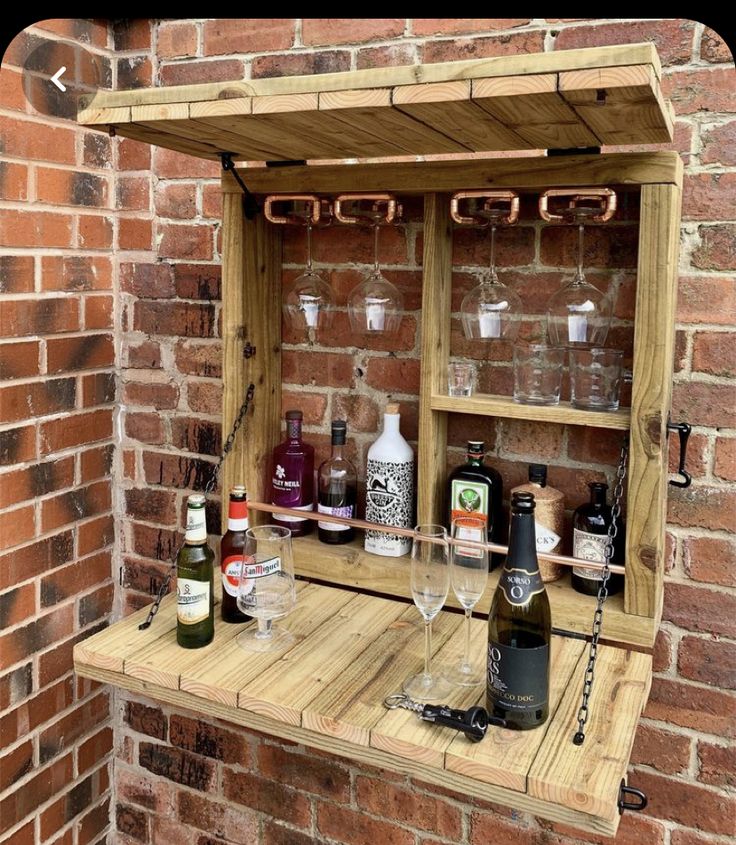
Step 6: Adding Storage and Custom Features
One of the best parts of this project was customizing my bar. Here are some upgrades I made:
- Storage Shelves – I added wooden shelves inside the back of the bar for storing bottles and glasses.
- Footrest – I used a metal pipe along the bottom as a footrest.
- Built-in Bottle Opener – I attached a small metal bottle opener to the side.
- Under-Bar Lighting – I installed LED strip lights underneath the counter for a cool ambiance.
Step 7: Placing the Bar and Enjoying It!
After everything was assembled, I placed my pallet bar in the backyard patio. It became the highlight of my outdoor space, perfect for hosting friends and family.
Bonus: Video Tutorial for Extra Help
If you’re more of a visual learner, here’s a great video that walks through the process step by step:
This tutorial helped me refine some of the details and gave me a few new ideas!
Conclusion
Building a pallet bar was one of the most satisfying DIY projects I’ve done. Not only did I save money, but I also created a custom piece that fits my space perfectly. If you’re thinking about making one yourself, I highly recommend giving it a try!
For more detailed woodworking plans and hundreds of additional projects, check out Ted’s Woodworking Plans. It’s an excellent resource with step-by-step guides for all skill levels.
Affiliate Disclosure: This article may contain affiliate links. If you purchase through these links, I may earn a commission at no extra cost to you. This helps support my work in creating helpful DIY guides.
Discover more from WoodReality
Subscribe to get the latest posts sent to your email.

Pingback: How I Built My DIY Pallet Workbench: A Step-by-Step Guide – WoodReality
Pingback: How to Build a Wooden Adirondack Chair: A Step-by-Step Guide – WoodReality