
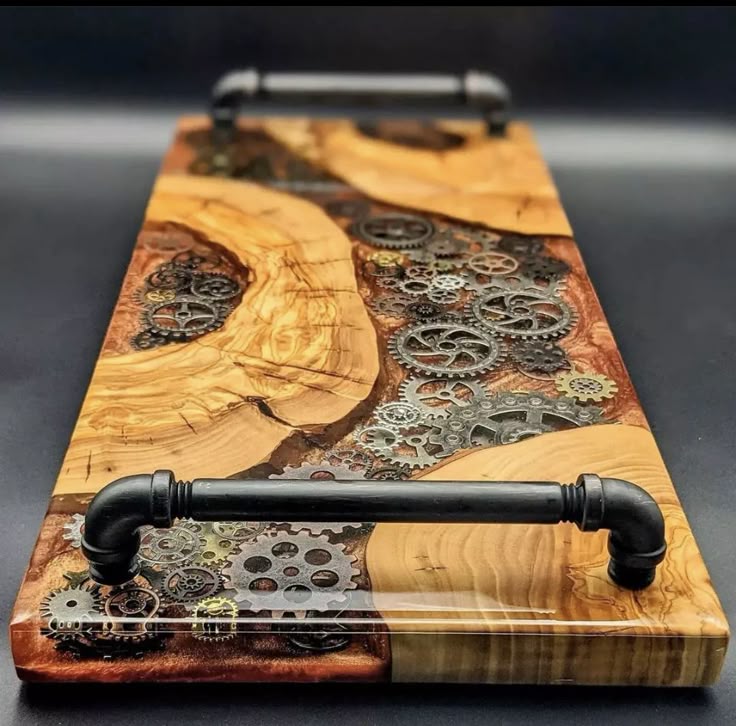
Resin cutting boards are a stunning blend of functionality and art. Whether you’re a woodworking enthusiast or a DIY crafter, creating a resin cutting board is a rewarding project. Not only do these cutting boards look beautiful, but they’re also practical and make great gifts. In this guide, we’ll walk you through the process step-by-step, share tips for success, and recommend the best products to make your project a breeze.
Why Make a Resin Cutting Board?
Resin cutting boards are unique because they combine the natural beauty of wood with the vibrant, glossy finish of epoxy resin. They’re perfect for:
- Adding a pop of color to your kitchen.
- Creating custom gifts for friends and family.
- Exploring the intersection of woodworking and resin art.
Plus, with the right materials and techniques, you can create a cutting board that’s both functional and food-safe.
Materials Needed
Before you start, gather these materials:
- Wood slab: Choose a hardwood like maple, walnut, or cherry. These woods are durable and food-safe.
- Crystal Clear Epoxy Resin: This food-safe resin is perfect for cutting boards because it’s durable, non-toxic, and crystal clear.
- Resin Dye: Add vibrant colors to your resin with these easy-to-use dyes.
- Silicone Mixing Cups and Sticks: These reusable cups and sticks make measuring and mixing resin a breeze.
- Sanding and Polishing Kit: Achieve a smooth, glossy finish with this essential kit.
- Nitrile Gloves: Protect your hands while working with resin.
- Painter’s tape: To create a barrier and prevent resin from leaking.
- Level surface: Ensure your cutting board dries evenly.
- Heat gun or torch: For removing air bubbles from the resin.

Step-by-Step Tutorial
Step 1: Prepare the Wood
- Choose the Right Wood: Select a hardwood slab that’s at least 1.5 inches thick. Maple, walnut, and cherry are excellent choices because they’re durable and food-safe. Avoid softwoods like pine, as they can absorb resin unevenly.
- Sand the Wood: Use 120-grit sandpaper to smooth the surface and remove any rough edges. Gradually move to 220-grit sandpaper for a finer finish. Sanding ensures the resin adheres properly and creates a smooth surface.
- Clean the Surface: Wipe the wood with a damp cloth to remove dust and debris. Let it dry completely. Any leftover dust can affect the resin’s finish.
Step 2: Create a Mold
- Seal the Edges: Use painter’s tape to seal the edges of the wood slab. This will act as a barrier and prevent the resin from leaking. Make sure the tape is firmly pressed down to avoid gaps.
- Level the Surface: Place the wood slab on a level surface. This ensures the resin spreads evenly and doesn’t pool on one side. You can use a spirit level to double-check.
Step 3: Mix the Resin
- Measure the Resin: Follow the instructions on the Let’s Resin Crystal Clear Epoxy Resin to measure the correct ratio of resin and hardener. Accurate measurements are crucial for proper curing.
- Mix Thoroughly: Use the Let’s Resin Silicone Mixing Cups and Sticks to mix the resin and hardener for at least 3-5 minutes. Scrape the sides and bottom of the cup to ensure everything is well combined. Incomplete mixing can result in sticky or uncured resin.
- Add Color (Optional): If you want to add color, mix in a few drops of Let’s Resin Resin Dye. Stir until the color is evenly distributed. You can use one color or blend multiple shades for a unique effect.
Step 4: Pour the Resin
- Pour Slowly: Start pouring the resin onto the wood slab in a thin, even layer. Use a spreader or stick to guide the resin into the desired areas. Pouring slowly helps control the flow and prevents overflow.
- Remove Air Bubbles: Use a heat gun or torch to gently remove air bubbles from the surface. Move the heat source quickly to avoid scorching the resin. You can also use a toothpick to pop stubborn bubbles.
- Let It Settle: Allow the resin to settle for 10-15 minutes. If needed, add a second layer for a thicker finish. Multiple layers can create a more dynamic look.
Step 5: Let It Cure
- Cover the Project: Place a cover over the cutting board to protect it from dust while it cures. A cardboard box or plastic tent works well.
- Wait Patiently: Let the resin cure for 24-48 hours, depending on the temperature and humidity of your workspace. Avoid moving or touching the project during this time.
Step 6: Sand and Polish
- Sand the Surface: Once the resin is fully cured, use the Let’s Resin Sanding and Polishing Kit to sand the surface. Start with 400-grit sandpaper and gradually move to 2000-grit for a smooth finish. Sanding removes any imperfections and prepares the surface for polishing.
- Polish the Resin: Apply a polishing compound to bring out the resin’s natural shine. Buff the surface with a soft cloth for a glossy finish. This step enhances the clarity and beauty of the resin.
Safety Tips
- Work in a Well-Ventilated Area: Resin fumes can be strong, so make sure your workspace has good airflow. Open windows or use a fan if necessary.
- Wear Protective Gear: Always wear Let’s Resin Nitrile Gloves to protect your skin from resin. Consider wearing safety goggles and a mask for added protection.
- Avoid Direct Contact: Keep resin away from your eyes and mouth. If contact occurs, rinse immediately with water.
FAQs
Q: Is Let’s Resin epoxy food-safe?
A: Yes, the Let’s Resin Crystal Clear Epoxy Resin is food-safe once fully cured. It’s non-toxic and safe for use on cutting boards.
Q: Can I use any wood for a resin cutting board?
A: Hardwoods like maple, walnut, or cherry are ideal because they’re durable and food-safe. Avoid softwoods like pine, as they can absorb resin unevenly.
Q: How do I clean a resin cutting board?
A: Hand wash the cutting board with mild soap and water. Avoid soaking it or putting it in the dishwasher, as this can damage the resin.
Conclusion
Creating a resin cutting board is a fun and creative project that combines woodworking and resin art. With high-quality materials, you can achieve professional results that are both beautiful and functional. Whether you’re making one for yourself or as a gift, this project is sure to impress.
Ready to get started? Gather your materials, follow this guide, and let your creativity shine!
Looking for detailed, step-by-step woodworking plans? Ted’s Woodworking Plans offers 16,000+ easy-to-follow blueprints for projects of all skill levels! Whether you’re a beginner or a seasoned woodworker, you’ll find everything you need to create stunning projects with ease.
Affiliate Disclosure: This post contains affiliate links. If you purchase through my link, I may earn a small commission at no extra cost to you. Thank you for your support!
Discover more from WoodReality
Subscribe to get the latest posts sent to your email.
