Introduction
Building a wooden deck is one of the best ways to enhance your outdoor living space. It not only adds value to your home but also creates a perfect area for relaxing, hosting barbecues, and enjoying time with family and friends.
While hiring a professional might be an option, building your own deck is a rewarding project that saves you thousands of dollars. The key to success is careful planning, the right materials, and patience.
In this detailed step-by-step guide, I’ll walk you through the entire process—from planning and gathering materials to building, finishing, and maintaining your deck. Whether you’re a beginner or an experienced DIYer, this guide will equip you with all the knowledge you need to build a strong, beautiful wooden deck that lasts for years.
Step 1: Planning Your Wooden Deck
Choosing the Right Location
The first and most crucial step in building a wooden deck is deciding where to place it. Your choice of location will impact everything from the design to the durability of the deck.
Consider these factors when choosing a location:
- Sunlight and shade – Will the deck receive too much sun, or will it be shaded throughout the day?
- Privacy – Is it visible to neighbors, or will it provide a private retreat?
- Accessibility – Should it be attached to your house, or would a freestanding deck be better?
- Ground conditions – Is the ground level, or will you need to make adjustments?
- Drainage – Avoid areas where water pools to prevent wood rot.
Measuring and Designing Your Deck
Once you’ve chosen the location, it’s time to measure and create a blueprint.
- Measure the space carefully, marking the deck’s perimeter with stakes and string.
- Consider adding stairs, built-in seating, or railings.
- Use deck design software or sketch out your plan on paper.
A well-thought-out design ensures that your deck will be both functional and visually appealing.
Checking Local Building Codes and Permits
Before you start construction, check with your local building department to see if you need permits. Many areas have regulations regarding:
- Deck size and height
- Railing height requirements
- Distance from property lines
- Weight-bearing limits
Skipping this step could result in fines or needing to tear down your deck later.
Step 2: Gathering Materials and Tools
Materials Needed
Choosing the right materials is crucial for the longevity and stability of your deck. Here’s a list of essential materials:
- Pressure-treated wood – Ideal for framing as it resists rot and insect damage.
- Cedar or redwood decking boards – Beautiful and naturally resistant to decay.
- Composite decking boards – Low maintenance but more expensive.
- Concrete mix – Used for securing posts.
- Galvanized screws and nails – Prevent rust and ensure durability.
- Joist hangers and post anchors – Provide additional stability.
Tools Required
You’ll need a set of reliable tools to make the building process smooth:
- Circular saw or miter saw
- Power drill with screwdriver bits
- Level and measuring tape
- Post-hole digger
- Shovel
- Chalk line for marking straight cuts
- Hammer or nail gun
Investing in high-quality tools will make your work easier and more precise.
Step 3: Preparing the Ground and Foundation
Clearing and Leveling the Site
- Remove grass, rocks, and any obstacles from the site.
- Use a shovel to dig out any high spots and fill in low areas.
- Tamp down the soil to create a solid base.
Setting Up the Foundation Posts
A strong foundation is essential for a stable deck.
- Dig holes for the posts, about 12-18 inches deep (depending on frost lines in your area).
- Place concrete footings in each hole to prevent sinking.
- Insert 4×4 posts and pour concrete around them.
- Use a level to ensure they are perfectly straight before the concrete sets.
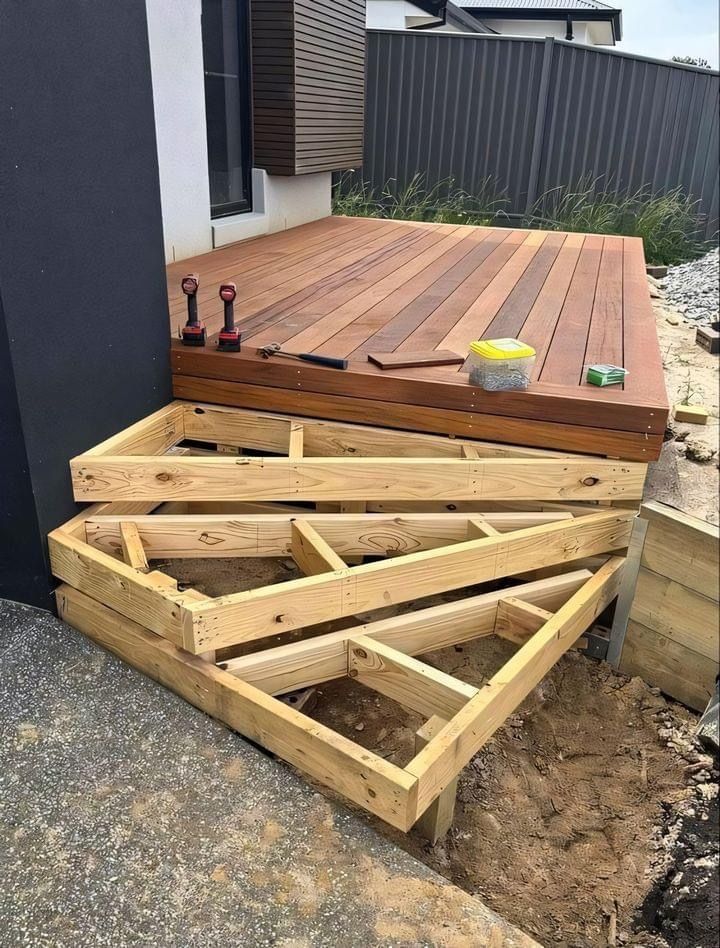
Step 4: Building the Frame
Installing Ledger Boards (For Attached Decks)
A ledger board is a key support piece that attaches your deck to the house.
- Mark where the board will go and use lag bolts to secure it.
- Add spacers to prevent moisture buildup and rot.
- Ensure it’s perfectly level before moving on.
Attaching Joists and Beams
Joists provide the framework that supports the deck boards.
- Space joists 12 to 16 inches apart for strength.
- Secure them with joist hangers.
- Use a chalk line to ensure even spacing.
A well-framed deck ensures longevity and durability.
Step 5: Installing the Deck Boards
Deck boards are the visible surface of your deck. Choose your pattern wisely:
- Parallel installation – Boards run parallel to the house for a classic look.
- Diagonal installation – Adds visual interest but requires more cutting.
Securing the Boards
- Use galvanized deck screws to prevent rust.
- Leave a small gap (about ⅛ inch) between boards for drainage.
- Stagger board joints for a more professional look.
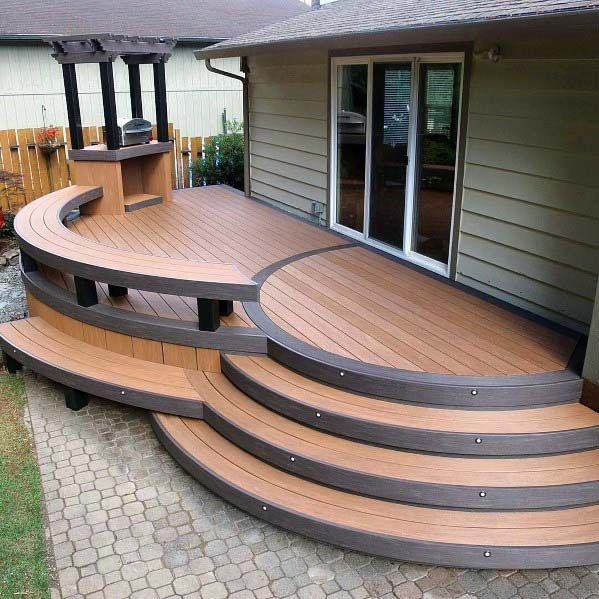
Step 6: Adding Railings and Stairs
Choosing Railing Styles
Railings are required if your deck is more than 30 inches off the ground. Options include:
- Wood railings – Classic and easy to customize.
- Metal railings – Modern and durable.
- Glass panels – Offers an unobstructed view.
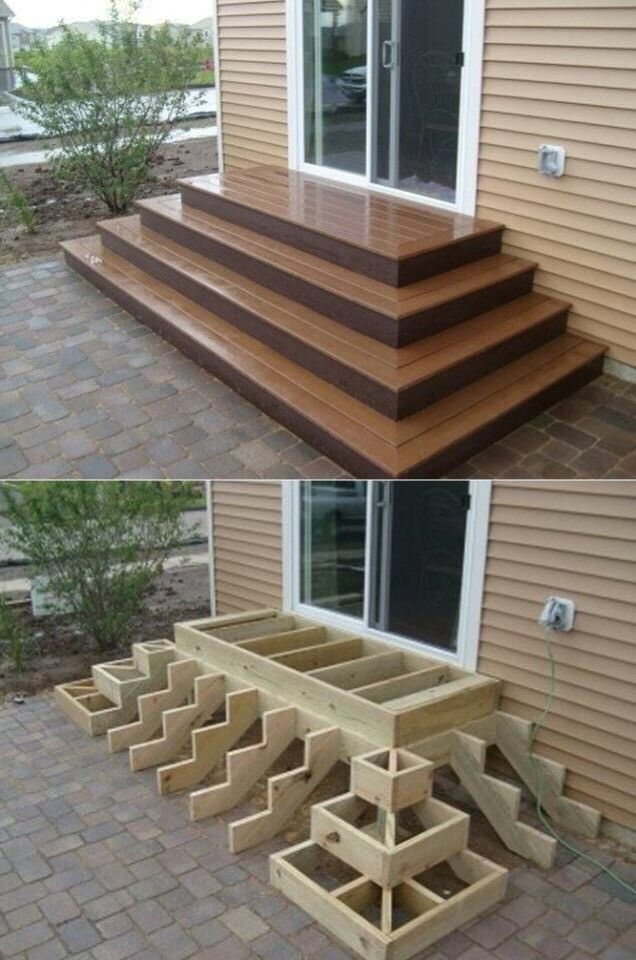
Installing the Stairs
- Measure and cut stair stringers.
- Attach treads securely.
- Ensure risers are evenly spaced for safety.
Step 7: Finishing Touches
Sanding and Sealing the Deck
- Sand rough spots to prevent splinters.
- Apply a waterproof stain or sealant to protect the wood.
- Reapply sealant every 2-3 years.
Adding Furniture and Decor
- Place comfortable outdoor seating.
- Add string lights for ambiance.
- Consider a fire pit for warmth.
Step 8: Maintenance and Long-Term Care
- Sweep regularly to remove dirt.
- Inspect for loose screws or nails.
- Re-stain or paint as needed.
- Keep an eye out for rot or insect damage.
Estimated Cost Breakdown
| Item | Estimated Cost |
|---|---|
| Wood and materials | $1,500 – $4,000 |
| Tools | $300 – $700 |
| Labor (DIY savings) | $2,000 – $5,000 |
Free Deck Blueprints to Get Started
If you’re looking for detailed deck blueprints to guide your project, you’re in luck! There are several free resources available online that provide step-by-step plans, material lists, and even 3D renderings to help you build the perfect deck.
You can browse and download free deck blueprints here:
👉 Decks.com Free Deck Plans
Conclusion
Building your own wooden deck is a challenging yet rewarding project. With proper planning and execution, you’ll have a durable and stylish outdoor space that enhances your home’s value.
If you need expert guidance, I highly recommend Ted’s Woodworking Plans. This collection of over 16,000 detailed plans will help you build any project with ease.
Affiliate Disclosure:
This article contains affiliate links, meaning I may earn a commission at no extra cost to you if you purchase through my link.
Discover more from WoodReality
Subscribe to get the latest posts sent to your email.

Pingback: How to Build a Wooden Outdoor Shower for Your Garden – A Complete DIY Guide – WoodReality