
Imagine stepping outside on a warm summer morning, surrounded by the natural beauty of your garden, and taking a refreshing outdoor shower. Whether you’re rinsing off after a swim, washing away dirt after gardening, or just enjoying the outdoors, an outdoor shower is a functional and stylish addition to your space.
Building a wooden outdoor shower is a DIY-friendly project that enhances your outdoor living experience while adding value to your home. In this in-depth guide, I’ll show you how to build a durable and beautiful wooden outdoor shower step by step.
You’ll learn about:
✅ Choosing the perfect location
✅ Different design options
✅ Plumbing and drainage solutions
✅ Tools and materials needed
✅ Detailed step-by-step construction process
✅ Privacy and customization ideas
✅ Eco-friendly and off-grid options
✅ Maintenance and long-term care
Plus, I’ll include a FREE blueprint and a video tutorial to guide you through the process.
Table of Contents
- Benefits of a Wooden Outdoor Shower
- Choosing the Right Location
- Types of Outdoor Showers
- Essential Tools and Materials
- Step-by-Step Construction Guide
- Plumbing Options & Water Supply
- Waterproofing & Drainage Solutions
- Privacy & Aesthetic Enhancements
- Alternative Materials & Customization Ideas
- Eco-Friendly & Off-Grid Shower Options
- Maintenance & Seasonal Care
- Cost Estimation & Budgeting
- Inspirational Outdoor Shower Designs
- Free Blueprint Download
- Step-by-Step Video Guide
- FAQs
- Conclusion
Benefits of a Wooden Outdoor Shower
Before we dive into the construction process, let’s explore why an outdoor shower is a fantastic addition to your garden:
1. Practicality & Convenience
- Perfect for rinsing off after swimming, gardening, or exercising.
- Keeps mud, sand, and chlorine outside instead of tracking them into your house.
2. Adds Value to Your Home
- A stylish outdoor shower makes your backyard more functional and increases property value.
- Great for vacation homes, Airbnb rentals, and poolside areas.
3. Enhances Outdoor Aesthetics
- A well-designed wooden shower blends beautifully with natural surroundings.
- You can add tropical plants, stone pathways, or decorative enclosures for a spa-like retreat.
4. Customizable for Any Space
- Can be small and minimalist or large with built-in storage and seating.
- Works in gardens, pool areas, cabins, and even urban rooftops.
Choosing the Right Location
The location of your outdoor shower affects its functionality and ease of use. Consider these key factors:
1. Privacy & Visibility
- Pick a secluded area or plan for privacy screens.
- Consider bamboo walls, lattice panels, or vine-covered trellises for natural privacy.
2. Sunlight Exposure
- Morning sun warms up the shower space naturally.
- Avoid shady areas where mold and mildew can grow.
3. Proximity to Water Supply
- Connecting to an existing outdoor faucet makes plumbing easier.
- If you’re installing a hot water option, it should be close to your home’s water heater.
4. Drainage Considerations
- Ensure water flows away from your home and doesn’t pool in one spot.
- Gravel, French drains, or wooden slat floors help with drainage.
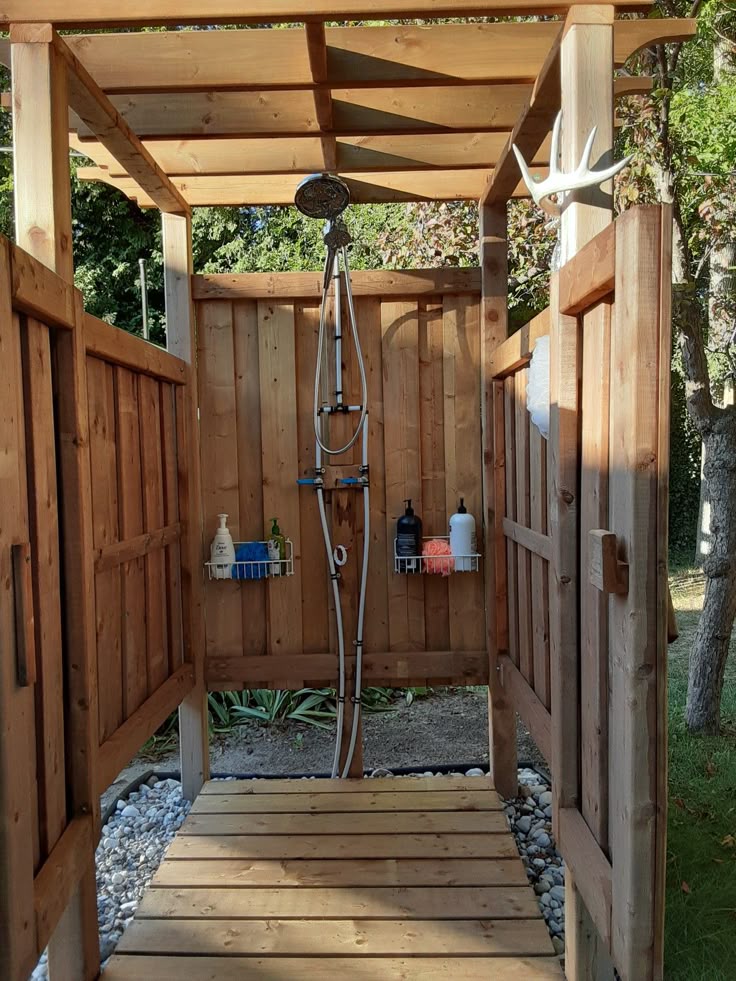
Types of Outdoor Showers
There are three main types of outdoor showers to consider:
1. Open-Air Showers
✔️ Simple design with no walls.
✔️ Great for poolside rinses or beach homes.
✔️ Fastest and easiest to build.
2. Partially Enclosed Showers
✔️ Provides some privacy with one or two walls.
✔️ Works well in gardens and backyards.
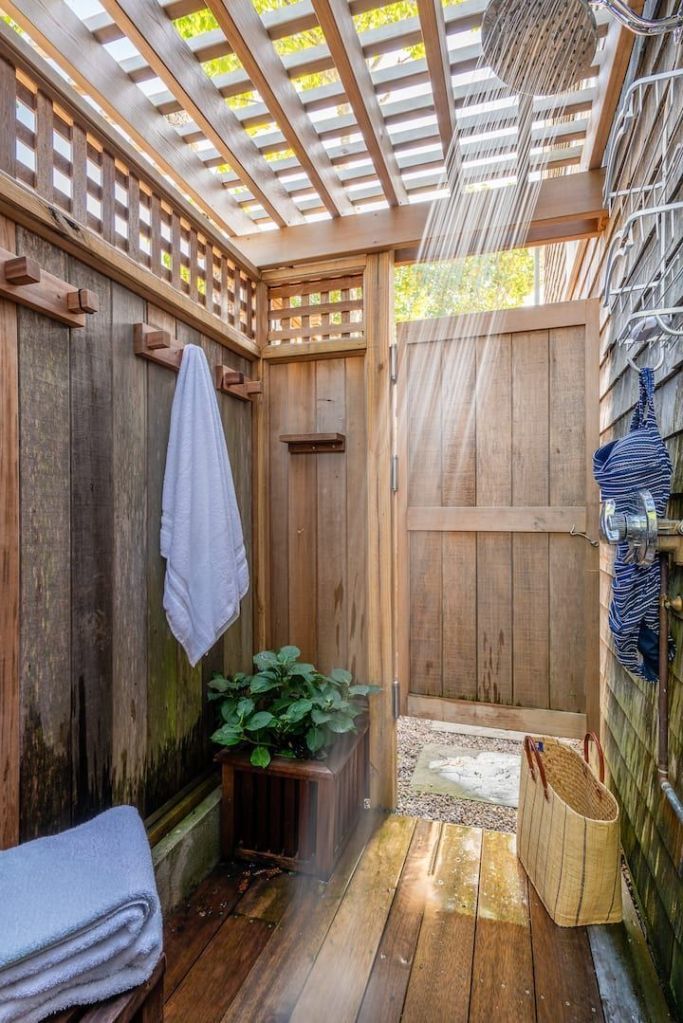
3. Fully Enclosed Showers
✔️ Offers maximum privacy.
✔️ Perfect for homes with neighbors nearby.
✔️ Can be designed with a door, wooden walls, or frosted glass panels.
Essential Tools and Materials
🛠 Tools Needed:
- Measuring tape & level
- Power saw (or handsaw)
- Drill & screwdriver
- Pipe wrench & plumbing tools
- Shovel & post-hole digger
🪵 Materials:
- Cedar, teak, or redwood (naturally water-resistant)
- Stainless steel screws & brackets
- Showerhead & plumbing fixtures
- Concrete mix (for securing posts)
- Gravel or wooden slats (for drainage flooring)
- Waterproof sealant
Step-by-Step Construction Guide
Step 1: Marking & Preparing the Area
✅ Clear debris and level the ground.
✅ Mark dimensions using stakes and string.
Step 2: Installing the Support Posts
✅ Dig post holes 2 feet deep for stability.
✅ Set wooden posts securely in concrete.
✅ Let the concrete cure for 24-48 hours.
Step 3: Building the Frame & Walls
✅ Attach horizontal beams to create the frame.
✅ Secure vertical wooden slats for walls.
Step 4: Installing Plumbing & Fixtures
✅ Connect pipes to your water source.
✅ Attach a showerhead and temperature control.
✅ Test for leaks and adjust pressure.
Step 5: Adding Flooring & Drainage
✅ Lay gravel, stone, or wooden decking for proper water drainage.
Waterproofing & Drainage Solutions
One of the most important aspects of an outdoor shower is ensuring it remains waterproof and well-drained to prevent wood rot, mold, and structural damage.
Step-by-Step Waterproofing for a Wooden Outdoor Shower
✅ Choose the Right Wood
- Cedar, teak, or redwood are the best options because they naturally resist moisture and rot.
- Avoid untreated pine, as it will deteriorate quickly.
✅ Apply a High-Quality Waterproof Sealant
- Use a marine-grade sealant to protect the wood from moisture.
- Apply two coats for maximum durability.
- Reapply annually to maintain protection.
✅ Use Proper Drainage Techniques
- Avoid standing water by ensuring the shower base is slightly sloped.
- Use gravel, a French drain system, or wooden slats to direct water away.
✅ Protect Metal Fixtures from Rust
- Use stainless steel or galvanized metal for screws, showerheads, and pipes.
- If using copper pipes, apply a corrosion-resistant coating.
✅ Ventilation is Key
- Leave small gaps between wooden slats for airflow.
- This prevents moisture buildup and extends the life of your shower.
Privacy & Aesthetic Enhancements
Your outdoor shower should feel like a relaxing retreat, not just a place to rinse off. Here are some ways to add style, privacy, and comfort:
Best Privacy Ideas for an Outdoor Shower
1. Wooden Lattice Screens
✔️ Adds partial privacy while allowing airflow.
✔️ Can be stained or painted to match your garden style.
2. Bamboo Walls
✔️ Provides a tropical spa vibe.
✔️ Eco-friendly and water-resistant.
3. Tall Planters with Greenery
✔️ Use large ferns, bamboo, or climbing ivy for a natural privacy screen.
4. DIY Fabric Shower Curtain
✔️ A simple and cost-effective solution.
✔️ Use waterproof outdoor fabric to prevent mildew.
5. Full Wooden Enclosure with a Door
✔️ Offers maximum privacy.
✔️ Great for homes with close neighbors.
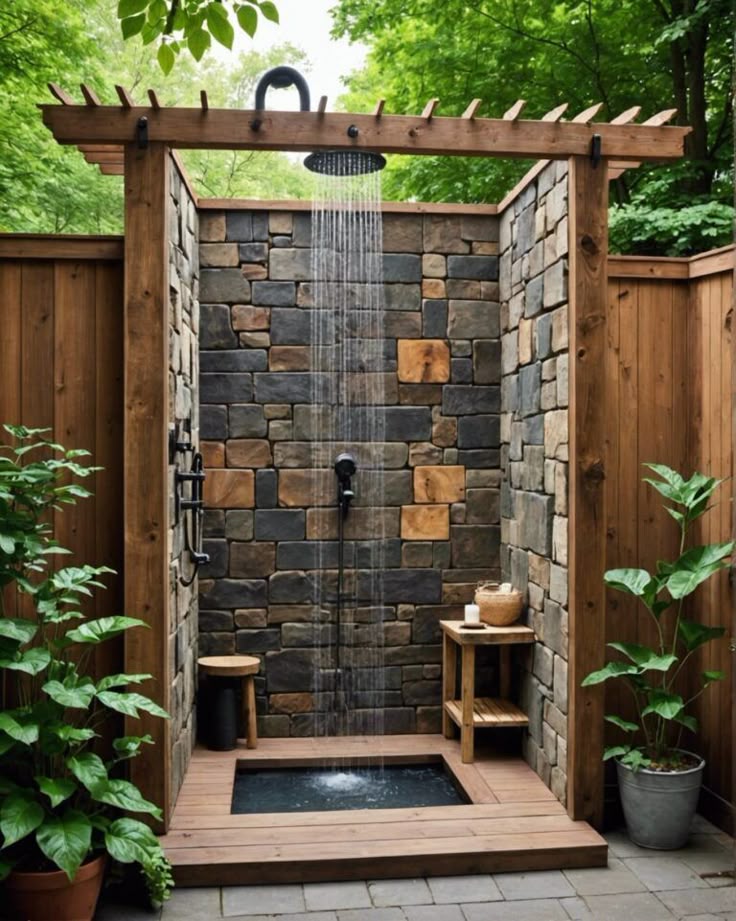
Alternative Materials & Customization Ideas
Want to personalize your shower? Here are alternative materials and unique design upgrades:
Alternative Flooring Materials
✅ Stone or Pebble Flooring – Provides a spa-like feel and great drainage.
✅ Reclaimed Wood Planks – Eco-friendly and adds a rustic charm.
✅ Concrete with Mosaic Tiles – Modern and customizable with patterns.
Stylish Upgrades for a Luxurious Shower Experience
✔️ Built-in Wooden Bench – Perfect for relaxing or shaving legs.
✔️ Overhead Rainfall Showerhead – Mimics a natural rain experience.
✔️ LED Waterproof Lighting – Great for evening showers under the stars.
✔️ Heated Outdoor Shower Option – Connect to a solar water heater for warm showers.
Eco-Friendly & Off-Grid Shower Options
If you’re looking to reduce your carbon footprint, consider sustainable, off-grid solutions:
1. Solar-Heated Water System
- Install a black PVC pipe on the roof to naturally heat water using sunlight.
- Connect it to your showerhead for a hot water supply without electricity.
2. Rainwater Collection System
- Collect rainwater from your roof and filter it for shower use.
- Use a barrel with a gravity-fed spout for easy access.
3. Low-Flow Showerheads
- Save water with aerated, low-flow showerheads that reduce usage by 50%.
Maintenance & Seasonal Care
Regular Cleaning Routine
🟢 Weekly:
✅ Scrub the shower floor to prevent mold.
✅ Rinse off soap residue to avoid slippery buildup.
🟢 Monthly:
✅ Inspect for loose screws or rotting wood.
✅ Check water pressure for clogs in the showerhead.
🟢 Annual Maintenance:
✅ Reapply waterproof sealant to protect the wood.
✅ Winterize the plumbing (if in a cold climate) to prevent frozen pipes.
Cost Estimation & Budgeting
The cost of your shower will depend on materials, size, and whether you hire help.
| Item | DIY Cost (USD) | Professional Installation Cost (USD) |
|---|---|---|
| Wooden Materials | $200 – $500 | $800 – $1,500 |
| Plumbing & Fixtures | $100 – $250 | $400 – $1,000 |
| Privacy Screens | $50 – $200 | $300 – $800 |
| Additional Features | $30 – $100 | $200 – $500 |
| Total Cost | $400 – $1,000 | $1,500 – $3,800 |
✔️ DIY is much cheaper, but hiring a pro may save time.
Inspirational Outdoor Shower Designs
Here are some beautiful outdoor shower ideas for inspiration:
🔹 Rustic Wooden Cabin Style – Use log-style walls and a vintage showerhead.
🔹 Zen Minimalist Shower – Keep it sleek with neutral colors and bamboo accents.
🔹 Hidden Garden Shower – Blend it into lush greenery for a natural escape.
🔹 Modern Stainless Steel & Wood Mix – Combines urban style with rustic charm.
Free Blueprint Download
Download free detailed plans for an outdoor shower here:
➡ Outdoor Shower Plans – MyOutdoorPlans
This includes diagrams, measurements, and step-by-step instructions.
Step-by-Step Video Guide
Watch this YouTube tutorial on how to build a wooden outdoor shower:
Read Also:
Conclusion
Building a wooden outdoor shower is an exciting and rewarding DIY project that adds beauty and functionality to your garden. Whether you choose a simple open-air design or a fully enclosed retreat, this guide has provided all the details you need to create your dream outdoor shower.
FAQs
1. Can I build an outdoor shower without plumbing?
Yes! A gravity-fed water tank or solar-heated water bag can provide water.
2. How do I prevent insects and mold?
Use cedar wood, proper drainage, and waterproof sealant to avoid issues.
3. Is a permit required?
Check local building codes to see if a permit is needed for plumbing.
Discover More DIY Woodworking Plans!
If you love DIY woodworking, get access to thousands of easy-to-follow blueprints with Ted’s Woodworking Plans:
👉 Click here to explore Ted’s Woodworking Plans!
Affiliate Disclosure: This article contains affiliate links. I may earn a commission if you purchase through these links, at no extra cost to you. Thanks for your support!
Discover more from WoodReality
Subscribe to get the latest posts sent to your email.
