Introduction
Spring is here, and it’s the perfect time to revamp your backyard with a cozy outdoor dining space! Whether you love hosting BBQs, family gatherings, or simply enjoying your morning coffee outdoors, a picnic table is an essential addition. Instead of buying one, why not build your own? With a DIY picnic table, you can customize the size, style, and materials to fit your backyard perfectly.
In this article, we’ll explore 10 outdoor picnic table ideas you can build yourself, ranging from classic wooden tables to modern designs incorporating concrete and reclaimed wood. Plus, we’ll share expert tips, recommended tools, and an exclusive resource—Teds Woodworking Plans—to help you build your dream picnic table effortlessly.
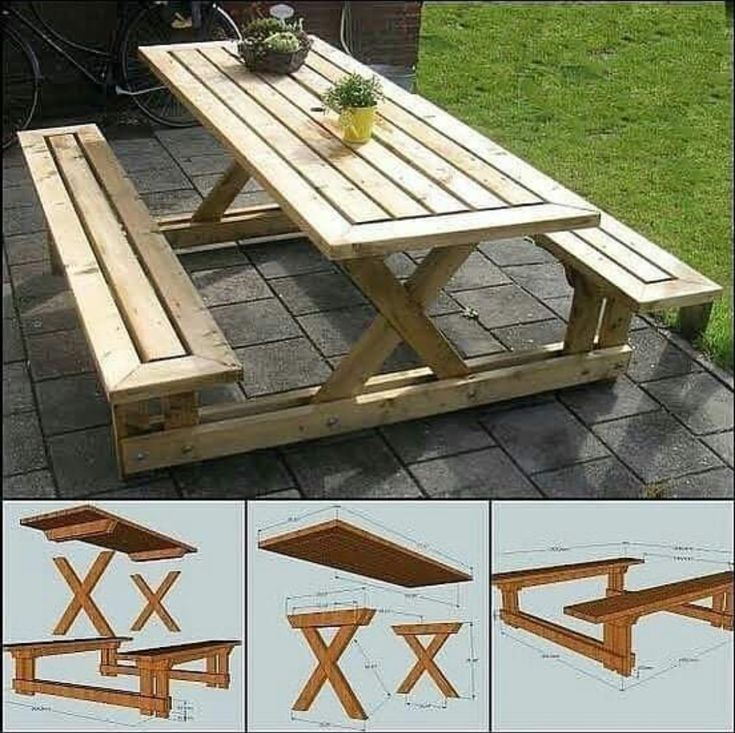
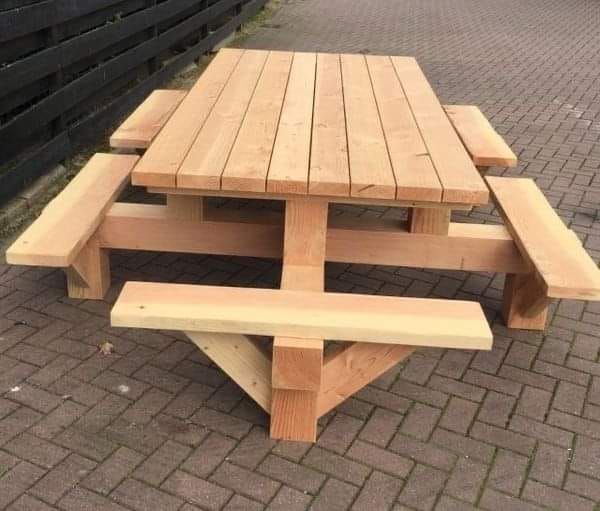
1. Classic Wooden Picnic Table
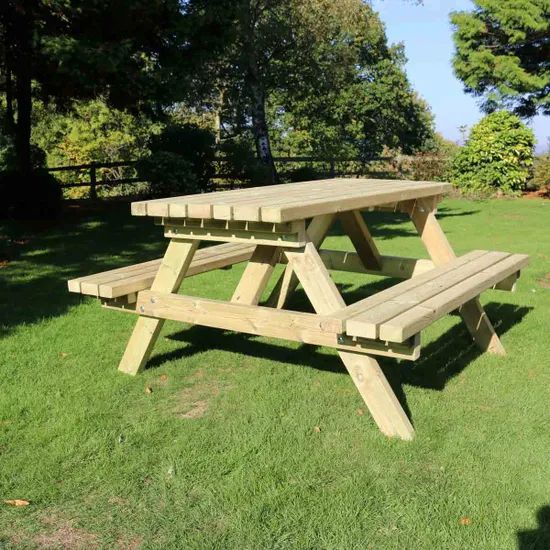
Nothing beats the traditional wooden picnic table. It’s a timeless, sturdy, and family-friendly option that works in any backyard setting.
How to Build a Classic Wooden Picnic Table
Materials Needed:
- Pressure-treated wood or cedar (for durability).
- Galvanized screws and bolts.
- Saw, drill, measuring tape, and wood glue.
Steps:
- Cut the Wood: Measure and cut wood for the tabletop, seats, and legs.
- Assemble the Tabletop: Arrange planks side by side and secure them with screws.
- Attach the Legs: Cut four legs at an angle for stability and attach them to the tabletop.
- Add Support Beams: Install cross beams underneath for additional strength.
- Secure the Seats: Attach benches on both sides.
- Sand and Finish: Smooth the surface and apply weatherproof sealant or paint.
A classic picnic table is a fantastic beginner-friendly project that provides a long-lasting outdoor dining solution.
2. Folding Picnic Table
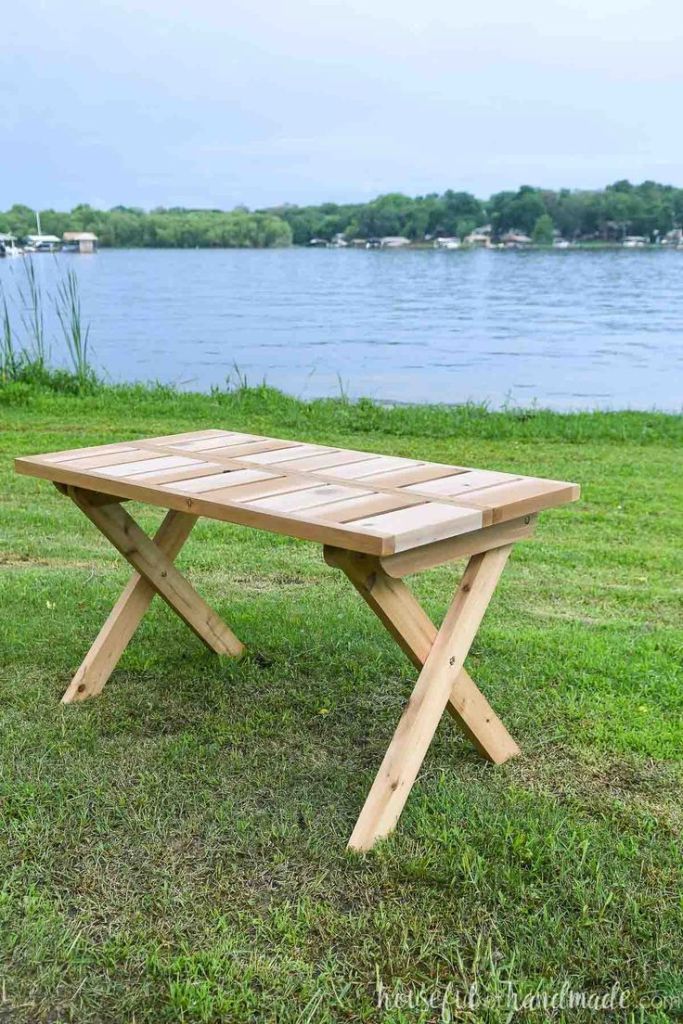
If space is a concern, a folding picnic table is the perfect solution! This design allows you to store it away easily when not in use.
Key Features of a Folding Picnic Table:
✅ Space-saving design.
✅ Portable and lightweight.
✅ Easy to build with minimal materials.
Steps to Build:
- Create the Tabletop & Seats: Cut wooden boards and assemble them.
- Attach Hinges: Install heavy-duty hinges between the tabletop and legs.
- Add Locking Mechanisms: Use latches or wooden braces to keep it stable.
- Sand & Finish: Apply a protective coating to withstand outdoor conditions.
A folding picnic table is ideal for small patios, balconies, or occasional outdoor dining.
3. Convertible Picnic Table and Bench
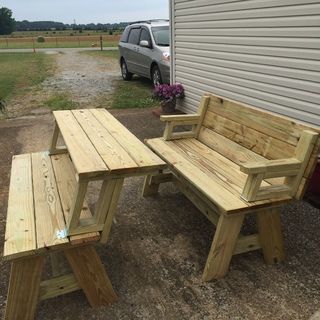
Want two pieces of furniture in one? A convertible picnic table that transforms into a bench is a genius design!
Why Choose a Convertible Design?
- Space-efficient: Works as a bench when not in use.
- Stylish & Functional: Modern look with practical usability.
- Perfect for Small Backyards: No need for separate benches.
How to Build a Convertible Picnic Table:
- Create the Tabletop: Use strong wood planks to construct a sturdy tabletop.
- Build the Bench Base: Design the bench seat with a folding mechanism.
- Install Hinges: Attach metal hinges to allow smooth conversion.
- Secure & Finish: Add weatherproof stain or sealant for durability.
This project requires basic woodworking skills but is a fantastic way to maximize your backyard space!
4. Kid-Sized Picnic Table
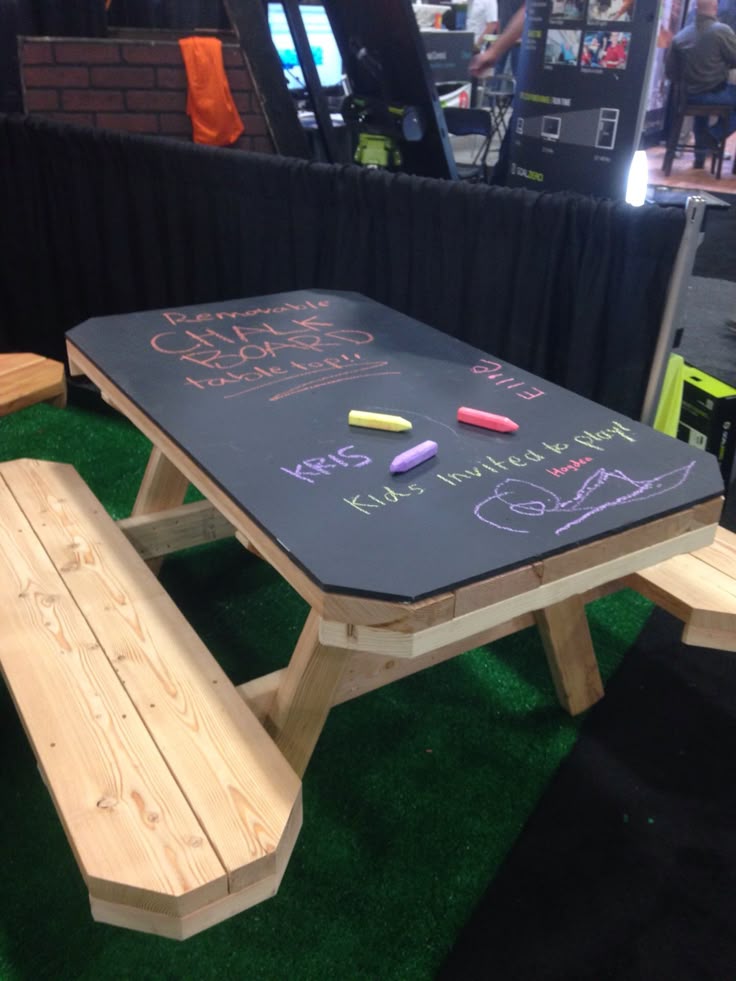
If you have kids, building a smaller, child-friendly picnic table is a great way to give them their own space for outdoor meals, crafts, and games.
Why a Kid-Sized Table?
✅ Perfect height and size for young children.
✅ Safer than adult-sized picnic tables.
✅ Encourages outdoor play and creativity.
How to Build a Kid-Friendly Picnic Table
Materials Needed:
- Softwood like pine or cedar (gentle on small hands).
- Screws and bolts for a sturdy build.
- Non-toxic, child-safe paint or stain.
Steps:
- Cut the Wood Pieces: Measure and cut smaller planks for the tabletop, seats, and legs.
- Assemble the Tabletop: Attach the wooden slats together.
- Secure the Legs: Use angled cuts for stability and attach them to the tabletop.
- Add Support Beams: Install cross beams to reinforce the structure.
- Smooth & Paint: Sand all rough edges and apply a non-toxic, weather-resistant finish.
A kid-sized picnic table is a simple, fun, and rewarding DIY project that will make outdoor playtime even better.
5. Octagon Picnic Table
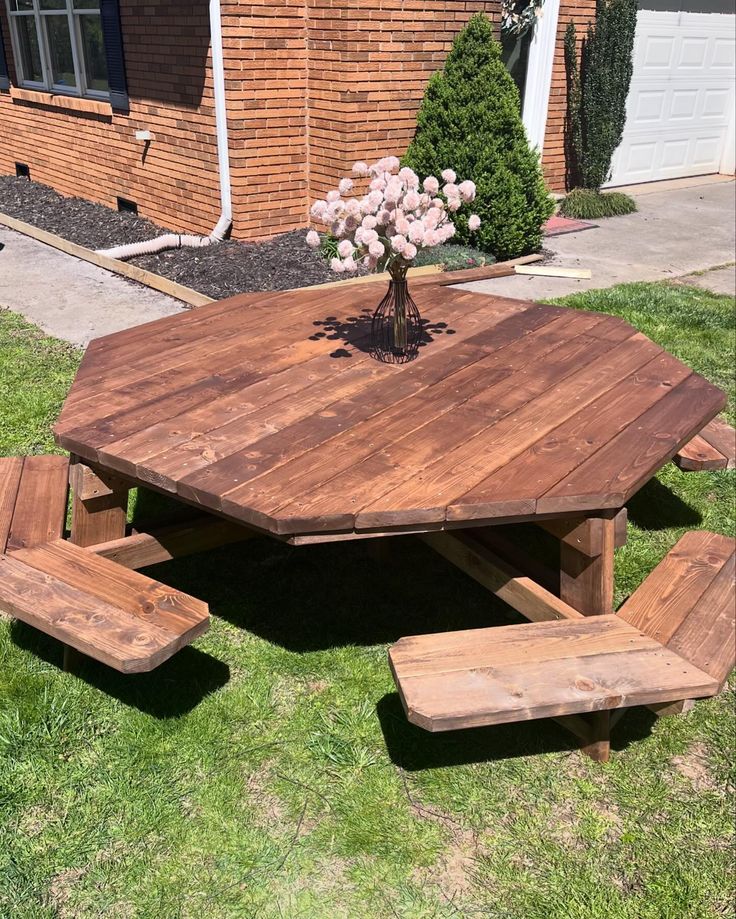
Looking for a unique and stylish alternative to the classic rectangular picnic table? An octagon picnic table offers aesthetics and functionality, making it a great centerpiece for any backyard.
Benefits of an Octagonal Design
✔️ More seating capacity.
✔️ Perfect for social gatherings.
✔️ Visually appealing and enhances backyard decor.
How to Build an Octagon Picnic Table
Materials Needed:
- Sturdy hardwood like oak or redwood.
- Galvanized screws and bolts.
- Measuring tape, saw, drill, and wood glue.
Steps:
- Create the Octagonal Frame: Cut and assemble the eight tabletop sections.
- Attach the Table Legs: Position them evenly for a balanced structure.
- Add the Seating Benches: Install benches around the perimeter.
- Reinforce the Table: Use additional supports under the tabletop.
- Smooth & Seal: Sand and apply a durable outdoor finish.
An octagonal picnic table makes a beautiful and functional addition to any backyard, offering plenty of seating space.
Find detailed picnic table plans on Etsy, with step-by-step guides, materials lists, and unique designs. Perfect for any DIY skill level!
🔗 Shop Picnic Table Plans on Etsy
6. Hexagon Picnic Table
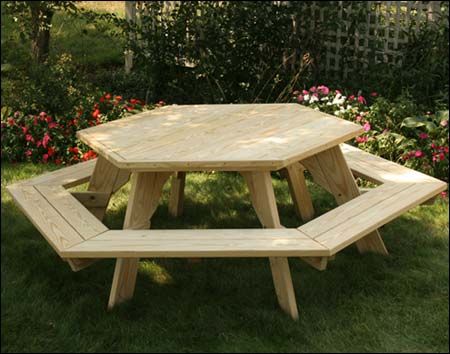
A hexagonal picnic table is another stylish design that maximizes seating while maintaining a compact footprint.
Why Choose a Hexagonal Table?
🔹 Space-efficient for small yards.
🔹 Encourages social interaction.
🔹 Unique and visually appealing.
How to Build One:
- Cut the Hexagonal Tabletop: Use six wooden panels and join them at the edges.
- Attach Legs Evenly: Distribute the legs to maintain balance.
- Add Benches: Secure six separate seating areas.
- Reinforce with Cross Supports: Ensure the structure is strong and stable.
- Seal & Finish: Apply a waterproof sealant to protect against the elements.
A hexagonal table offers an elegant and modern picnic table design, great for family gatherings or backyard parties.
7. Modern Concrete and Wood Picnic Table
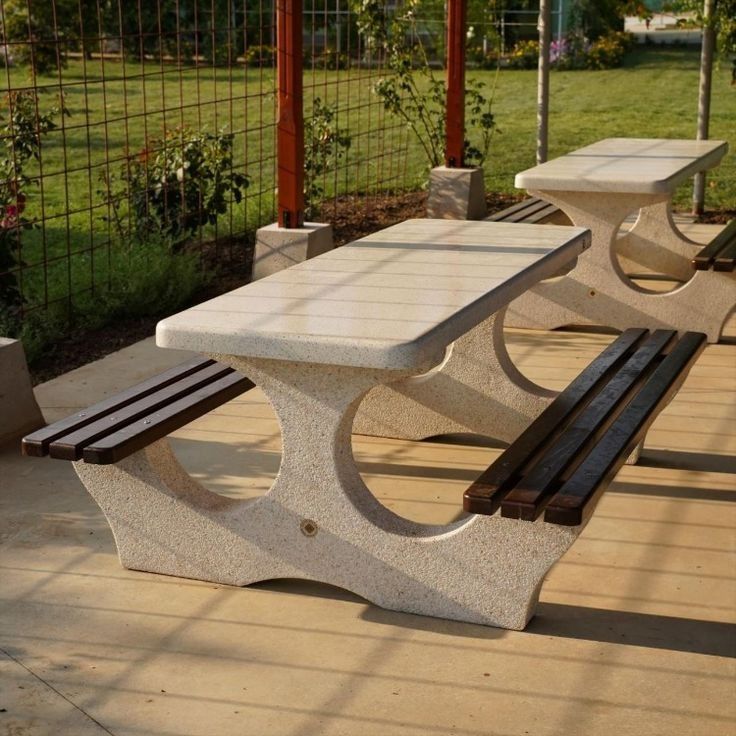
For a sleek, contemporary look, combining wood and concrete creates a stunning outdoor picnic table.
Why Choose a Concrete Table?
✅ Extremely durable and weather-resistant.
✅ Modern, stylish, and unique.
✅ Low maintenance compared to all-wood designs.
How to Build a Concrete & Wood Picnic Table
Materials Needed:
- Concrete mix for the tabletop.
- Wooden planks for the base and seats.
- Metal reinforcements for extra strength.
Steps:
- Mold & Pour Concrete: Use a mold to shape the tabletop and let it cure.
- Build the Wooden Base: Assemble a sturdy wooden frame.
- Attach the Concrete Slab: Secure it to the wooden base using strong adhesive.
- Install Seating: Use matching wood for the benches.
- Seal & Finish: Apply a weatherproof sealant to prevent damage.
A concrete and wood picnic table is a long-lasting and modern outdoor furniture piece, perfect for those who love contemporary designs.
8. Rustic Log Picnic Table

If you love a natural, log-style aesthetic, building a rustic log picnic table is a great choice!
Why Choose a Log Picnic Table?
🌲 Blends perfectly with nature.
🌲 Extremely sturdy and durable.
🌲 Unique, handcrafted look.
How to Build One:
- Choose Large Logs: Cut logs into tabletop and bench sections.
- Assemble the Frame: Secure the logs using dowels or heavy-duty screws.
- Add Cross Supports: Ensure structural stability with extra reinforcements.
- Sand & Finish: Apply a sealant to protect against moisture and pests.
A rustic picnic table adds a natural, charming touch to any outdoor space and is perfect for cabins or woodsy backyard settings.
9. Folding Wall-Mounted Picnic Table
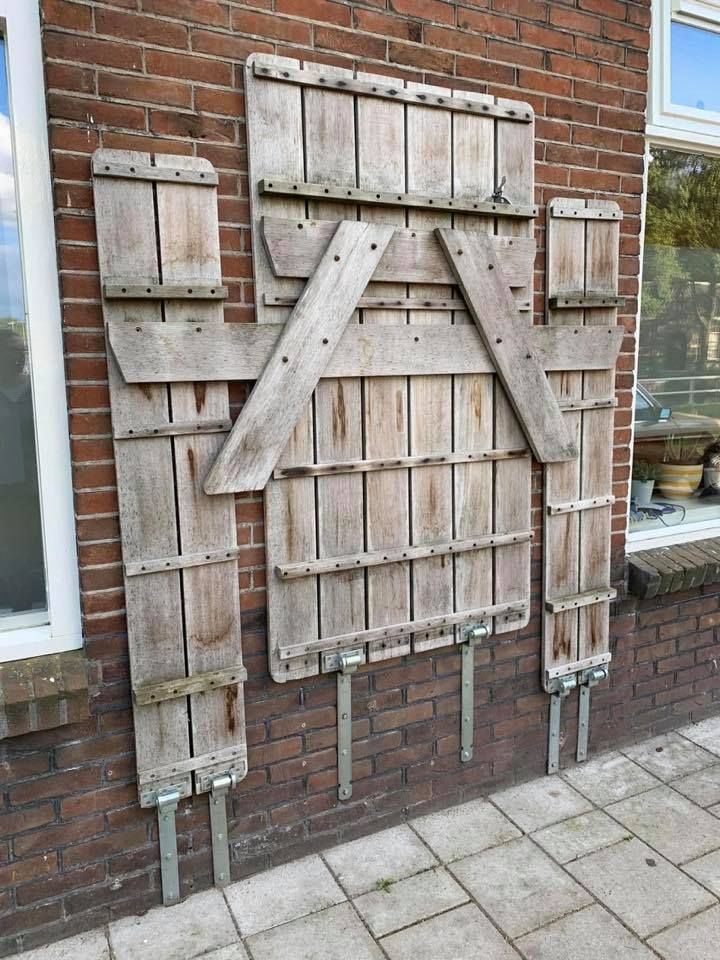
For tiny backyards or patios, a wall-mounted, foldable picnic table is a space-saving dream!
Benefits of a Folding Wall-Mounted Table
✔️ Saves space.
✔️ Easy to fold up when not in use.
✔️ Great for balconies, patios, and small yards.
How to Build One:
- Attach a Hinged Tabletop to a Sturdy Wall Mount.
- Secure Legs that Fold Out When Needed.
- Use Strong Metal Hinges for Stability.
- Paint or Stain for a Stylish Look.
This innovative picnic table is perfect for those who want a functional, yet space-efficient backyard setup.
10. Pallet Wood Picnic Table
Looking for a budget-friendly picnic table? A pallet wood picnic table is the best low-cost, eco-friendly option!
Why Choose Pallet Wood?
♻️ Affordable and easy to source.
♻️ Great for recycling and sustainability.
♻️ Customizable and easy to build.
How to Build a Pallet Picnic Table:
- Disassemble Pallets: Remove nails and sand rough edges.
- Build the Tabletop: Secure pallet slats together.
- Attach the Legs: Use sturdy wooden beams for support.
- Add Seating: Create matching benches with extra pallet slats.
- Paint or Seal: Enhance durability with an outdoor wood sealant.
A pallet picnic table is an easy and cost-effective DIY project that adds charm to your outdoor space.
Teds Woodworking Plans: The Ultimate DIY Guide
Want step-by-step instructions for all these picnic table ideas? Teds Woodworking Plans offers 16,000+ woodworking projects with detailed blueprints, materials lists, and easy-to-follow guides.
🔗 Get Access to Teds Woodworking Plans Here
YouTube Video Guide: How to Build a Picnic Table
Conclusion
Building your own outdoor picnic table is an incredibly rewarding project! Not only do you get a custom, high-quality table, but you also save money and enjoy the satisfaction of a DIY project.
If you’re ready to start, don’t forget to check out Teds Woodworking Plans for detailed blueprints and expert tips!
FAQs
1. What type of wood is best for an outdoor picnic table?
The best wood types for outdoor picnic tables are cedar, redwood, and pressure-treated pine because they are naturally weather-resistant. Cedar and redwood have natural oils that help repel insects and moisture, while pressure-treated pine is chemically treated to withstand the elements.
2. How can I weatherproof my picnic table?
To weatherproof your picnic table:
- Use a high-quality wood sealer or outdoor varnish to protect against rain and UV rays.
- Apply a water-resistant stain to prevent moisture absorption.
- Cover your table when not in use to extend its lifespan.
- Use galvanized or stainless-steel screws and bolts to prevent rusting.
3. Are pallet picnic tables durable?
Yes, but the durability depends on the quality of the pallets used. Look for heat-treated (HT) pallets instead of chemically treated ones, and choose solid, undamaged wood. Sanding and sealing the pallets with a waterproof finish will help increase durability.
4. Can I build a picnic table without power tools?
Yes, but it will require more effort and time. Hand tools like a handsaw, hammer, chisel, and screwdriver can be used, but power tools like a circular saw and drill make the process much faster and easier.
5. How much does it cost to build a DIY picnic table?
The cost depends on the materials and design:
- A simple pallet picnic table can cost as little as $30–$50.
- A classic wooden picnic table costs around $100–$200.
- A modern concrete and wood table can range from $200–$500 due to the cost of concrete and special tools.
Affiliate Disclosure
This article contains affiliate links. If you purchase through them, I may earn a commission at no extra cost to you.
Discover more from WoodReality
Subscribe to get the latest posts sent to your email.

Pingback: 10 Creative Pallet Wood Garden Pathway Ideas to Enhance Your Outdoor Space | WoodReality
Pingback: 10 Adirondack Chair Ideas to Elevate Your Outdoor Space | WoodReality