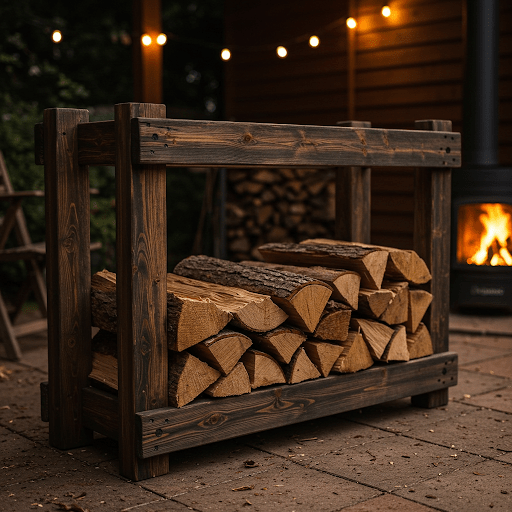
When winter approaches or you simply enjoy the cozy ambiance of a fireplace, keeping your firewood organized and easily accessible becomes a priority. A DIY wooden firewood rack is the perfect solution—practical, affordable, and customizable to suit your space and style. Whether you’re a seasoned woodworker or a beginner looking for a rewarding project, building your own firewood rack offers both functionality and a sense of accomplishment. In this comprehensive guide, we’ll walk you through everything you need to know to create a sturdy, stylish, and efficient firewood storage solution. From choosing materials to step-by-step instructions, we’ve got you covered.
Why Build a DIY Wooden Firewood Rack?
Firewood racks are essential for anyone who relies on a wood-burning fireplace, stove, or outdoor fire pit. Storing logs directly on the ground can lead to rot, pest infestations, and damp wood that’s difficult to burn. A well-designed firewood rack elevates your logs, improves air circulation, and keeps them dry and ready to use. Plus, a DIY approach allows you to:
- Save Money: Pre-made firewood racks can be pricey, but building your own is cost-effective.
- Customize: Tailor the size, shape, and finish to match your home or yard.
- Sustainability: Use reclaimed wood or leftovers from other projects.
- Enjoyment: There’s nothing like the satisfaction of a hands-on woodworking project.
In this article, we’ll cover the tools, materials, design options, and detailed construction steps to help you build a DIY wooden firewood rack that keeps your logs organized and your space tidy.
Benefits of Keeping Your Firewood Organized

Before diving into the project, let’s explore why organization matters when it comes to firewood:
- Improved Drying: Elevating logs off the ground allows air to circulate, speeding up the seasoning process and ensuring dry, burn-ready wood.
- Pest Prevention: Stacks on the ground attract insects and rodents. A rack minimizes this risk.
- Aesthetic Appeal: A neatly organized firewood rack adds rustic charm to your porch, patio, or backyard.
- Convenience: No more digging through a messy pile—your logs are easy to grab when you need them.
- Longevity: Proper storage extends the life of your firewood by protecting it from moisture and decay.
With these benefits in mind, let’s get started on your DIY firewood rack project.
Planning Your DIY Wooden Firewood Rack
Step 1: Determine the Size
The size of your firewood rack depends on how much wood you plan to store. Here are some guidelines:
- Small Rack: Holds about 1/8 cord (roughly 16 cubic feet) for occasional use. Ideal dimensions: 4 feet wide x 2 feet deep x 3 feet tall.
- Medium Rack: Holds 1/4 cord (32 cubic feet) for regular fireplace users. Suggested size: 6 feet wide x 2 feet deep x 4 feet tall.
- Large Rack: Holds 1/2 cord or more (64+ cubic feet) for heavy use or outdoor fire pits. Consider: 8 feet wide x 3 feet deep x 4 feet tall.
Measure your available space—whether it’s a corner of your garage, a spot on your porch, or an area in your yard—and adjust accordingly.
Step 2: Choose a Location
Place your firewood rack in a spot that’s:
- Accessible: Close to where you’ll use the wood (e.g., near the fireplace or fire pit).
- Well-Ventilated: Avoid damp, enclosed areas to keep wood dry.
- Protected: Under a roof or tarp if possible to shield from rain, but with airflow to prevent mold.
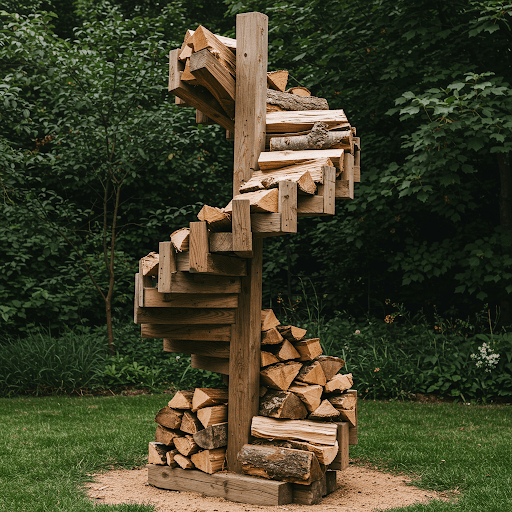
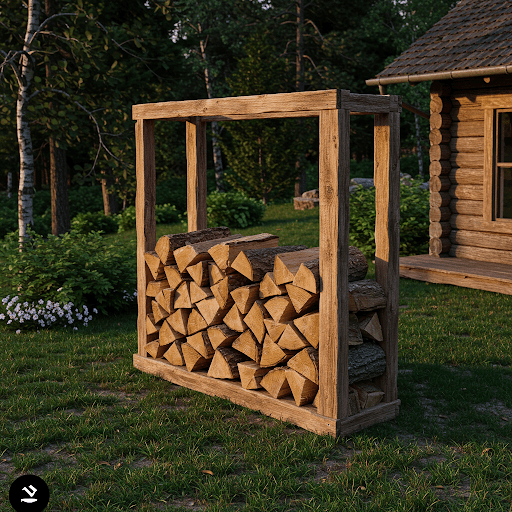
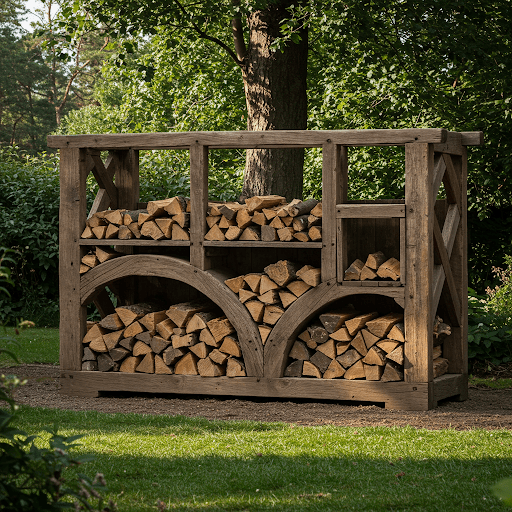
Step 3: Decide on a Design
Your DIY wooden firewood rack can be as simple or elaborate as you like. Here are some popular options:
- Basic Frame: A rectangular base with vertical supports and crossbars.
- A-Frame: Two slanted sides for stability and a unique look.
- Lean-To: A single-slanted rack that leans against a wall.
- Covered Rack: Add a roof for extra weather protection.
For this guide, we’ll focus on a basic frame design—it’s beginner-friendly, sturdy, and adaptable.
Materials and Tools Needed

Materials
- Lumber: Pressure-treated 2x4s are ideal for outdoor use due to their durability and resistance to rot. You’ll need:
- 4 pieces of 2×4 (8 feet long) for the frame.
- 2 pieces of 2×4 (4 feet long) for cross supports.
- Wood Screws: 3-inch exterior-grade screws (at least 20-30).
- Optional Base: Concrete blocks or bricks to elevate the rack off the ground.
- Wood Stain or Sealant: To protect the wood from weathering (optional but recommended).
- Tarp or Roof Material: For rain protection (optional).
Tools
- Tape Measure: For precise cuts and layout.
- Pencil: To mark your cuts.
- Circular Saw or Handsaw: To cut the lumber to size.
- Drill: For driving screws and pre-drilling holes.
- Screwdriver Bit: Compatible with your screws.
- Level: To ensure the rack is even.
- Safety Gear: Gloves, goggles, and a dust mask.
Cost Estimate
- Lumber: $20-$40 (depending on local prices).
- Screws: $5-$10.
- Optional extras (stain, blocks): $10-$20.
- Total: Around $35-$70—a fraction of the cost of a store-bought rack!
Step-by-Step Guide to Building Your DIY Wooden Firewood Rack
Now, let’s get to the fun part—building your rack. Follow these detailed steps for a 6-foot-wide, 2-foot-deep, 4-foot-tall rack (adjust measurements as needed).
Step 1: Cut the Lumber
Using your saw, cut the 2x4s to the following lengths:
- Base Frame:
- 2 pieces at 6 feet (front and back).
- 2 pieces at 2 feet (sides).
- Vertical Supports:
- 4 pieces at 4 feet (one for each corner).
- Cross Supports:
- 2 pieces at 4 feet (to stabilize the top).
Double-check your cuts with a tape measure to ensure accuracy.
Step 2: Assemble the Base Frame
- Lay out the two 6-foot pieces parallel to each other, 2 feet apart.
- Place the two 2-foot pieces perpendicularly at each end to form a rectangle.
- Pre-drill holes at each corner (two per joint) to prevent splitting.
- Secure the corners with 3-inch screws, driving them in with your drill.
- Check that the frame is square by measuring diagonally from corner to corner—both diagonals should match.
Step 3: Attach the Vertical Supports
- Stand one 4-foot 2×4 upright at each corner of the base frame.
- Align each vertical piece flush with the outer edge of the base.
- Pre-drill two holes through the bottom of each vertical support into the base.
- Fasten with 3-inch screws.
- Use a level to ensure each support is plumb (perfectly vertical).
Step 4: Add the Cross Supports
- Take the two 4-foot cross supports and position one across the top of the front verticals and one across the back.
- Align them flush with the top edges of the vertical supports.
- Pre-drill holes and secure each end with two screws.
- These crossbars will prevent the rack from swaying and provide a surface to stack wood against.
Step 5: Optional Elevation
To keep the wood off the ground:
- Place concrete blocks or bricks under each corner of the base frame.
- Adjust until the rack is level—use your level tool to confirm.
Step 6: Finishing Touches
- Sand: Smooth any rough edges with sandpaper for a polished look.
- Seal: Apply a wood stain or sealant with a brush, following the product instructions. This step is crucial for outdoor racks to protect against moisture and UV damage.
- Test Stability: Give the rack a gentle shake to ensure it’s sturdy. Add extra screws or braces if needed.
Step 7: Load Your Firewood
Stack your logs neatly within the rack, keeping the pile below the top crossbars for stability. Start with larger logs at the bottom and smaller pieces on top for easy access.
Design Variations for Your DIY Wooden Firewood Rack
Want to mix things up? Here are some creative twists:
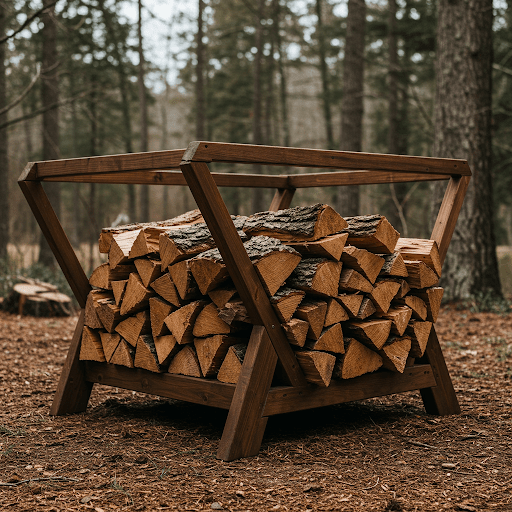
1. A-Frame Firewood Rack
- Cut the vertical supports at a 15-degree angle to create a slanted “A” shape on each end.
- Connect the tops with a horizontal beam.
- This design is stable and visually appealing but requires more precise cuts.
2. Covered Firewood Rack
- Extend the vertical supports by 1-2 feet and attach a sloped roof using plywood or corrugated metal.
- Ideal for areas with heavy rainfall.
3. Portable Firewood Rack
- Build a smaller version (e.g., 3 feet wide) and add handles by attaching short 2×4 pieces to the sides.
- Perfect for moving wood indoors or to a campsite.
For more inspiration and detailed woodworking plans, check out resources like Ryan’s Shed Plans, which offers thousands of blueprints for sheds, racks, and other projects to fuel your DIY creativity.
Tips for Maintaining Your Firewood Rack
To ensure your DIY wooden firewood rack lasts for years:
- Check for Wear: Inspect the wood and screws annually for signs of rot or loosening.
- Reapply Sealant: Every 1-2 years, refresh the protective coating.
- Cover It: Use a tarp or move the rack under shelter during extreme weather.
- Keep It Clean: Remove debris like leaves or dirt that can trap moisture.
Common Mistakes to Avoid
- Skipping Measurements: Inaccurate cuts lead to an unstable rack. Measure twice, cut once.
- Using Untreated Wood: Indoors, it’s fine, but outdoor racks need pressure-treated lumber or sealant.
- Overloading: Stick to the rack’s capacity to avoid collapse.
- Poor Placement: Avoid low-lying areas prone to flooding or poor drainage.
How Much Firewood Can Your DIY Rack Hold?
A standard cord of firewood is 128 cubic feet (4 feet high x 4 feet wide x 8 feet long). For our 6x2x4-foot rack:
- Volume = 6 ft x 2 ft x 4 ft = 48 cubic feet.
- That’s about 1/3 of a cord, enough for a season of occasional fires.
Adjust the size during planning if you need more or less capacity.
Safety Considerations
- Wear Gear: Protect your eyes and hands while cutting and drilling.
- Stable Ground: Ensure the rack sits on a flat surface to prevent tipping.
- Secure Stacking: Don’t pile wood too high—it could fall and cause injury.
Cost Comparison: DIY vs. Store-Bought
- DIY Wooden Firewood Rack: $35-$70 (depending on materials).
- Store-Bought: $50-$150 for a basic model, up to $300+ for fancy designs.
By building your own, you save money and get exactly what you want.
Troubleshooting Your Firewood Rack Build
- Wobbly Frame? Add diagonal braces between the vertical supports and base.
- Wood Splitting? Pre-drill all holes to reduce stress on the lumber.
- Uneven? Adjust the base with shims or reposition the blocks.
Why This Project Is Perfect for Beginners
The DIY wooden firewood rack is an ideal starter project because:
- It uses basic cuts and joints.
- It requires minimal tools.
- It’s forgiving—small imperfections won’t ruin the function.
Once you’ve mastered this, you’ll be ready for more complex builds!
Final Thoughts
Building a DIY wooden firewood rack is a rewarding way to keep your logs organized, dry, and ready for those chilly nights by the fire. With a few hours, some affordable materials, and this detailed guide, you can create a sturdy, stylish storage solution tailored to your needs. Whether you stick with the basic design or customize it with a roof or unique finish, your firewood rack will serve you well for years to come.
Ready to take your woodworking skills further? Explore Ryan’s Shed Plans for thousands of detailed blueprints to inspire your next project, from sheds to furniture. Happy building!
Affiliate Disclosure
This article contains affiliate links, including the link to Ryan’s Shed Plans. If you purchase through these links, I may earn a small commission at no additional cost to you. This helps support the creation of more free content like this guide. Thank you for your support!
Discover more from WoodReality
Subscribe to get the latest posts sent to your email.
