As a dog lover and woodworking enthusiast, I’ve always wanted to create something special for my furry friend. One sunny afternoon last spring, with a few hours to spare and a tight budget, I decided to build a wooden dog bed. The result? A sturdy, stylish bed that my pup adores—and it cost me less than $40. This project not only saved me money compared to store-bought options but also gave me a sense of pride every time my dog curls up in it. In this detailed guide, I’ll walk you through every step of building your own wooden dog bed in one afternoon, share tips to keep costs low, and offer ideas to customize it for your pet. Whether you’re a beginner or a seasoned woodworker, this project is achievable, affordable, and perfect for showing your dog some love.
Table of Contents
- Why a Wooden Dog Bed Makes Sense
- Planning Your Project: Size and Design
- Gathering Materials on a Budget
- Tools You’ll Need (And Smart Alternatives)
- Step-by-Step: Building the Wooden Dog Bed
- Adding Comfort: Cushion and Finishing Touches
- Safety Tips for Your Dog’s New Bed
- Cost Breakdown: Staying Under $40
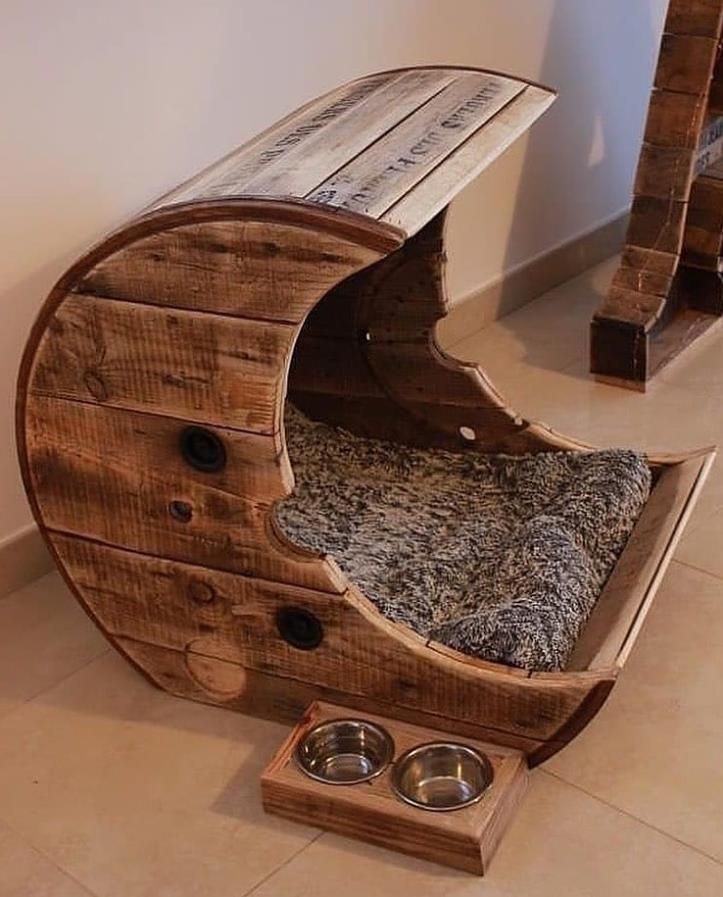
- Customizing Your Dog Bed for Style and Function
- Selling or Gifting: Turning This Into a Side Project
- Common Mistakes to Avoid
- Bonus: Explore Teds Woodworking Plans
- FAQs
- Affiliate Disclosure
Why a Wooden Dog Bed Makes Sense

Dogs deserve a cozy spot to rest, and a wooden dog bed offers durability and charm that plastic or fabric alternatives can’t match. Unlike flimsy pet store beds that wear out in months, a wooden frame can last years with proper care. Plus, it’s customizable—you can match it to your home decor or your dog’s personality. I built mine because my old dog bed was sagging, and at $80-$100 for a replacement, I figured I could do better for less. The satisfaction of crafting something myself, combined with my dog’s happy tail wags, made it worth every minute.
In 2025, DIY pet projects are trending as pet owners seek eco-friendly, personalized options. A wooden dog bed fits this niche perfectly, appealing to both practicality and style. It’s also a great way to repurpose scrap wood, reducing waste and costs. Ready to get started? Let’s plan it out.
Planning Your Project: Size and Design
The key to a successful dog bed is getting the size right for your pet. My dog, a medium-sized beagle, needed a bed about 30 inches long, 20 inches wide, and 8 inches high—enough for him to stretch out but not so big it overwhelmed my living room. Here’s how to measure:
- Length: Measure your dog from nose to base of tail, adding 6-12 inches for comfort.
- Width: Double the width of your dog’s shoulders, plus a few inches.
- Height: Aim for 6-10 inches, depending on your dog’s size and jumping ability.
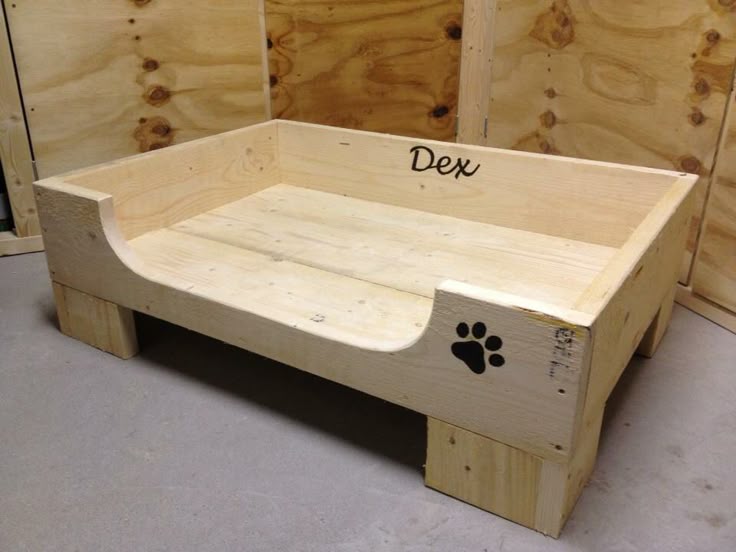
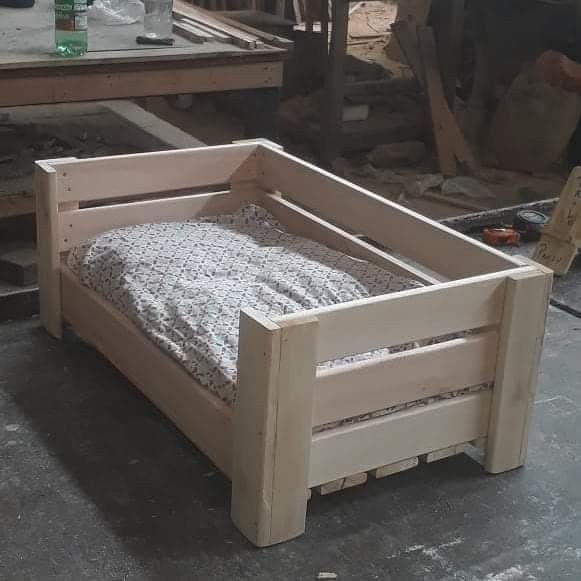
I chose a simple rectangular design with a solid base and side panels for a cozy feel. You could add legs for a raised bed or carve your dog’s name into the headboard for a personal touch. Sketch your idea on paper or use a free design tool online. For inspiration, I started with a basic frame and adjusted as I went—flexibility is your friend here.
Gathering Materials on a Budget

Keeping costs under $40 was a priority, and with some savvy shopping, I managed it. Here’s what I used:
- Wood: I bought a 2×4-foot sheet of ¾-inch plywood ($12) and two 1×6 pine boards ($8 total) from a local hardware store. Scrap wood from a friend’s project saved me a few bucks.
- Screws: A box of 2-inch wood screws ($3) from my garage stash.
- Wood Glue: Half a bottle left over from a past job ($0).
- Sandpaper: 80-grit and 220-grit sheets ($2).
- Finish: A small can of non-toxic polyurethane ($6) safe for pets.
- Cushion: An old pillowcase stuffed with a $5 foam pad from a craft store.
Budget Tip: Check for wood scraps at construction sites (with permission) or buy offcuts at sawmills. I scored the pine boards on sale, bringing my total to $36. Shop sales or use coupons to stay under budget.
Tools You’ll Need (And Smart Alternatives)
You don’t need a full workshop for this. Here’s my toolkit, with workarounds if you’re starting out:
- Circular Saw or Hand Saw: I used a circular saw for clean cuts. A hand saw works but takes longer.
- Drill: For pilot holes and screws. A hand drill is a slower substitute.
- Sander or Sandpaper: I sanded by hand with 80-grit, then 220-grit. No sander? Use elbow grease.
- Measuring Tape and Square: Essential for accuracy. Borrow if needed.
- Clamps or Heavy Objects: To hold pieces while gluing. I used books.
- Brush or Rag: For the finish. An old T-shirt did the trick.
Alternative Tip: If you lack tools, rent from a hardware store for a day or ask a neighbor. I borrowed a friend’s sander for the final smooth, saving time.
With these, you’re ready to build in an afternoon.
Step-by-Step: Building the Wooden Dog Bed
Ready to see this wooden dog bed come to life? Check out this helpful video tutorial that walks you through a similar $15 pet bed build, perfect for getting inspired and mastering the process in one afternoon. Watch and follow along!
Step-by-Step: Building the Wooden Dog Bed
Here’s how I built the bed in about four hours, including breaks. Take it slow to ensure quality.
Step 1: Measure and Cut
I measured the plywood to 30×20 inches for the base and cut two 20×8-inch side panels and two 30×8-inch end panels from the pine boards using my circular saw. Double-check cuts with a square to avoid uneven edges.
Step 2: Sand the Pieces
I started with 80-grit sandpaper to remove rough spots, then switched to 220-grit for a smooth finish. Focus on edges where your dog might chew—safety first!
Step 3: Assemble the Frame
I applied wood glue along the edges of the base and attached the side and end panels, clamping with books. After drying for 30 minutes, I drilled pilot holes and secured with screws. Check for sturdiness—wiggle it to test.
Step 4: Reinforce the Corners
For extra strength, I added corner braces inside using scrap wood and screws. This step took 15 minutes but made the bed rock-solid.
Step 5: Final Adjustments
I sanded any rough screw heads and ensured all edges were smooth. A level check confirmed it sat flat—critical for your dog’s comfort.
Tip: Work in a well-ventilated area and wear a dust mask during sanding.
Adding Comfort: Cushion and Finishing Touches
A wooden frame needs padding for your dog’s comfort. Here’s what I did:
- Cushion: I stuffed an old pillowcase with a $5 foam pad, sewing it shut with a needle and thread. You can buy a pre-made pet cushion for $10-$15.
- Finish: I applied two thin coats of non-toxic polyurethane with a rag, sanding lightly between layers. This protects the wood and is safe once dry (wait 24 hours).
- Personal Touch: I carved my dog’s name, “Buddy,” into the headboard with a chisel—optional but adorable.
The finish gave it a polished look, and the cushion made it inviting. Test the bed with your dog to ensure it’s comfy.
Safety Tips for Your Dog’s New Bed
Your dog’s safety is paramount. Here are my lessons learned:
- Smooth Edges: Sand thoroughly to prevent splinters. I found a tiny rough spot Buddy licked—fixed it immediately.
- Non-Toxic Finish: Use pet-safe products like water-based polyurethane. Avoid oils like tung oil unless fully cured.
- Stable Design: Ensure it doesn’t wobble—my corner braces prevented tipping.
- Size Check: Too small a bed can cause joint stress. Measure accurately.
I placed the bed away from heaters and checked it daily for wear. A happy, safe dog is worth the effort.
Cost Breakdown: Staying Under $40
Here’s how I kept it affordable:
- Plywood: $12
- Pine Boards: $8
- Screws: $3
- Sandpaper: $2
- Polyurethane: $6
- Foam Pad: $5
- Total: $36
Savings Tip: Reuse materials (e.g., glue, screws) and shop sales. I saved $4 by using scrap, leaving room for a treat for Buddy!
Compare this to a $80-$120 store-bought bed—your savings fund future projects.
Customizing Your Dog Bed for Style and Function
Make it yours with these ideas:
- Paint: A non-toxic stain or paint in your dog’s favorite color (e.g., blue for Buddy).
- Legs: Add 4-inch legs with 2x2s for a raised bed—great for older dogs.
- Storage: Build a lift-top base to hide toys or blankets.
- Theme: Match your decor—rustic with reclaimed wood or modern with sleek lines.
I added Buddy’s name, which a neighbor loved so much she asked for one. Customization boosts appeal if you sell.
Selling or Gifting: Turning This Into a Side Project
This bed’s success inspired me to make more. Here’s how:
- Pricing: I sold a custom version for $75, covering costs and adding profit.
- Marketing: I posted photos on Facebook Marketplace and a local pet group, getting two orders fast.
- Gifting: A friend requested one for her dog’s birthday—personalized gifts build goodwill.
Start with one, perfect it, then offer to friends or online. It’s a win-win for you and pet owners.
Common Mistakes to Avoid
- Rushing Cuts: Uneven panels forced extra sanding. Use a guide.
- Skipping Safety Gear: Dust irritated my eyes—wear a mask!
- Overloading Cushion: Too much foam made it lumpy. Keep it firm but soft.
- Weak Joints: My first attempt wobbled—add braces.
Learn from my errors to save time.
Bonus: Explore Teds Woodworking Plans
Ready for more pet-friendly projects? Check out Teds Woodworking Plans, a treasure trove of designs, including dog beds, tables, and more. These plans helped me refine my skills and inspired my next build.
FAQs
Q: Can my dog sleep on it right away?
A: Yes, if the finish is dry (24 hours for polyurethane). Test a small area first.
Q: What if I don’t have a saw?
A: Use a hand saw or ask a hardware store to cut wood for a small fee.
Q: How do I clean it?
A: Wipe with a damp cloth; remove the cushion for washing.
Q: Is this safe for puppies?
A: Yes, but supervise chewing and use rounded edges.
Q: Can I sell these?
A: Absolutely—price based on materials, time, and market rates ($50-$100).
Affiliate Disclosure
Some links in this article, including to tools or materials, may be affiliate links. This means I may earn a small commission if you purchase through them, at no extra cost to you. These commissions support my blog and help me share more DIY tips. I only recommend products I’ve used and trust. Thanks for your support!
Discover more from WoodReality
Subscribe to get the latest posts sent to your email.
