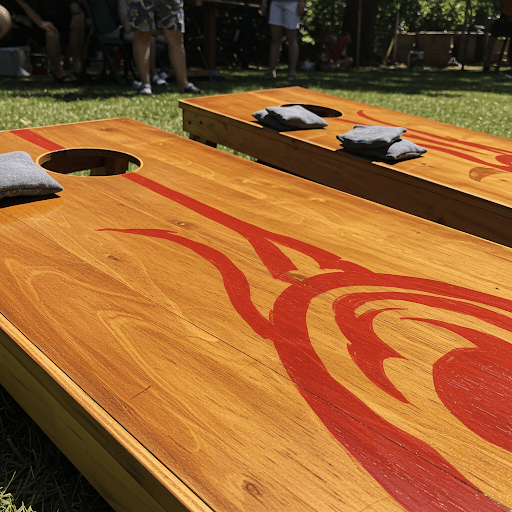
Cornhole is the quintessential backyard game that brings friends and family together during summer gatherings. Whether you’re hosting a BBQ, a beach party, or a casual evening under the stars, a well-crafted wooden cornhole board is a must-have for endless fun. In this comprehensive guide, we’ll walk you through how to make a wooden cornhole board for summer gatherings from scratch, ensuring it’s durable, professional-looking, and customized to your style. This article covers everything from materials and tools to step-by-step instructions, finishing tips, and maintenance advice.
Why Build Your Own Wooden Cornhole Board?
Building your own wooden cornhole board is a rewarding DIY project that combines creativity, craftsmanship, and summer fun. Here’s why you should consider making one:
- Cost-Effective: Store-bought cornhole boards can cost $100-$300, but building your own can be done for under $50 with basic materials.
- Customizable: Personalize your board with colors, designs, or logos to match your summer aesthetic or favorite sports team.
- Durable: A handmade board using quality wood and finishes can withstand years of outdoor use.
- Fun for All Ages: Cornhole is a versatile game that’s easy to learn, making it perfect for summer gatherings with kids, teens, and adults.
- Satisfying DIY Experience: There’s nothing like the pride of playing on a board you built yourself.
This guide is designed for beginners and experienced woodworkers alike, with clear instructions to ensure your cornhole board is regulation-size, sturdy, and ready for summer tournaments.
Materials Needed for a Wooden Cornhole Board

To build a regulation-size cornhole board (24” x 48”), you’ll need the following materials. These are affordable and available at most hardware stores like Home Depot or Lowe’s.
For Two Cornhole Boards (Standard Set):
- Plywood (1/2” thick): 1 sheet of 4’ x 8’ sanded birch or pine plywood (for two 24” x 48” tops).
- 2×4 Lumber:
- 4 pieces at 48” (long frame sides, 2 per board).
- 4 pieces at 21” (short frame sides, 2 per board).
- 4 pieces at 12” (legs, 2 per board).
- Wood Screws:
- 2-1/2” wood screws (for frame assembly, ~20).
- 1-1/2” wood screws (for attaching plywood, ~20).
- Carriage Bolts:
- 4 bolts (3/8” x 2-1/2”) with washers and wing nuts (for adjustable legs).
- Wood Glue: Waterproof glue for added strength.
- Sandpaper: 120-grit and 220-grit for smoothing surfaces.
- Primer and Paint:
- Exterior-grade primer (1 quart).
- Exterior acrylic paint (2-3 colors, 1 pint each).
- Polyurethane Sealer: Clear, exterior-grade (1 quart) for weather resistance.
- Optional Decor:
- Vinyl decals, stencils, or painter’s tape for custom designs.
- Non-slip pads for legs (to prevent sliding on grass).
Pro Tip: Choose high-quality plywood with a smooth surface to ensure a consistent playing experience. Birch plywood is ideal for a premium finish, while pine is budget-friendly.
Tools Required for the Project

You don’t need a fully equipped workshop to build a cornhole board. Here’s a list of essential tools:
- Circular Saw or Table Saw: For cutting plywood and 2x4s.
- Jigsaw: For cutting the 6” cornhole.
- Drill/Driver: For screws and bolt holes.
- 3/8” Drill Bit: For bolt holes in legs.
- 6” Hole Saw: For the cornhole (or use a compass and jigsaw).
- Measuring Tape: For precise cuts and alignment.
- Carpenter’s Square: To ensure 90-degree angles.
- Clamps: To hold pieces during assembly.
- Sander or Sanding Block: For smoothing edges and surfaces.
- Paintbrushes and Rollers: For applying primer, paint, and sealer.
- Safety Gear: Safety glasses, gloves, and a dust mask.
If you’re new to woodworking and want access to detailed plans for projects like this, consider exploring resources like Ted’s Woodworking Plans, which offers thousands of blueprints for DIY enthusiasts.
Step-by-Step Guide to Building a Cornhole Board
Follow these detailed steps to build a regulation-size wooden cornhole board. We’ll cover one board here, but repeat the process for the second to create a set. Each step includes tips to ensure accuracy and durability.
Step 1: Cut the Wood to Size
Goal: Prepare all wooden pieces for assembly.
- Cut the Plywood Top:
- Measure and mark a 24” x 48” rectangle on the 1/2” plywood sheet.
- Use a circular saw or table saw to cut the rectangle. Ensure edges are straight using a carpenter’s square.
- Sand the edges lightly with 120-grit sandpaper to remove splinters.
- Cut the 2×4 Frame Pieces:
- For the frame:
- Cut 2 pieces of 2×4 to 48” (long sides).
- Cut 2 pieces of 2×4 to 21” (short sides).
- For the legs:
- Cut 2 pieces of 2×4 to 12” (legs).
- Label each piece to avoid confusion during assembly.
- For the frame:
- Double-Check Measurements:
- Regulation cornhole boards must be exactly 24” x 48”. Recheck your cuts before proceeding.
Tip: If you’re cutting multiple boards, create a jig or template to ensure consistency.
Step 2: Assemble the Frame
Goal: Build a sturdy rectangular frame to support the plywood top.
- Form the Rectangle:
- Arrange the 2x4s into a 24” x 48” rectangle: two 48” pieces (long sides) and two 21” pieces (short sides, placed inside the long sides).
- Use a carpenter’s square to ensure 90-degree corners.
- Secure with Glue and Screws:
- Apply wood glue along the ends of the 21” pieces where they meet the 48” pieces.
- Drill pilot holes (to prevent splitting) and drive 2-1/2” wood screws through the 48” pieces into the 21” pieces (2 screws per corner).
- Wipe away excess glue with a damp cloth.
- Check Stability:
- Ensure the frame is square by measuring diagonals (they should be equal). Adjust if needed before the glue dries.
Tip: Clamp the frame to a workbench while screwing to keep pieces aligned.
Step 3: Attach the Plywood Top
Goal: Secure the plywood playing surface to the frame.
- Position the Plywood:
- Place the 24” x 48” plywood sheet on top of the frame, ensuring all edges are flush.
- Clamp the plywood to the frame to prevent shifting.
- Fasten the Plywood:
- Drill pilot holes every 6-8 inches along the perimeter of the plywood, through the plywood and into the 2×4 frame.
- Apply wood glue between the plywood and frame for extra strength.
- Drive 1-1/2” wood screws through the pilot holes to secure the plywood.
- Inspect the Surface:
- Ensure the plywood is flat and fully attached, with no gaps or raised edges.
Tip: Countersink screws slightly for a smoother surface, especially if you plan to paint or apply decals.
Step 4: Cut the Cornhole
Goal: Create the 6” hole for gameplay.
- Mark the Hole Location:
- Measure 9” from the top edge of the plywood (the end that will be elevated) and 12” from either side to find the center of the hole.
- Mark this point clearly with a pencil.
- Cut the Hole:
- Option 1: Use a 6” hole saw attached to your drill. Drill slowly and steadily to create a clean circle.
- Option 2: Draw a 6” circle using a compass or round object, then cut it out with a jigsaw.
- Sand the edges of the hole with 120-grit sandpaper to remove roughness.
- Test the Hole:
- Ensure the hole is smooth and exactly 6” in diameter, as per regulation standards.
Tip: Practice on a scrap piece of plywood if you’re new to using a hole saw or jigsaw.
Step 5: Build and Attach the Legs
Goal: Add adjustable legs to elevate the board to regulation height (12” at the top end).
- Prepare the Legs:
- Take the two 12” 2×4 pieces (legs). Round one end of each leg using a jigsaw to create a smooth curve (this end will touch the ground).
- Sand the rounded ends with 120-grit sandpaper.
- Drill Bolt Holes:
- Measure 1-1/2” from the non-rounded end of each leg and mark the center.
- Drill a 3/8” hole through each leg for the carriage bolt.
- On the frame, mark the center of the 2×4 long sides, 1-1/2” from the top edge. Drill 3/8” holes through the frame.
- Attach the Legs:
- Insert a 3/8” carriage bolt through the frame and leg, securing it with a washer and wing nut on the inside.
- Tighten the wing nut, but ensure the leg can pivot (for folding during storage).
- Repeat for the second leg.
- Adjust the Height:
- Flip the board so the top end (with the hole) is elevated. Measure from the ground to the top edge of the board—it should be 12”.
- If needed, trim the legs slightly to achieve the correct height, ensuring the board is level.
Tip: Add non-slip pads to the bottom of the legs to prevent sliding on grass or slick surfaces.
Step 6: Sand and Smooth the Surface
Goal: Prepare the board for painting and ensure a smooth playing surface.
- Sand the Entire Board:
- Use 120-grit sandpaper to sand the plywood top, frame, and legs, focusing on edges and the cornhole.
- Switch to 220-grit sandpaper for a finer finish, especially on the playing surface.
- Clean the Surface:
- Wipe the board with a damp cloth to remove sawdust, then let it dry completely.
Tip: A smooth surface is critical for consistent gameplay, as rough spots can affect bean bag slides.
Step 7: Paint and Customize Your Cornhole Board
Goal: Add color and personality to your board for summer gatherings.
- Apply Primer:
- Brush or roll on a thin, even coat of exterior-grade primer over the entire board (top, sides, and legs).
- Let it dry for 4-6 hours, then lightly sand with 220-grit sandpaper for a smooth base.
- Paint the Base Color:
- Choose an exterior acrylic paint in a bright, summer-inspired color (e.g., navy blue, coral, or white).
- Apply 2-3 thin coats, allowing each coat to dry fully (2-4 hours). Use a roller for the top and a brush for edges.
- Add Custom Designs:
- Use painter’s tape to create geometric patterns (e.g., stripes or chevrons).
- Apply vinyl decals or stencils for logos, names, or summer themes (e.g., palm trees, suns, or waves).
- Paint over the stencils with contrasting colors, removing tape or decals carefully after drying.
- Highlight the Cornhole:
- Paint the rim of the 6” hole in a bold color to make it stand out.
Tip: Test your design on paper first, and choose UV-resistant paints to prevent fading in summer sun.
Step 8: Seal for Weather Resistance
Goal: Protect your board from summer elements like sun, rain, and humidity.
- Apply Polyurethane:
- Use a clear, exterior-grade polyurethane sealer (gloss or semi-gloss for a sleek look).
- Brush or roll on 2-3 thin coats, sanding lightly with 220-grit sandpaper between coats.
- Ensure the cornhole and seams are well-sealed to prevent water damage.
- Cure the Sealer:
- Let the board cure for 48-72 hours in a dry, well-ventilated area before use.
Tip: Apply sealer in a dust-free environment to avoid specks on the playing surface.
Tips for Perfecting Your Cornhole Board
- Regulation Compliance: Ensure the board is 24” x 48”, the hole is 6” in diameter (centered 9” from the top), and the top edge is 12” off the ground.
- Weight Distribution: Test the board’s stability by tossing bean bags. Adjust legs or add weight to the frame if it tips.
- Smooth Gameplay: The playing surface should be slick but not slippery. Test with bean bags and sand lightly if too glossy.
- Storage: Fold the legs and store the board in a dry place to protect it from moisture.
- Transport: Add handles (cut slots in the frame or attach rope) for easy carrying to summer events.
How to Maintain Your Cornhole Board for Longevity
To keep your cornhole board looking great and performing well for years:
- Clean Regularly: Wipe the surface with a damp cloth after use to remove dirt or spills. Avoid harsh chemicals.
- Reapply Sealer: Every 1-2 years, lightly sand and apply a new coat of polyurethane to maintain weather resistance.
- Store Properly: Keep the board indoors or under a tarp during heavy rain or winter months.
- Inspect for Damage: Check screws, bolts, and legs for looseness and tighten as needed. Repair cracks with wood filler.
- Touch Up Paint: Refresh faded designs with a quick coat of paint to keep the board vibrant.
Customizing Your Cornhole Board for Summer Vibes
Make your cornhole board the centerpiece of summer gatherings with these ideas:
- Tropical Theme: Paint palm trees, pineapples, or flamingos in bright greens, yellows, and pinks.
- Nautical Style: Use navy and white stripes with anchor or lighthouse decals for a coastal vibe.
- Sports Team Pride: Add your favorite team’s logo or colors for tailgate-ready boards.
- Glow-in-the-Dark: Apply glow-in-the-dark paint around the cornhole for nighttime play.
- Personalized Touch: Stencil your family name or event date (e.g., “Smith Family Reunion 2025”) for a keepsake.
For more inspiration, check out Ted’s Woodworking Plans, which includes creative designs for outdoor games and furniture to complement your cornhole board.
Where to Find More Woodworking Plans
If you enjoyed building your cornhole board, expand your woodworking skills with other summer projects like picnic tables, pergolas, or outdoor bars. Resources like Ted’s Woodworking Plans offer over 16,000 detailed blueprints for DIY projects, including outdoor furniture and games. These plans provide step-by-step guidance, material lists, and tips to streamline your next build, whether you’re a beginner or a seasoned woodworker.
FAQs About Building a Wooden Cornhole Board
Q: What’s the best wood for a cornhole board?
A: Birch or pine plywood (1/2” thick) is ideal for the top due to its smooth surface and durability. Use pine 2x4s for the frame and legs for affordability.
Q: How long does it take to build a cornhole board?
A: With basic tools and experience, it takes 4-6 hours, including cutting, assembly, and painting. Allow 2-3 days for drying and curing.
Q: Can I make a cornhole board without power tools?
A: Yes, but it’s slower. Use a hand saw for cutting and a manual drill for screws. A hole saw or jigsaw is recommended for the cornhole.
Q: How do I make my cornhole board weatherproof?
A: Use exterior-grade plywood, waterproof wood glue, and multiple coats of polyurethane sealer. Store indoors when not in use.
Q: What are regulation cornhole board dimensions?
A: The board must be 24” x 48”, with a 6” hole centered 9” from the top. The top edge should be 12” off the ground, and the bottom edge 3-4”.
Q: Where can I find cornhole bean bags?
A: Buy regulation bean bags (6” x 6”, filled with corn or resin) online or make your own with duck cloth and corn feed.
Conclusion
Building a wooden cornhole board for summer gatherings is a fun, affordable, and rewarding woodworking project that elevates any outdoor event. With this detailed guide, you’ve learned how to create a regulation-size board from scratch, customize it with vibrant summer designs, and maintain it for years of enjoyment. Whether you’re tossing bean bags at a family reunion, beach party, or backyard BBQ, your handmade cornhole board will be the star of the show.
Ready to take on more DIY projects? Explore resources like Ted’s Woodworking Plans for inspiration and blueprints to build everything from outdoor furniture to garden decor. Share your finished cornhole board on social media with #SummerWoodWorks, and let us know how it turned out in the comments!
Affiliate Disclosure
This article contains affiliate links, including links to Ted’s Woodworking Plans. If you make a purchase through these links, we may earn a small commission at no additional cost to you. This helps support our content creation and allows us to provide more free, detailed guides like this one. Thank you for your support!
Discover more from WoodReality
Subscribe to get the latest posts sent to your email.
