You’ve got the passion, the tools, and a burning desire to create beautiful things with your hands. But you’re missing one crucial ingredient: space. For many woodworkers, the dream of a sprawling, dedicated workshop is just that—a dream. The reality is often a corner of a garage, a small basement, or a shed where every square inch is a battleground against clutter.
If this sounds like you, then this article is your blueprint to winning that war. We’re not just talking about putting a few tools on the wall; we’re diving deep into the philosophy of small-shop design. We’ll explore how to transform your cramped, chaotic space into an efficient, organized, and surprisingly productive workshop. We’ll move beyond simple tips and provide you with a fully detailed, step-by-step guide to implement seven clever solutions that will fundamentally change the way you work.
The goal is to create a workshop that works for you, not against you. A place where every tool has a home, where your workspace is a blank canvas, and where you can focus on the craft without tripping over a table saw. The solutions we’ll cover are not just about saving space; they’re about creating a more enjoyable and safer woodworking experience.
Are you ready to reclaim your shop? Let’s get started.
The Small Shop Philosophy: Thinking Vertically, Moving Flexibly
Before we get to the “how-to,” let’s talk about the mindset. A small shop isn’t a limitation; it’s a design challenge. Your biggest advantage is your ability to think differently. The traditional workshop layout—with stationary tools placed against walls—is a luxury you can’t afford. You need to think vertically, using every inch from the floor to the ceiling. And you need to embrace mobility, putting everything from your workbench to your major power tools on wheels.
The central idea is to create a blank slate. By making your tools mobile and your storage vertical, you can clear the floor to work on any project, no matter how large. This approach is what allows a woodworker in a one-car garage to build a dining room table without having to move their car out every time they want to make a cut.
Let’s dive into the seven solutions that will make this philosophy a reality.
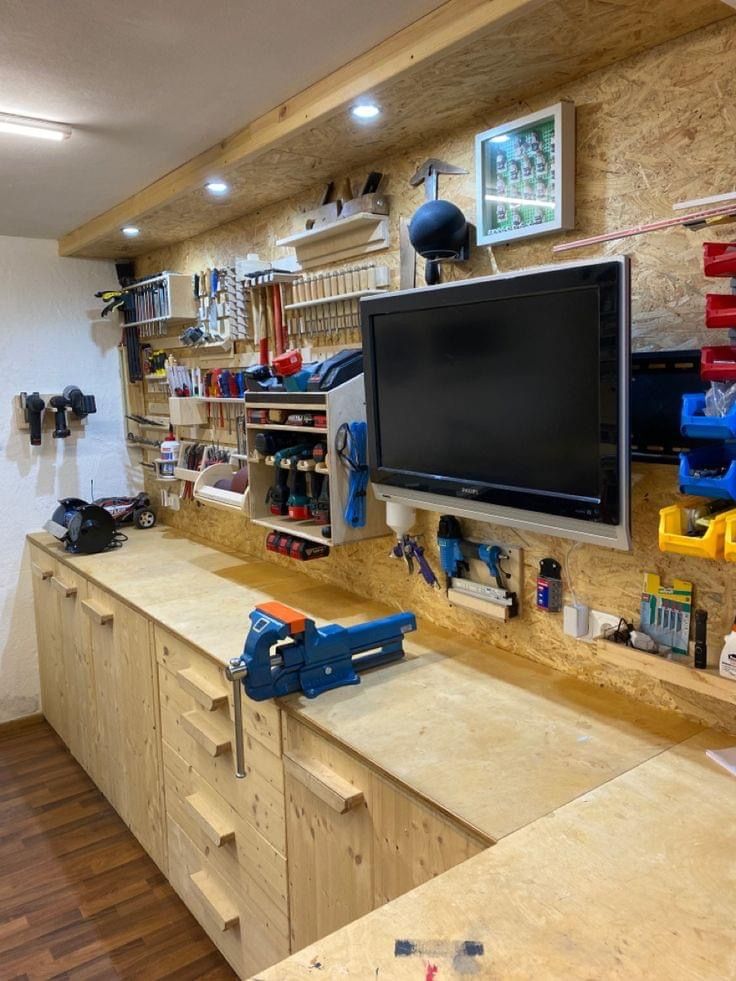
Solution 1: The Mobile & Modular Workbench System
Your workbench is the heart of your shop. In a small space, it needs to be more than just a surface; it needs to be a multi-functional hub that can adapt to the task at hand. The best way to achieve this is with a mobile workbench on a robust set of casters.
Why a Mobile Workbench is a Game-Changer:
- Flexibility: You can roll it to the center of the room for assembly, tuck it against a wall for a smaller project, or use it as an outfeed table for your table saw.
- Storage: The space beneath the workbench is prime real estate. You can build drawers, cabinets, or open shelves to store frequently used tools, jigs, and even a compact dust collection system.
- Workflow: By having a workbench on wheels, you can arrange your entire shop for a specific task. Need to mill a lot of lumber? You can line up your jointer, planer, and workbench to create an assembly line.
How to Build Your Ultimate Mobile Workbench:
This isn’t a simple build; it’s a foundational project for your entire shop. It needs to be heavy, stable, and customizable. We’ll detail a plan for a workbench that can be built from 2x4s and plywood.
Materials List:
- (12) 2x4s, 8 ft long
- (2) sheets of 3/4″ plywood
- (4-6) heavy-duty locking casters
- Wood screws, pocket hole screws, and wood glue
- T-tracks (optional, but highly recommended)
Step-by-Step Construction Guide:
- Cut the Components: Cut your 2x4s to create two identical frames for the top and bottom of the bench. The dimensions will depend on your space, but a 2×6-foot top is a great starting point. Cut your plywood for the top and a lower shelf.
- Assemble the Frames: Use pocket holes and wood glue to build your two rectangular frames. Ensure they are perfectly square.
- Attach the Legs: Cut four 2x4s for the legs. Use wood glue and screws to attach them to the inside corners of the bottom frame. The bottom frame should be raised about 4-6 inches from the ground to allow for casters and a stable base.
- Install Casters: Flip the base upside down and attach your locking casters to the bottom of the legs. Make sure to use heavy-duty hardware to support the weight of the bench and your projects.
- Build the Top: Attach the second frame to the top of the legs. Then, screw down your two layers of 3/4″ plywood to create a solid, heavy top. You can add T-tracks to the top for easy clamping.
- Add a Lower Shelf: The lower shelf is crucial for storage and adding weight for stability. Cut your second piece of plywood to fit and screw it down to the bottom frame.
The Ultimate Small Shop Companion: Once your workbench is built, consider integrating a few key accessories. A built-in vise is essential, as is a power strip mounted to the side. The true beauty of this mobile workbench is that it becomes the central pillar of an ultimate small shop that you can build around. It’s not just a surface; it’s a fully functional workstation.
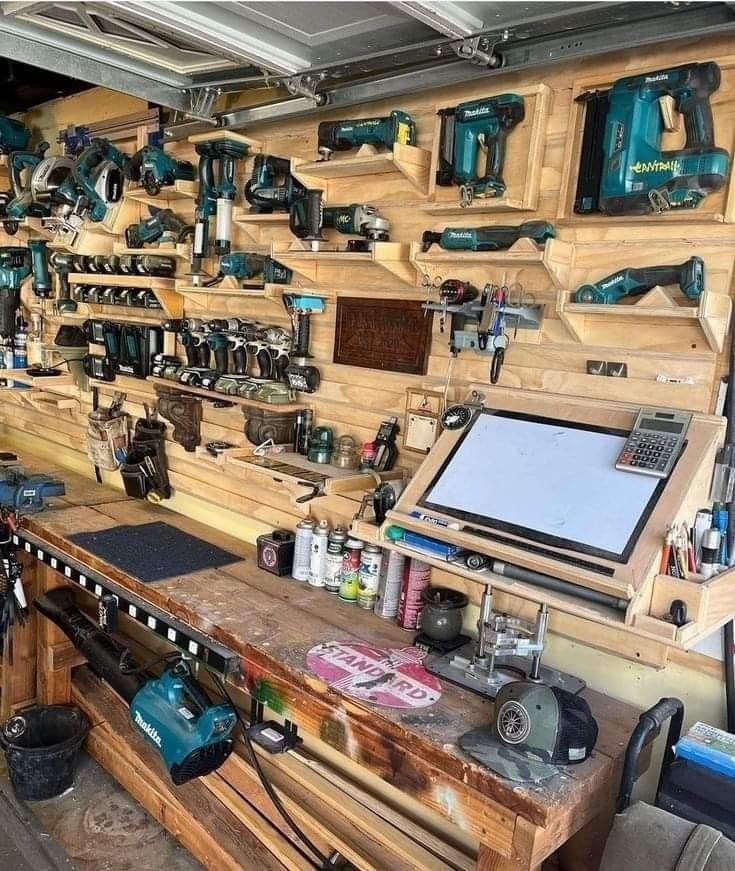
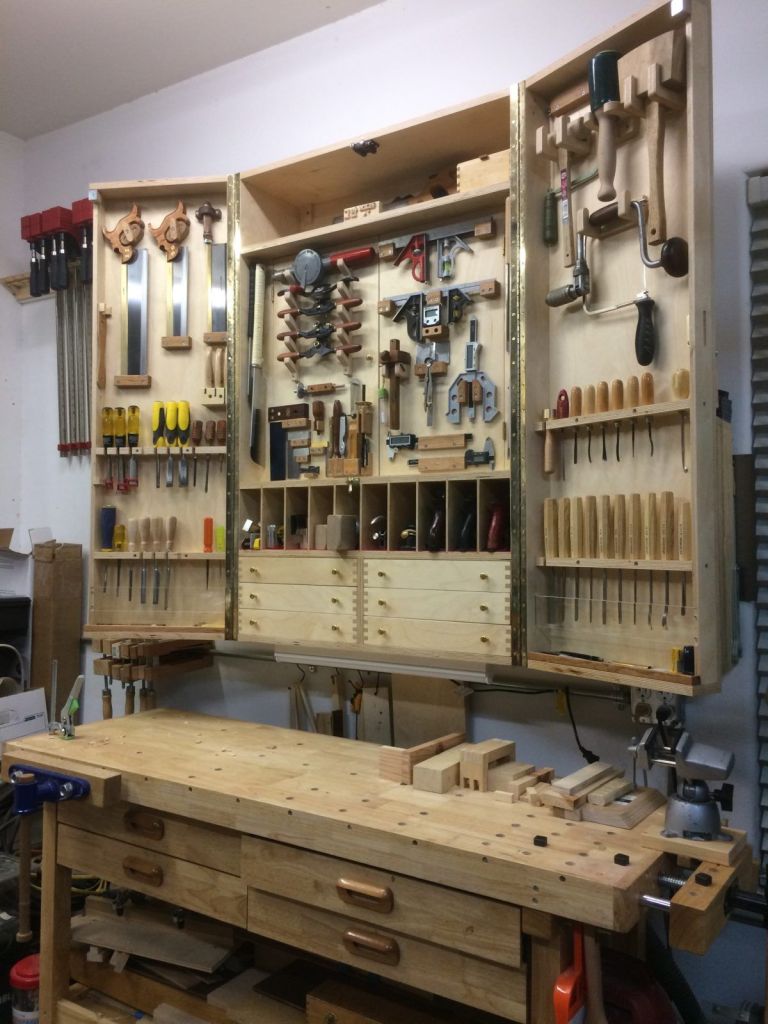
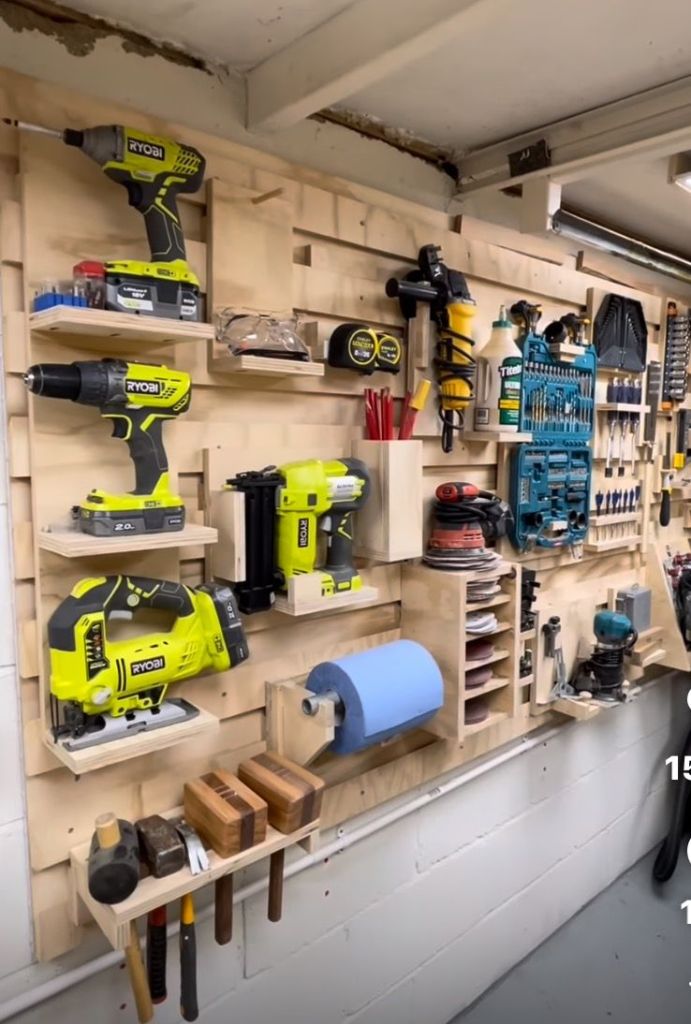
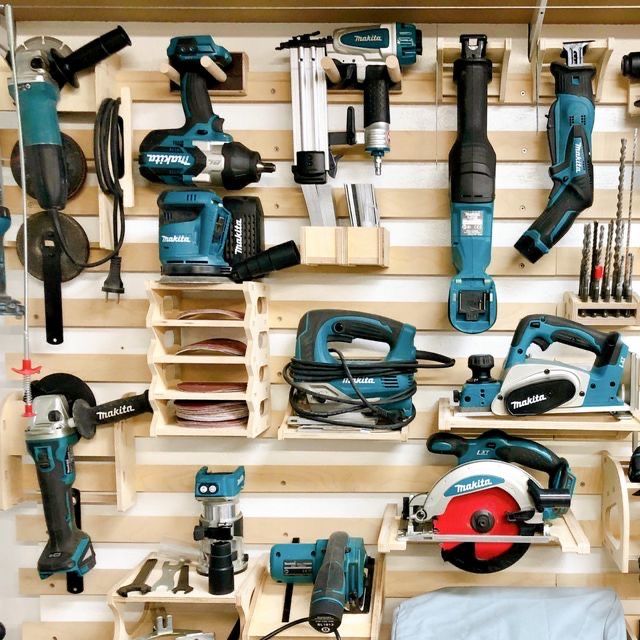
Solution 2: Embrace the French Cleat Wall System

Walls are your most underutilized asset. You’ve got an entire vertical dimension just waiting to be organized. Forget flimsy pegboards that bend under pressure; the French cleat system is the gold standard for small shop organization.
What is a French Cleat System? A French cleat is a simple, yet incredibly strong, way to hang things on a wall. It consists of two interlocking pieces of wood, both cut at a 45-degree angle. One piece is mounted to the wall, and the other is attached to the back of a tool holder, cabinet, or shelf. The two pieces slide together, creating a secure and easily movable hanging system.
Why It’s a Perfect Small Shop Solution:
- Total Flexibility: You can move tool holders and cabinets around in a matter of seconds to reconfigure your shop for a new project.
- Strength: Because the cleats interlock, they can hold a surprising amount of weight, from a handful of chisels to a heavy cordless drill charging station.
- Customization: You can build tool holders for every single tool you own, from hand planes to tape measures. This ensures every tool has a designated spot, eliminating clutter on your workbench.
How to Install Your French Cleat System:
- Attach Cleats to the Wall: Cut long strips of 3/4″ plywood with a 45-degree bevel on one edge. Screw these strips into the wall studs, making sure the beveled edge is facing up and away from the wall. Use a level to ensure each cleat is perfectly straight.
- Build Tool Holders: Cut pieces of wood and plywood to build custom holders for your tools. On the back of each holder, attach a cleat with a 45-degree bevel facing down.
- Hang and Organize: Now you can simply hang your tool holders on the wall cleats. You’ll be amazed at how quickly your cluttered workbench disappears.
The French cleat system is one of the foundational elements of a truly ultimate small shop because it provides an infinitely customizable organizational system that grows with your tool collection.
Solution 3: Go Vertical with Overhead Storage
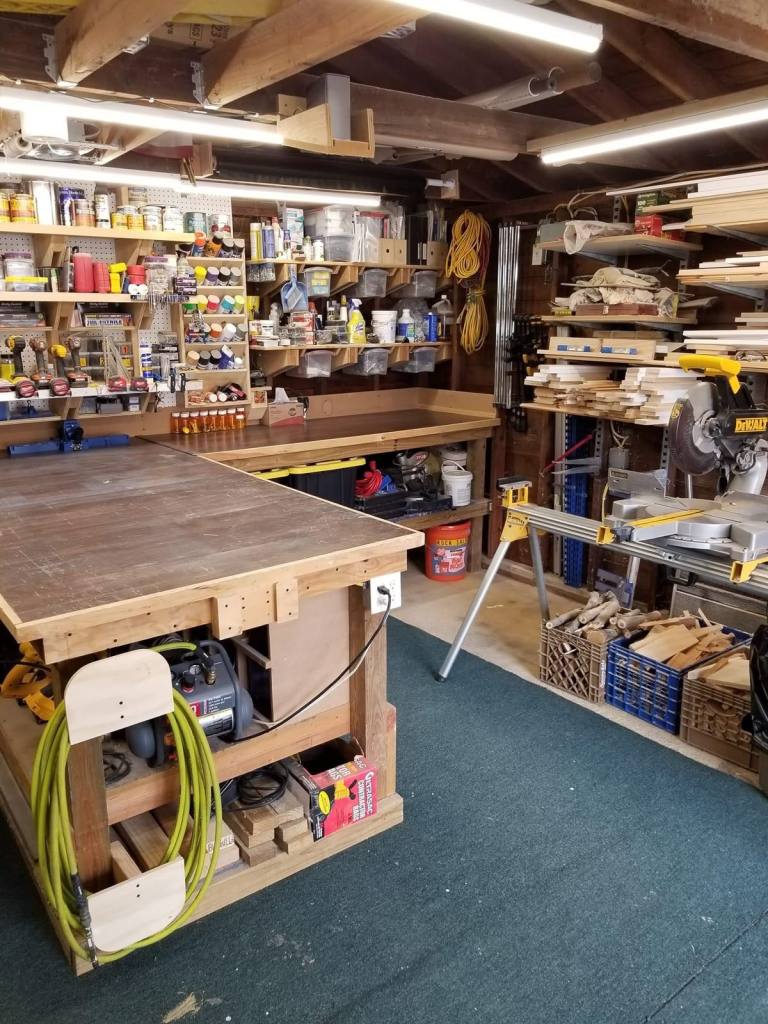
The space above your head is often completely empty. This is valuable real estate for storing things you don’t use every day, like long pieces of lumber, sheet goods, or seasonal tools.
Why Overhead Storage is Essential:
- Frees Up Floor Space: The number one goal in a small shop is to keep the floor clear. Storing lumber, which is notoriously difficult to organize, overhead is a great way to accomplish this.
- Safety: It keeps long, unwieldy boards from leaning against walls where they could fall and cause an accident.
- Visibility: You can see what you have in stock at a glance, making project planning easier.
DIY Overhead Lumber Rack: You can build a simple and strong overhead lumber rack using 2x4s and plywood.
- Build the Brackets: Cut two identical brackets for each side. The brackets should have a vertical piece that attaches to the ceiling joists and a horizontal arm that extends out to hold the lumber. Use gussets (triangular pieces of plywood) to reinforce the corners.
- Attach to Ceiling Joists: Locate your ceiling joists and screw your brackets securely into them. Ensure the brackets are perfectly aligned.
- Add Plywood Runners: Cut strips of plywood to create a floor for your lumber rack. These runners will connect your brackets and provide a solid surface for your lumber to rest on.
For a smaller shop, a simple ceiling-mounted plywood rack that holds a few sheets of plywood or a few long boards can be a game-changer. This simple addition is a huge step toward creating an ultimate small shop where every item has its place.
Solution 4: Mobilize Your Major Tools
Your table saw, bandsaw, and planer are probably your biggest space hogs. But they don’t have to be. By putting them on mobile bases, you can bring them out for a cut and then tuck them away when you’re done.
Why Mobile Bases are Non-Negotiable:
- Fluid Workflow: You can arrange your tools to accommodate the size of your project. Need to rip a long board? You can roll your table saw into the middle of the room for a clear path.
- Versatility: A major tool on a mobile base can double as a temporary outfeed table or an extra work surface when a larger project is underway.
- Safety: You can maintain a safe distance from other tools and obstacles while using your equipment.
How to Mobilize Your Tools:
- Buy a Pre-Made Mobile Base: Many tool companies sell universal mobile bases that can be adjusted to fit most stationary tools. This is the quickest and easiest option.
- Build a DIY Mobile Base: You can build a custom base for any tool using 2x4s and locking casters. The advantage of a DIY base is that you can build in additional storage, like a small cabinet or shelf beneath the tool.
A fully mobilized shop is a key feature of the ultimate small shop. It allows you to use your space for what you need, when you need it, rather than being dictated by the fixed placement of your large tools.
Solution 5: The Compact & Effective Dust Collection System
Dust collection is often an afterthought in a small shop, but it shouldn’t be. Fine wood dust is a serious health hazard, and a cluttered shop is often a dusty one. A large, centralized dust collector is often out of the question, but there are excellent small-shop solutions.
Why a Compact System is Crucial:
- Health & Safety: It keeps dangerous airborne particles out of your lungs and off your projects.
- Cleanliness: It makes cleanup a breeze, allowing you to move quickly from one task to the next.
- Space-Saving: Modern compact dust collectors and shop vacs with cyclone separators are incredibly effective and take up minimal space.
DIY Compact Dust Collection Solutions:
- The Shop Vac & Cyclone Separator: A high-quality shop vacuum paired with a cyclone separator is a powerhouse for a small shop. The separator captures over 99% of dust before it reaches the vacuum, preventing the filter from clogging and maintaining suction. You can easily build a rolling cart to hold both the vacuum and the separator, creating a mobile dust collection unit.
- Wall-Mounted Dust Collector: For a more permanent solution, a wall-mounted dust collector frees up valuable floor space. You can run small, flexible hoses to your major tools, creating a semi-centralized system without the need for extensive ductwork.
Good dust collection is a hallmark of a professional ultimate small shop. It’s an investment in your health and the quality of your work, and there are many compact solutions that don’t require a dedicated dust room.
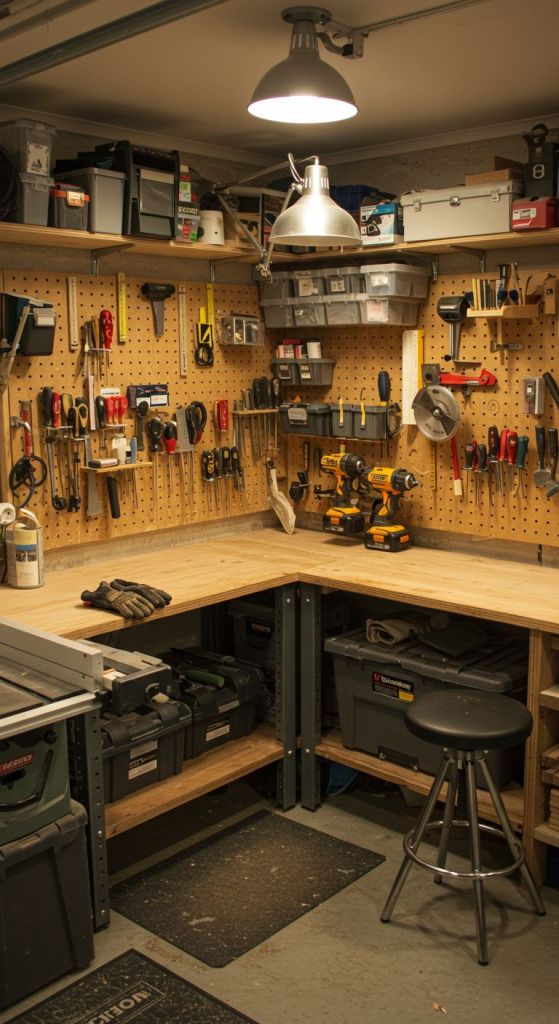
Solution 6: Clever Small Part Storage
In a small shop, screws, nails, hinges, and other small parts can quickly turn into a messy nightmare. If you can’t find a screw, your project grinds to a halt. The solution is to create a storage system that is both compact and highly accessible.
Why Small Parts Storage Matters:
- Time-Saving: You spend less time searching for the right hardware and more time building.
- Organization: It keeps your workbench and drawers from becoming a junk pile.
- Efficiency: A well-organized system allows you to easily see what you have in stock, so you don’t buy things you already own.
DIY Small Parts Storage Ideas:
- Wall-Mounted Bins: Small plastic bins mounted to a wall panel are a great way to store a wide variety of fasteners. You can use labels to quickly identify what’s inside.
- Clear Drawer Cabinets: These cabinets, often used for organizing electrical components, are perfect for storing screws, washers, and other small parts.
- Magnetic Tool Holders: A magnetic strip mounted to the wall or a tool holder is a great way to keep drill bits, screwdrivers, and other metal tools in plain sight.
For a truly ultimate small shop, your small parts storage should be just as carefully considered as your major tool layout.
Solution 7: Multi-Purpose & Collapsible Work Surfaces
Even with a mobile workbench, you’ll still need extra space for assembly, sanding, or finishing. This is where multi-purpose and collapsible work surfaces come in.
Why Multi-Purpose Surfaces are Key:
- Extra Space When You Need It: A fold-down workbench, a collapsible set of sawhorses, or even a sheet of MDF that sits on top of your main workbench can give you the extra room you need for a large project.
- Versatility: A workbench can be an assembly table, an outfeed table, or a finishing station, all in one.
- Clears the Floor: When you’re done, these surfaces can be folded up and stored out of the way, returning your floor space to its natural, uncluttered state.
DIY Collapsible Surfaces:
- Wall-Mounted Fold-Down Workbench: You can build a simple fold-down workbench using a sturdy piece of plywood, a few hinges, and a pair of fold-down brackets. It’s perfect for a second work surface or a dedicated finishing station.
- The Ultimate Outfeed/Assembly Table: Build a table that’s the same height as your table saw and put it on casters. This table can function as both an outfeed table and a central assembly table, saving you from having to purchase two separate pieces of furniture. This is an essential component of an ultimate small shop that’s designed for maximum productivity.
Conclusion: Your Small Shop, Reimagined
A small woodworking shop doesn’t have to feel small. By implementing these seven clever solutions, you can transform your cramped space into a highly efficient, organized, and productive workshop. The key is to stop seeing your space as a limitation and start seeing it as a puzzle to be solved.
By embracing mobility, leveraging vertical space, and using smart, multi-purpose solutions, you can create a shop that feels far larger than it is. The journey to the ultimate small shop is one of constant optimization, and these solutions are the perfect place to start. Now, go out there and build something great—without having to move your car first.
Affiliate Disclosure
This article contains affiliate links for products that we believe will help you in your small shop journey. If you make a purchase through one of these links, we may earn a small commission at no extra cost to you. These commissions help support our work and allow us to continue providing high-quality content. Thank you for your support.
Discover more from WoodReality
Subscribe to get the latest posts sent to your email.
