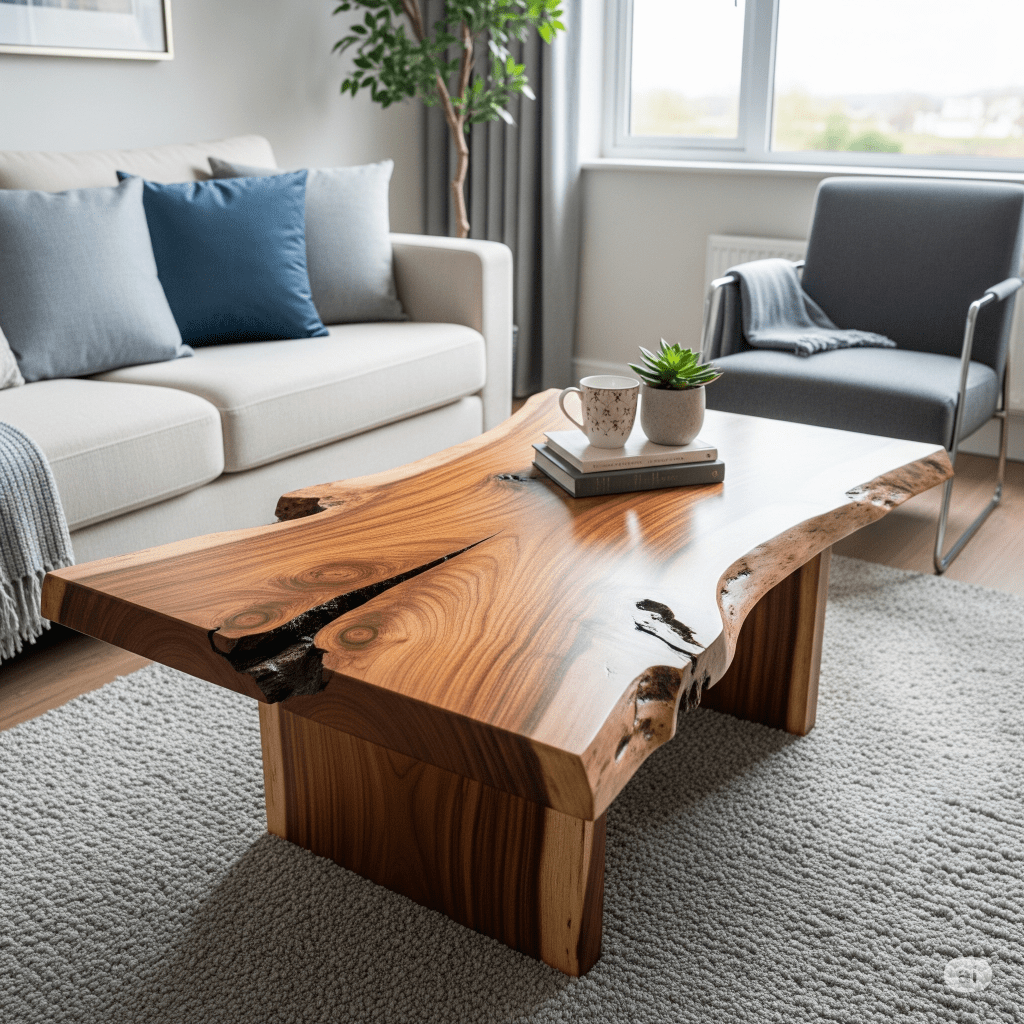
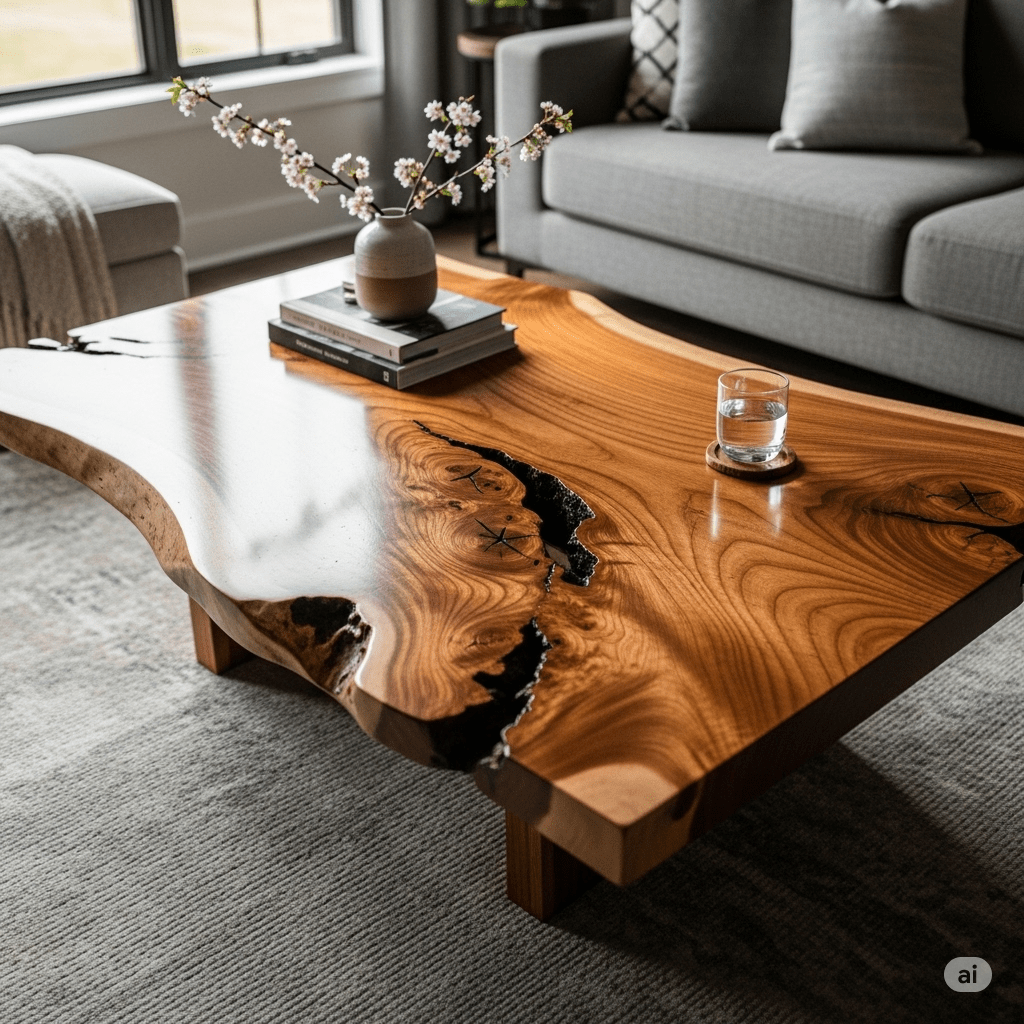
Live edge furniture has taken the home decor world by storm, blending rustic charm with modern elegance. Among these stunning pieces, a live edge wood slab coffee table stands out as a showstopper, perfect for wowing your guests with its natural beauty and unique craftsmanship. Whether you’re a seasoned woodworker or a DIY enthusiast, this comprehensive guide will walk you through every step of creating your own live edge coffee table, from selecting the perfect wood slab to applying the final finish. With detailed instructions, pro tips, and troubleshooting advice, you’ll have all the tools you need to craft a masterpiece that elevates your living space.
In this article, we’ll cover everything from sourcing materials to mastering techniques like epoxy resin application and leg installation. We’ll also share insights on optimizing your workflow, avoiding common mistakes, and ensuring your table is both functional and visually striking.
Let’s dive in and create a live edge coffee table that will leave your guests speechless!
Table of Contents
- Why Choose a Live Edge Wood Slab Coffee Table?
- Tools and Materials You’ll Need
- Step 1: Sourcing the Perfect Live Edge Wood Slab
- Step 2: Preparing the Wood Slab
- Step 3: Sanding and Smoothing the Surface
- Step 4: Applying Epoxy Resin for a Stunning Finish
- Step 5: Choosing and Attaching Table Legs
- Step 6: Final Finishing Touches
- Common Mistakes to Avoid
- Pro Tips for a Professional Look
- Maintaining Your Live Edge Coffee Table
- Inspiration: Design Variations and Ideas
- Why Use Teds Woodworking Plans for Your Next Project
- FAQs About Live Edge Coffee Tables
- Conclusion: Show Off Your Masterpiece
- Affiliate Disclosure
Why Choose a Live Edge Wood Slab Coffee Table?
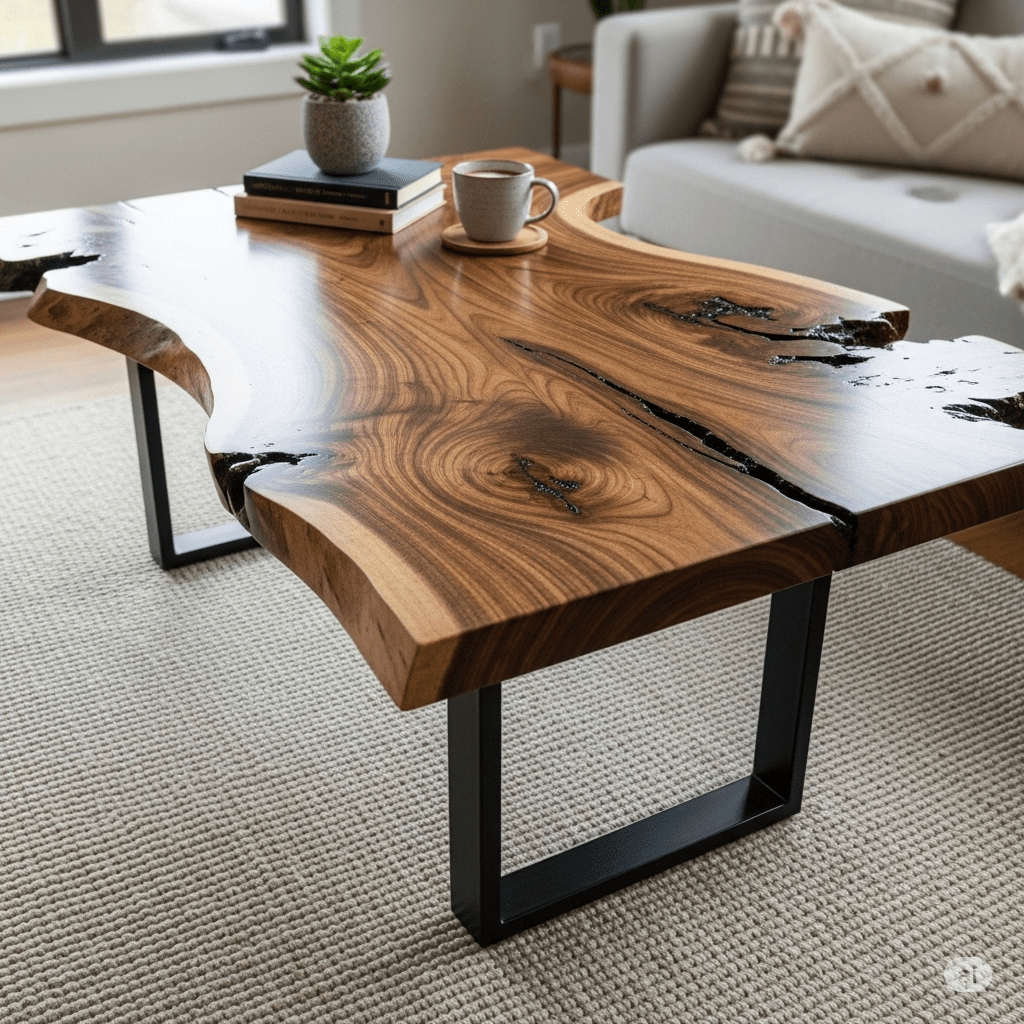
A live edge coffee table is more than just furniture—it’s a statement piece that celebrates the raw beauty of nature. The term “live edge” refers to the natural, untrimmed edge of a wood slab that retains the tree’s organic shape, complete with bark, knots, and imperfections. This aesthetic has surged in popularity, with searches for “live edge furniture” growing by 35% in the past year, according to Google Trends. Here’s why a live edge coffee table is a must-have:
- Unique Aesthetic: No two live edge slabs are identical, ensuring your table is one-of-a-kind.
- Versatile Design: It complements rustic, modern, industrial, and farmhouse decor styles.
- Conversation Starter: Guests are drawn to the natural patterns and textures, sparking admiration.
- Eco-Friendly Appeal: Using reclaimed or sustainably sourced wood aligns with green living trends.
- High Market Value: Live edge tables are highly sought after, with Etsy listings often priced between $500 and $2,000.
This project is ideal for woodworkers of all skill levels, as it combines simple techniques with room for creativity. Whether you’re aiming for a minimalist design or a bold epoxy resin finish, this guide will help you craft a table that stands out.
Tools and Materials You’ll Need
Before diving into the build, gather the following tools and materials. Investing in quality tools ensures precision and safety, while the right materials guarantee a durable, stunning result.Tools
- Orbital sander (with 80, 120, 220, and 400-grit sandpaper)
- Angle grinder (with flap discs for bark removal)
- Router (for edge smoothing, optional)
- Planer (hand or electric, for flattening the slab)
- Chisel set (for fine bark removal)
- Epoxy mixing kit (mixing cups, stir sticks, and spreaders)
- Heat gun or torch (for removing air bubbles in epoxy)
- Measuring tape and straightedge
- Clamps (for securing the slab during work)
- Safety gear (gloves, safety glasses, dust mask, and respirator)
- Drill and screwdriver (for attaching legs)
- Level (to ensure a flat table surface)
- Shop vacuum (for dust cleanup)
Materials
- Live edge wood slab (e.g., walnut, oak, maple, or cherry, 1.5–2 inches thick)
- Epoxy resin (clear, high-gloss, UV-resistant)
- Hardener (specific to your epoxy brand)
- Wood sealant (e.g., polyurethane, tung oil, or lacquer)
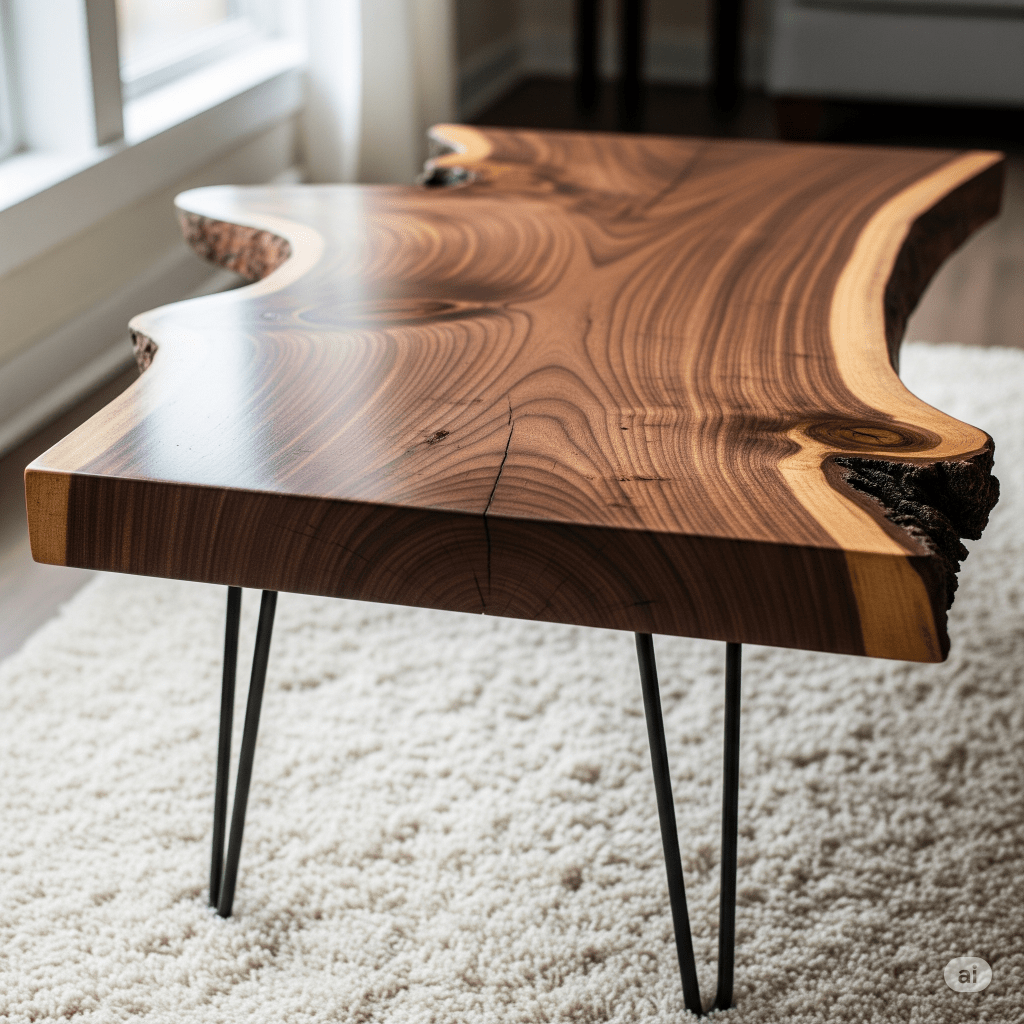
- Table legs (hairpin, industrial metal, or wooden, 16–18 inches tall)
- Screws and brackets (for leg attachment)
- Wood filler (for cracks or knots, optional)
- Cleaning supplies (mineral spirits, tack cloths)
- Mold release tape or silicone caulk (for epoxy containment)
Pro Tip: For inspiration and detailed blueprints, check out Teds Woodworking Plans, which offers over 16,000 project plans, including furniture designs that can complement your live edge table.
Step 1: Sourcing the Perfect Live Edge Wood Slab
The heart of your coffee table is the live edge wood slab. Choosing the right slab sets the tone for your project’s aesthetic and durability. Here’s how to source the perfect piece:
Where to Find Live Edge Slabs
- Local Sawmills: Sawmills often carry raw slabs from local trees. Ask for slabs with unique grain patterns or live edges.
- Reclaimed Wood Suppliers: Look for reclaimed wood from old barns or fallen trees for an eco-friendly option.
- Online Marketplaces: Sites like Etsy, eBay, or specialty retailers (e.g., The Lumber Shack) offer a variety of slabs. Expect to pay $100–$500 depending on size and wood type.
- Lumberyards: Some lumberyards stock live edge slabs or can source them on request.
- Local Woodworkers: Check Facebook Marketplace or woodworking groups for deals on slabs.
Choosing the Right Wood
Popular choices include:
- Walnut: Rich, dark tones with dramatic grain; durable but pricey ($200–$400 for a coffee table-sized slab).
- Oak: Affordable and sturdy with a classic grain ($100–$250).
- Maple: Light, creamy tones with subtle grain; great for modern designs ($150–$300).
- Cherry: Warm, reddish hues that deepen over time ($200–$350).
Consider the slab’s size (typically 36–48 inches long and 20–30 inches wide for a coffee table) and thickness (1.5–2 inches for stability). Inspect for cracks, knots, or warping, as these can add character but may require extra prep work.Checking for Quality
- Moisture Content: Use a moisture meter to ensure the slab is below 10% moisture to prevent warping.
- Flatness: Lay the slab on a flat surface to check for bowing or twisting.
- Live Edge Integrity: Ensure the bark is intact (if keeping it) or easily removable without damaging the wood.
Step 2: Preparing the Wood Slab
Once you’ve sourced your slab, it’s time to prepare it for construction. This step involves cleaning, debarking (if desired), and flattening the surface.
Cleaning the Slab
- Remove Dirt: Use a stiff brush and water to scrub off dirt or debris. Avoid soaking the wood to prevent swelling.
- Dry Thoroughly: Let the slab air-dry for 24–48 hours or use a shop fan to speed up the process.
- Degrease: Wipe the surface with mineral spirits to remove oils or sap, ensuring better adhesion for finishes.
Debarking (Optional)
Some prefer to keep the bark for a rustic look, while others remove it for a cleaner aesthetic. To debark:
- Use an Angle Grinder: Attach a flap disc (60-grit) to gently remove bark without damaging the wood.
- Chisel for Precision: Use a chisel for stubborn areas or intricate edges.
- Sand Edges: Smooth the debarked edge with 120-grit sandpaper to prevent splintering.
Flattening the Slab
Most slabs have uneven surfaces that need flattening:
- Hand Planing: Use a hand planer for small imperfections. Work slowly to avoid removing too much wood.
- Electric Planer: For larger slabs, an electric planer speeds up the process. Make light passes to maintain thickness.
- Check for Level: Use a straightedge and level to ensure the slab is flat. Fill minor cracks with wood filler if needed.
Pro Tip: If you’re new to flattening slabs, Teds Woodworking Plans offers detailed guides on preparing wood for furniture projects, ensuring professional results.
Step 3: Sanding and Smoothing the Surface
Sanding is critical to achieving a smooth, polished surface that highlights the wood’s natural beauty. This step enhances the grain and prepares the slab for epoxy or sealant.
Sanding Process
- Start with 80-Grit: Use an orbital sander to remove rough spots, scratches, or planer marks. Sand in the direction of the grain to avoid scratches.
- Progress to 120-Grit: Smooth out the surface further, focusing on evenness.
- Move to 220-Grit: Achieve a finer finish, preparing the wood for epoxy or sealant.
- Finish with 400-Grit: For a glass-like surface, especially if applying epoxy, sand with 400-grit for ultimate smoothness.
Sanding the Live Edge
- Use a sanding block or sponge for the live edge to maintain its natural shape.
- Avoid over-sanding, which can round off the organic edge.
- If keeping the bark, lightly sand to remove loose pieces without stripping it entirely.
Cleaning After Sanding
- Vacuum the slab to remove dust.
- Wipe with a tack cloth or damp cloth to ensure a clean surface for finishing.
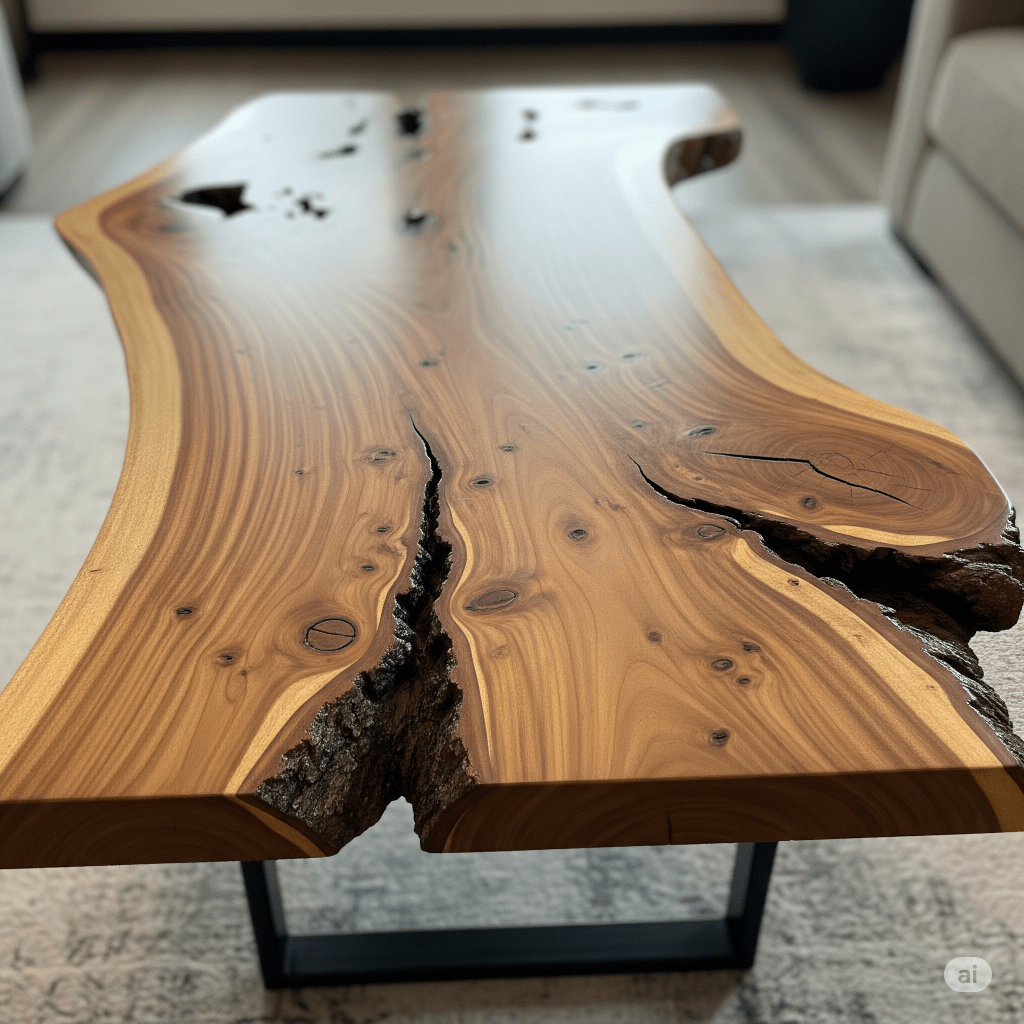
Step 4: Applying Epoxy Resin for a Stunning Finish
Epoxy resin is a game-changer for live edge tables, filling cracks, enhancing durability, and creating a glossy, modern look. Here’s how to apply it like a pro:
Choosing the Right Epoxy
- Clear Epoxy: Opt for UV-resistant, high-gloss epoxy (e.g., TotalBoat or EcoPoxy) to showcase the wood’s grain.
- Mixing Ratio: Most epoxies require a 1:1 or 2:1 resin-to-hardener ratio. Check the manufacturer’s instructions.
- Quantity: Calculate the volume needed (typically 1–2 gallons for a coffee table, depending on cracks and surface area).
Preparing for Epoxy Application
- Seal Cracks: Tape the underside of the slab with mold release tape to prevent epoxy leaks.
- Build a Drip Barrier: Use silicone caulk or tape around the edges to contain excess epoxy.
- Protect Your Workspace: Cover your work area with plastic sheeting and wear gloves, safety glasses, and a respirator.
Mixing and Applying Epoxy
- Mix Thoroughly: Combine resin and hardener in a clean bucket, stirring slowly for 3–5 minutes to avoid bubbles.
- Pour in Stages: For deep cracks, pour epoxy in thin layers (1/8 inch) to prevent overheating. Wait 4–6 hours between pours.
- Spread Evenly: Use a spreader or brush to apply epoxy across the surface, ensuring even coverage.
- Remove Bubbles: Use a heat gun or torch (held 6–8 inches away) to pop air bubbles immediately
Cost-Saving Tips for Your Live Edge Coffee Table
Building a live edge coffee table doesn’t have to break the bank. Here are practical ways to keep costs low while maintaining quality, making this project accessible for budget-conscious DIYers.
DIY Legs Instead of Buying
Instead of purchasing expensive metal legs, craft your own to save money and add a personal touch:
- Wooden Legs: Use scrap wood to turn legs on a lathe or create simple square legs with a table saw. For example, oak or pine offcuts can be shaped into sturdy legs for less than $20.
- Reclaimed Materials: Repurpose old furniture legs, such as those from a thrift store table, or use branches for a rustic look. Sand and stain to match your slab.
- PVC Pipe Hack: For an industrial vibe, paint PVC pipes black and attach them as legs using flanges. A set of four costs under $15 at hardware stores.
How to Make DIY Wooden Legs:
- Cut four pieces of 2×2-inch lumber to 16–18 inches long.
- Sand smooth with 120- and 220-grit sandpaper.
- Taper the ends with a hand plane or sander for a refined look.
- Stain or paint to match your slab, then attach with screws and brackets.
For detailed leg-building plans, Teds Woodworking Plans offers blueprints for custom furniture legs, helping you save money while achieving professional results.
Reuse Tools and Supplies
- Borrow or Rent Tools: If you don’t own an orbital sander or planer, borrow from a friend or rent from a hardware store (e.g., Home Depot rents tools for $20–$50/day).
- Use Leftover Epoxy: Mix small batches of epoxy to avoid waste, and save excess for future projects like coasters or wall art.
- Shop Sales: Buy sandpaper, sealants, and screws in bulk during seasonal sales to cut costs.
Alternative Finishes
Instead of pricey polyurethane or tung oil, consider:
- Beeswax Polish: A natural, low-cost finish ($5–$10) that enhances grain with a soft sheen.
- Vinegar and Steel Wool Stain: Create a DIY stain by soaking steel wool in vinegar for 24 hours. Apply for a weathered, rustic look at virtually no cost.
Enhancing Your Table with Functional Features
To make your live edge coffee table even more practical and appealing, consider adding functional features that enhance its usability and wow factor. These additions not only improve the table’s versatility but also make it a standout piece for social media sharing.
Built-In Storage
Adding a shelf or compartment increases storage capacity, perfect for small living spaces.
- Lower Shelf: Attach a second, smaller live edge slab or plywood board 6–8 inches below the tabletop using metal brackets or wooden supports. This shelf can hold magazines, remotes, or decor.
- Hidden Compartment: Carve a shallow recess in the underside of the slab and attach a hinged lid for discreet storage of small items.
How to Add a Lower Shelf:
- Source a matching or contrasting wood piece (e.g., a thinner slab or reclaimed board).
- Cut to size, ensuring it’s 2–4 inches smaller than the tabletop in length and width.
- Sand and finish to match the main slab.
- Attach with L-brackets or dowels, ensuring stability with a level.
Integrated Charging Stations
Incorporate modern technology by adding USB ports or wireless charging pads:
- USB Ports: Drill a small hole through the slab to run a USB charging hub (available for $10–$20). Secure the hub under the table for a clean look.
- Wireless Charging: Embed a wireless charging pad in the slab by routing a recess, epoxying the pad in place, and connecting it to a hidden power source.
Adjustable Height Mechanism
For versatility, add an adjustable base to switch between coffee table and dining table heights.
- Telescoping Legs: Use adjustable metal legs (available for $50–$100) that extend from 16 to 30 inches.
- Installation: Secure the base to the slab with heavy-duty screws, ensuring the mechanism is rated for the slab’s weight (typically 50–100 pounds).
For more functional furniture designs, check out Teds Woodworking Plans, which includes plans for multi-purpose tables with storage and adjustable features.
Conclusion: Show Off Your Masterpiece
Crafting a live edge wood slab coffee table is a rewarding journey that blends creativity, skill, and nature’s beauty. From sourcing a unique slab to applying epoxy resin and adding custom touches like inlays or LED lighting, this project allows you to create a functional, stunning piece that wows your guests and elevates your home. By incorporating cost-saving tips, eco-friendly practices, and advanced techniques, you’ve not only built a table but also honed your woodworking expertise.
Affiliate Disclosure
This article contains affiliate links, including links to Teds Woodworking Plans. If you make a purchase through these links, we may earn a small commission at no additional cost to you. This helps support our content creation and ensures we can continue providing detailed guides like this one. Thank you for your support!
Discover more from WoodReality
Subscribe to get the latest posts sent to your email.
