Introduction
A few months ago, I decided to build my own wooden bed frame. Why? Because store-bought frames can be expensive, and I wanted something custom-made to fit my style and needs. Plus, I love a good DIY challenge!
After researching, planning, and putting in some elbow grease, I successfully built a solid, stylish bed frame that I’m proud of. In this guide, I’ll walk you through every step I took, from choosing the right materials to assembling and finishing the frame. If you want to build your own sturdy, budget-friendly wooden bed frame, keep reading!
Step 1: Planning and Designing the Bed Frame
Before I grabbed any tools, I sat down to plan everything. Good preparation saves time and prevents costly mistakes later.
Choosing the Right Wood
I wanted something sturdy but not too pricey, so I had two main options:
- Hardwood (oak, maple, walnut): Super strong but more expensive.
- Softwood (pine, cedar): Budget-friendly and easier to cut.
I went with pine because it’s durable enough for a bed frame and easy to work with.
Determining the Size
The frame needed to match my mattress size perfectly. Here’s a quick reference:
- Twin: 38” x 75”
- Full: 54” x 75”
- Queen: 60” x 80”
- King: 76” x 80”
- California King: 72” x 84”
Since I had a queen mattress, I measured slightly larger to leave some wiggle room.
Sketching the Design
I grabbed a notebook and drew a rough sketch of the frame. It included:
- Side rails
- Headboard and footboard
- Support beams
- Wooden slats for the mattress base
Once I had my blueprint, I was ready to get started.
Step 2: Gathering Materials and Tools
A DIY project is only as good as the tools and materials used. Here’s what I needed:
Materials
✔️ Pinewood planks (cut to size)
✔️ Wood screws and bolts
✔️ L-brackets for extra stability
✔️ Wood glue for extra hold
✔️ Sandpaper (120-220 grit)
✔️ Wood stain or paint (for finishing)
Tools
🛠️ Saw (I used a circular saw)
🛠️ Drill with drill bits
🛠️ Measuring tape and pencil
🛠️ Clamps for holding pieces together
🛠️ Screwdriver
Safety Gear
✅ Safety goggles
✅ Dust mask
✅ Work gloves
With everything ready, I moved on to the fun part—building!
Step 3: Cutting and Preparing the Wood
Measuring and Marking
I measured and marked each piece carefully before cutting. Double-checking measurements saved me from wasting wood.
Cutting the Wood
Using my circular saw, I cut the following:
- Side rails (two long pieces)
- Headboard and footboard
- Support beams (one for the center, plus slats for the base)
Sanding the Edges
I didn’t want splinters in my bed, so I sanded every edge until smooth.
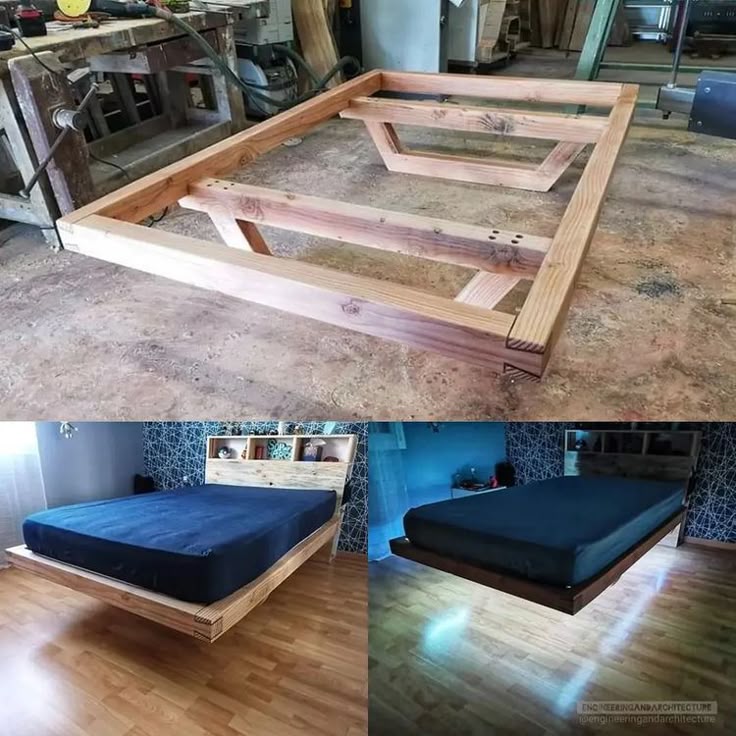
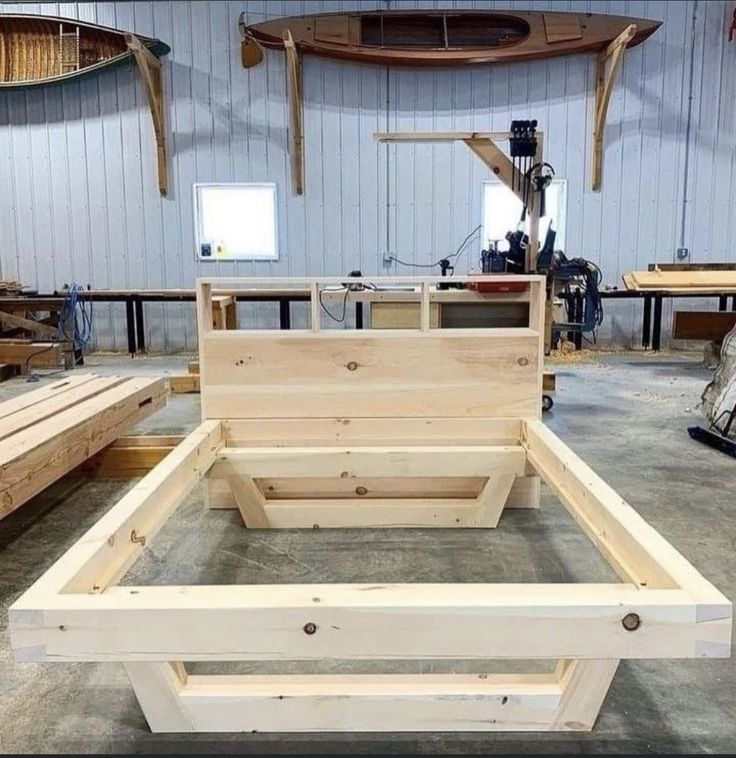
Step 4: Assembling the Bed Frame
Building the Side Rails
I started by connecting the two side rails to the headboard and footboard. I used wood screws and brackets for extra strength.
Adding the Center Support Beam
Since a queen-sized mattress needs extra support, I attached a center support beam with brackets.
Reinforcing the Frame
I didn’t want any wobbling, so I secured all joints with L-brackets and extra screws.
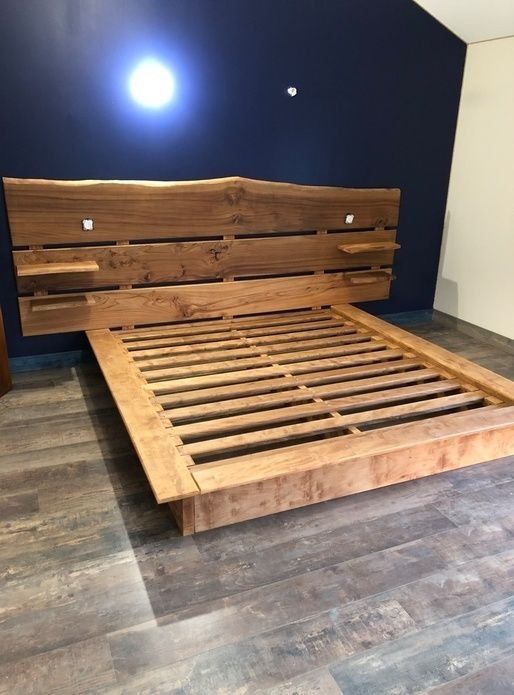
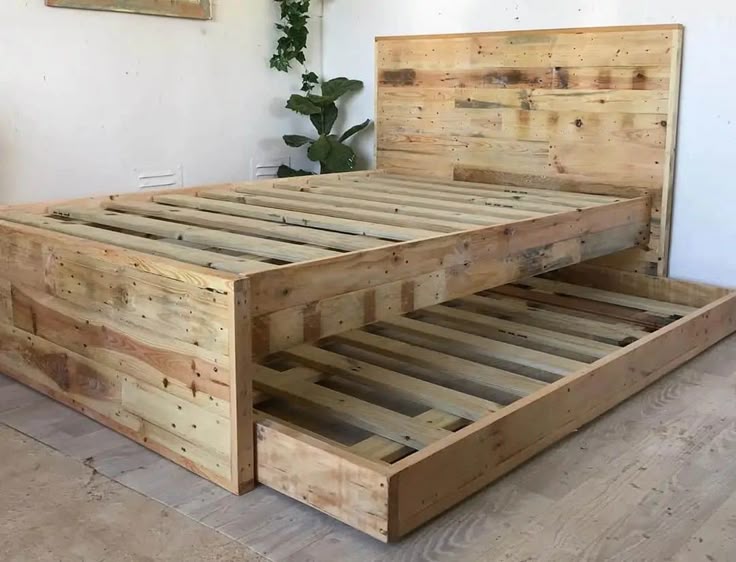
Step 5: Installing the Slats
Measuring and Spacing the Slats
For proper mattress support, I spaced the slats 2-3 inches apart.
Attaching the Slats
I secured each slat with screws. Some people prefer using a solid plywood sheet instead, but slats allow for better airflow.
Step 6: Finishing Touches
Sanding for a Smooth Look
Before staining, I gave the whole frame one final sanding.
Staining or Painting
I chose a rich walnut stain to give my bed a classy look. But you can go with any stain or paint that matches your room.
Applying a Protective Finish
To make sure the frame lasted for years, I applied a polyurethane finish for protection.
Step 7: Setting Up the Bed
With the frame fully built and dry, I moved it into my bedroom and set up my mattress. It fit perfectly!
Final Adjustments
- Tightened all screws one last time
- Checked for stability
- Added my mattress and bedding
I stood back, admired my work, and couldn’t believe I built a bed frame from scratch!
Tips for Maintenance
To keep my wooden bed frame in top shape, I follow these simple tips:
✅ Dust it regularly
✅ Avoid excess moisture
✅ Tighten screws every few months
Conclusion
Building my own wooden bed frame was one of the most rewarding DIY projects I’ve ever done. Not only did I save money, but I also got to create something sturdy, stylish, and custom-made for my space.
If you’re thinking about building your own, I highly recommend it. Just follow the steps, take your time, and enjoy the process.
FAQs
1. What type of wood is best for a bed frame?
Hardwoods like oak and maple are strong, but pine is a budget-friendly, sturdy option.
2. Can I build a bed frame without power tools?
Yes, but it’s more challenging. A handsaw, hammer, and screwdriver can get the job done, but power tools make it faster.
3. How much does it cost to build a wooden bed frame?
It depends on the wood type, but I spent around $150-$250 on mine—much cheaper than store-bought frames.
4. How do I make my bed frame more sturdy?
Use L-brackets, extra screws, and a center support beam for extra stability.
5. Can I add storage to this bed frame?
Absolutely! You can modify the design to include drawers or shelves under the bed.
Get Access to 16,000+ Woodworking Plans
If you loved this DIY project and want to take your woodworking skills to the next level, I highly recommend Ted’s Woodworking Plans. It’s the largest collection of step-by-step woodworking plans, featuring over 16,000 projects that are easy to follow—even if you’re a beginner!
🔨 Why Choose Ted’s Woodworking?
✔️ 16,000+ detailed plans for every skill level
✔️ Step-by-step instructions with blueprints & material lists
✔️ Easy-to-follow guides for furniture, sheds, outdoor projects & more
✔️ Save time & money with proven woodworking techniques
👉 Ready to start your next project? Click here to get instant access to Ted’s Woodworking Plans and start building today!
Affiliate Disclosure
This page contains affiliate links. If you purchase through these links, I may earn a small commission at no extra cost to you. This helps support my work and allows me to create more free DIY guides. Thank you for your support!
Discover more from WoodReality
Subscribe to get the latest posts sent to your email.

Pingback: How to Build a Wooden TV Stand: A Step-by-Step DIY Guide – WoodReality
Pingback: How to Make a DIY Wooden Headboard for Your Bed – WoodReality
Pingback: Ενδιαφέροντες Σύνδεσμοι