
Introduction
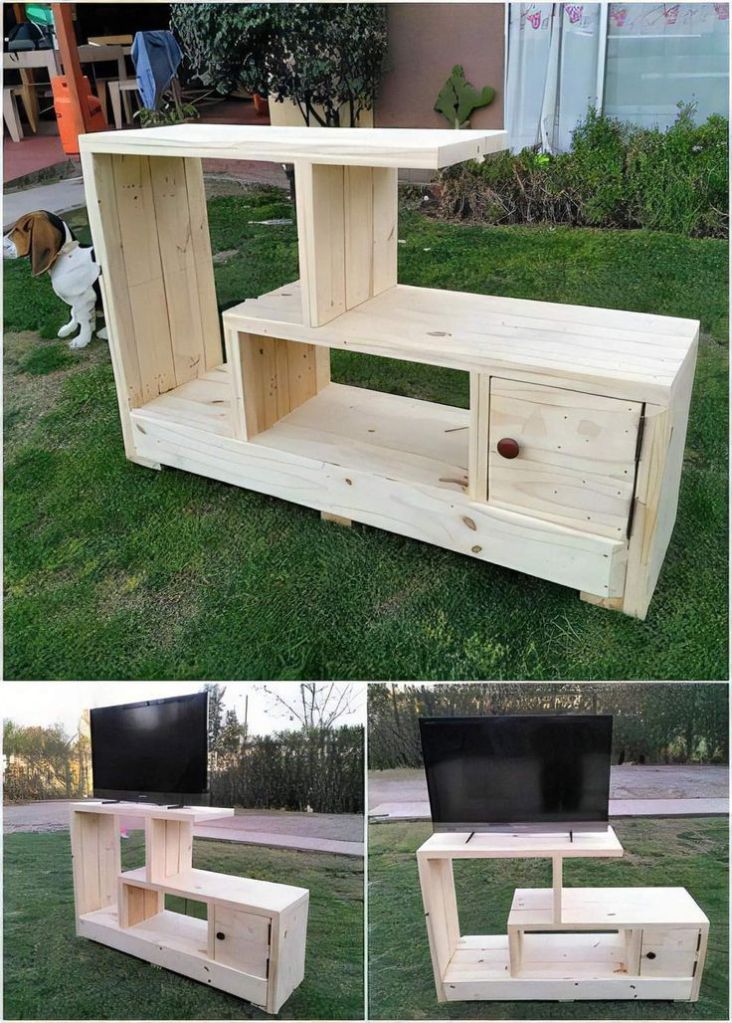
If you’ve ever walked into a furniture store and looked at the price tags on TV stands, you know they can be expensive. But why spend hundreds of dollars when you can build a high-quality wooden TV stand yourself? Not only will you save money, but you’ll also have the satisfaction of crafting a custom piece that fits perfectly into your home.
In this guide, I’ll walk you through how to build a wooden TV stand step by step. Whether you’re a beginner or a seasoned DIYer, I’ll cover everything you need to know, from choosing the right wood to adding the final touches.
Step 1: Planning Your Wooden TV Stand
Before you start cutting and assembling, it’s essential to have a clear plan. Ask yourself:
- What size should the TV stand be? (Consider the size of your TV and available space.)
- Do you want shelves for storage?
- Will you add doors or keep it open?
Materials and Tools Checklist:
✅ Wood (plywood, MDF, or hardwood)
✅ Screws, nails, wood glue
✅ Sandpaper and wood stain/paint
✅ Drill, saw, tape measure
Once you’ve mapped out your design, create a blueprint or sketch with measurements. This helps avoid costly mistakes down the road.
Step 2: Choosing the Right Wood for Your TV Stand
The type of wood you choose will impact the durability and appearance of your TV stand. Here are some options:
- Plywood – Affordable and easy to work with
- MDF (Medium-Density Fiberboard) – Smooth finish, good for painting
- Oak, Maple, or Pine – Sturdy and visually appealing
If you’re on a budget, plywood or MDF can be great choices. However, for a more rustic and long-lasting stand, solid hardwood is ideal.
Step 3: Tools and Materials You Need
For this project, you’ll need some basic woodworking tools:
- Circular saw or table saw (for cutting wood)
- Drill and screwdriver (for assembling pieces)
- Wood glue and screws (for extra stability)
- Sandpaper or power sander (for a smooth finish)
- Stain or paint (to customize the look)
Pro Tip: Invest in a clamp set to hold pieces together while assembling—it makes the process much easier!
Step 4: Measuring and Cutting the Wood
Step 1: Measure and mark the wood pieces according to your design.
Step 2: Use a circular saw or table saw to cut the pieces.
Step 3: Double-check measurements before making cuts to avoid errors.
Safety Tips:
⚠️ Always wear safety goggles when cutting.
⚠️ Use clamps to hold wood pieces in place for precision.
Step 5: Assembling the Frame of the TV Stand
Start by building the frame using screws and wood glue. Make sure everything is level and square before securing pieces together.
- Attach the sides to the top and bottom panels
- Use pocket hole screws or L-brackets for extra strength
- Let the glue dry completely before moving on
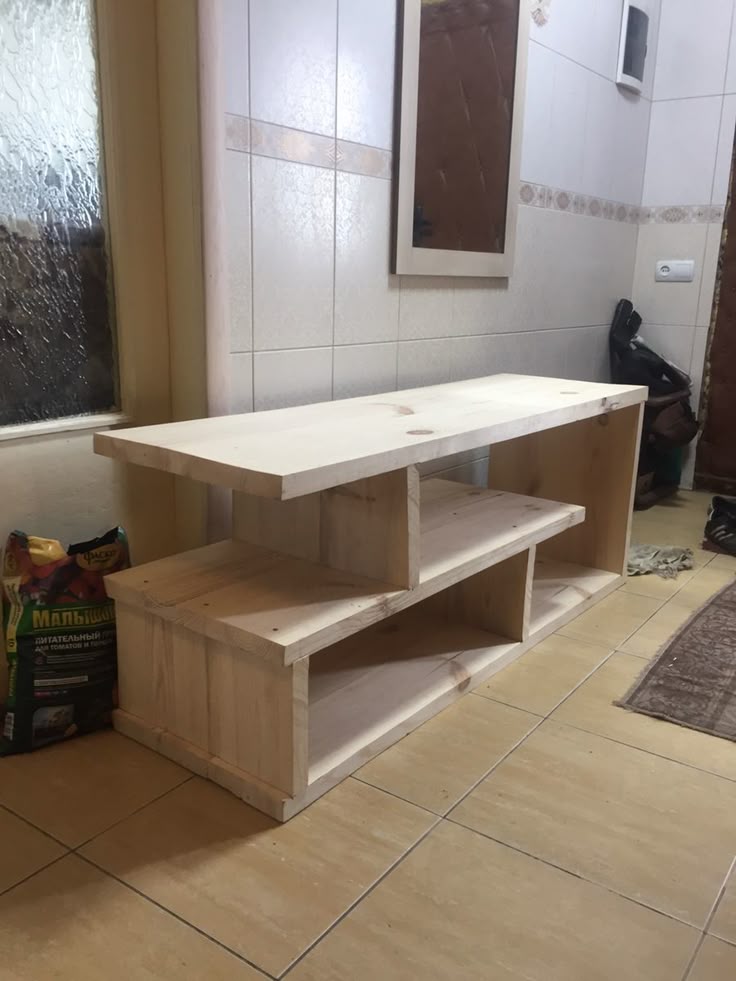
At this stage, your TV stand should start taking shape!
Step 6: Adding Shelves and Storage Space
Now that the frame is assembled, it’s time to add shelves or storage compartments. This step is crucial if you want a functional wooden TV stand that accommodates gaming consoles, cable boxes, or decorative items.
Deciding on the Shelf Layout
First, consider how many shelves you want. Do you need:
- One long open shelf for minimal storage?
- Multiple smaller shelves for organization?
- Cabinets with doors for a sleek look?
Measure and mark where the shelves will be placed. A good rule of thumb is to leave at least 6-8 inches of space between shelves to fit most electronics.
Attaching the Shelves
Once you’ve decided on the layout:
- Drill pilot holes on the sides where shelves will be placed.
- Use wood screws or L-brackets to secure the shelves.
- Double-check for level alignment before securing everything.
If you want an adjustable shelving system, consider drilling peg holes so you can move the shelves later.
Step 7: Sanding and Smoothing the Wood
No matter how good your cuts are, rough edges and splinters will make your TV stand look unpolished. Sanding is the key to getting a smooth and professional finish.
Best Sanding Techniques
- Start with coarse-grit sandpaper (80-100 grit) to remove rough spots.
- Move to medium-grit sandpaper (150-180 grit) to smooth the surface.
- Finish with fine-grit sandpaper (220-320 grit) for a polished look.
If you’re using an electric sander, move in circular motions to prevent swirl marks. For edges and corners, hand-sanding works best.
Step 8: Staining or Painting Your TV Stand
Once the sanding is complete, you need to decide: stain or paint?
- Stain enhances the natural wood grain, giving a rustic or classic look.
- Paint allows for more color customization and gives a modern touch.
How to Apply Wood Stain
- Use a lint-free cloth or foam brush to apply the stain in even strokes.
- Wipe off excess stain with a clean cloth.
- Let it dry for at least 24 hours before sealing with a polyurethane finish.
How to Paint the TV Stand
- Apply a wood primer if you’re using MDF or plywood.
- Use a high-quality brush or roller for even coverage.
- Apply two coats of paint, letting each coat dry before adding the next.
Step 9: Adding Finishing Touches and Protection
Once your TV stand is stained or painted, add finishing touches for durability and aesthetics.
Sealing and Protecting the Wood
- If stained, apply a polyurethane topcoat for scratch resistance.
- If painted, use a clear protective sealant to prevent chips.
Adding Hardware and Decorations
- Install handles or knobs if you have cabinet doors.
- Add decorative trim or molding for a unique look.
- Consider felt pads on the bottom to protect your floors.
These small details can make your DIY wooden TV stand look professionally made!
Step 10: Installing and Organizing Your TV Stand
Now it’s time to set up your new wooden TV stand in its rightful place.
Placement and Stability Checks
- Place the TV stand on a level surface to avoid wobbling.
- If needed, attach anti-tip brackets to the wall for added safety.
- Double-check that screws and joints are tight.
Cable Management for a Clean Look
Messy cables can ruin the look of your new TV stand. Consider:
✅ Cable clips to keep wires in place.
✅ Drilling holes in the back panel for wire access.
✅ Velcro ties to bundle multiple cords together.
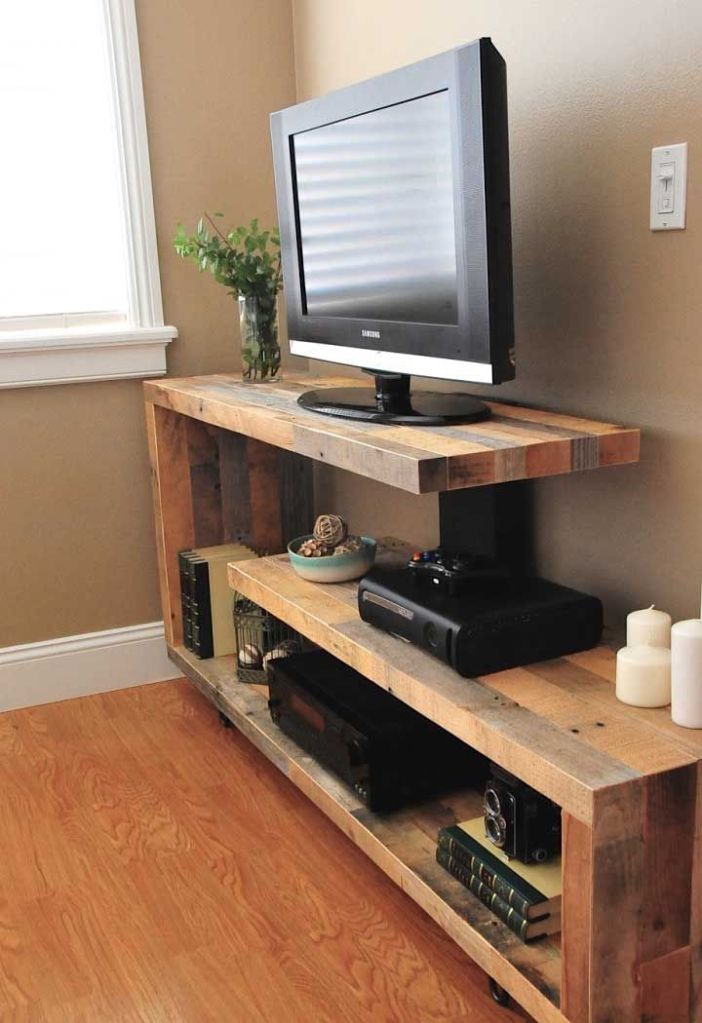
Now, place your TV, gaming consoles, speakers, or decorations on the stand, and enjoy your new handmade furniture!
Common Mistakes to Avoid When Building a TV Stand
Even experienced DIYers make mistakes. Here are some common pitfalls to watch out for:
❌ Incorrect Measurements – Always double-check before cutting.
❌ Weak Joints – Use screws AND wood glue for strong connections.
❌ Skipping Sanding – Rough wood will show flaws after staining/painting.
❌ Not Allowing Drying Time – Rushing the finishing process can cause smudges.
Why DIY Wooden TV Stands Are Better Than Store-Bought
You might be wondering: Why go through all this effort? Here’s why:
| Feature | DIY TV Stand | Store-Bought TV Stand |
|---|---|---|
| Cost | Lower ($50-$150) | Higher ($200-$500) |
| Customization | 100% Personalized | Limited choices |
| Durability | High (solid wood) | Often made of particleboard |
| Satisfaction | High (handmade) | Low (mass-produced) |
Building your own wooden TV stand isn’t just a money-saver—it’s a creative and rewarding project!
Tips for Maintaining Your Wooden TV Stand
To keep your new piece looking great for years:
✔ Dust regularly with a soft cloth.
✔ Use coasters to prevent water rings.
✔ Avoid direct sunlight to prevent fading.
✔ Touch up scratches with a wood repair marker.
Taking care of your wooden furniture ensures long-lasting beauty and durability.
Conclusion
Building a wooden TV stand may seem like a challenge, but with the right tools and guidance, anyone can do it! By following this step-by-step guide, you’ll end up with a sturdy, stylish, and customized piece of furniture.
So why settle for overpriced, low-quality store-bought stands? Grab your tools, pick your wood, and start building today!
Read Also:
How I Built a Sturdy Wooden Bed Frame (Step-by-Step DIY Guide)
How to Build a Wooden Adirondack Chair: A Step-by-Step Guide
How to Build a Wooden Desk: A Step-by-Step Guide for Beginners
Get Professional Woodworking Plans
If you loved this project but want even more detailed woodworking plans, I highly recommend Ted’s Woodworking Plans.
✅ Over 16,000 step-by-step woodworking projects
✅ Easy-to-follow blueprints for all skill levels
✅ Detailed materials list to avoid waste
👉 Click here to get instant access to Ted’s Woodworking Plans!
Affiliate Disclosure: This article contains affiliate links. If you purchase through these links, I may earn a small commission at no extra cost to you. This helps support my work and allows me to create more DIY guides for you!
FAQs
1. How long does it take to build a wooden TV stand?
It depends on your skill level. A simple design can take a day, while more complex stands with cabinets might take a weekend.
2. What’s the best wood for a TV stand?
Hardwood (oak, maple, pine) is the best for durability. For budget-friendly options, plywood or MDF works well.
3. Do I need power tools for this project?
Not necessarily! You can use hand tools like a handsaw and screwdriver, but power tools like a drill and circular saw will make the job faster and easier.
4. Can I build a TV stand without screws?
Yes! Wood glue, dowels, or pocket-hole joinery can hold pieces together, but screws add extra strength.
5. How much does it cost to build a wooden TV stand?
It depends on materials, but you can build one for $50-$150, which is much cheaper than buying one in a store!
Discover more from WoodReality
Subscribe to get the latest posts sent to your email.
