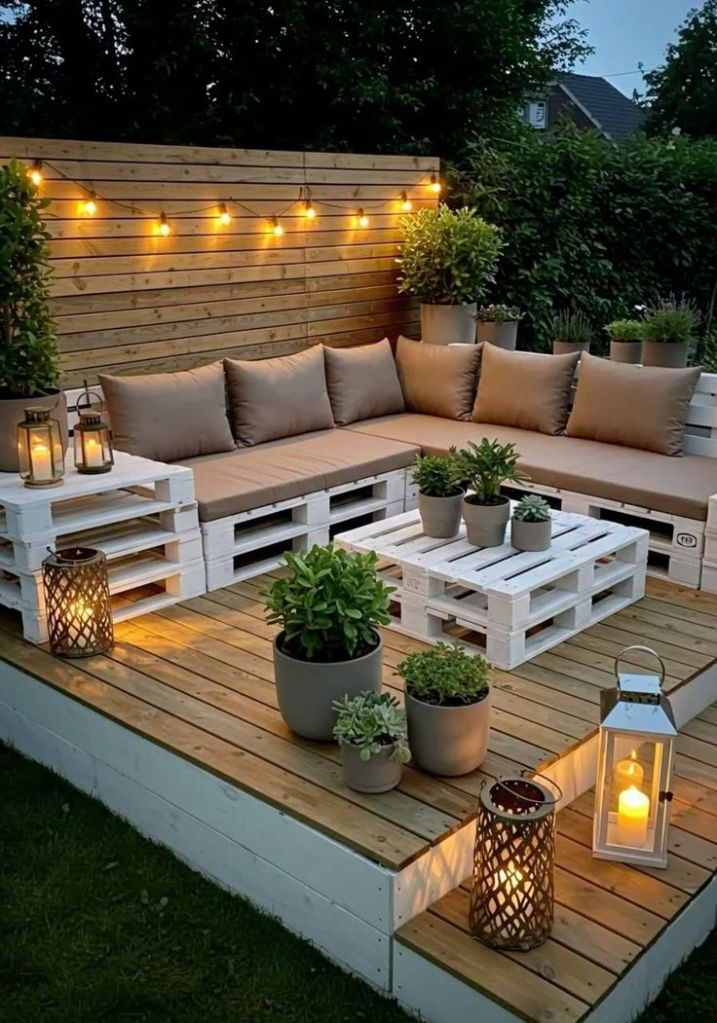
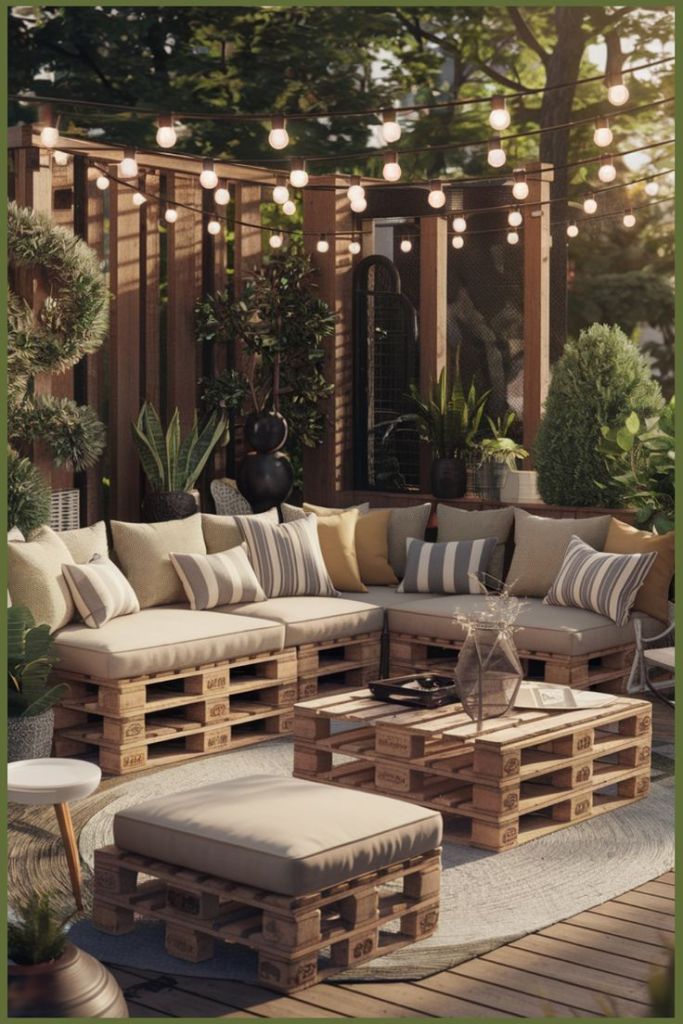
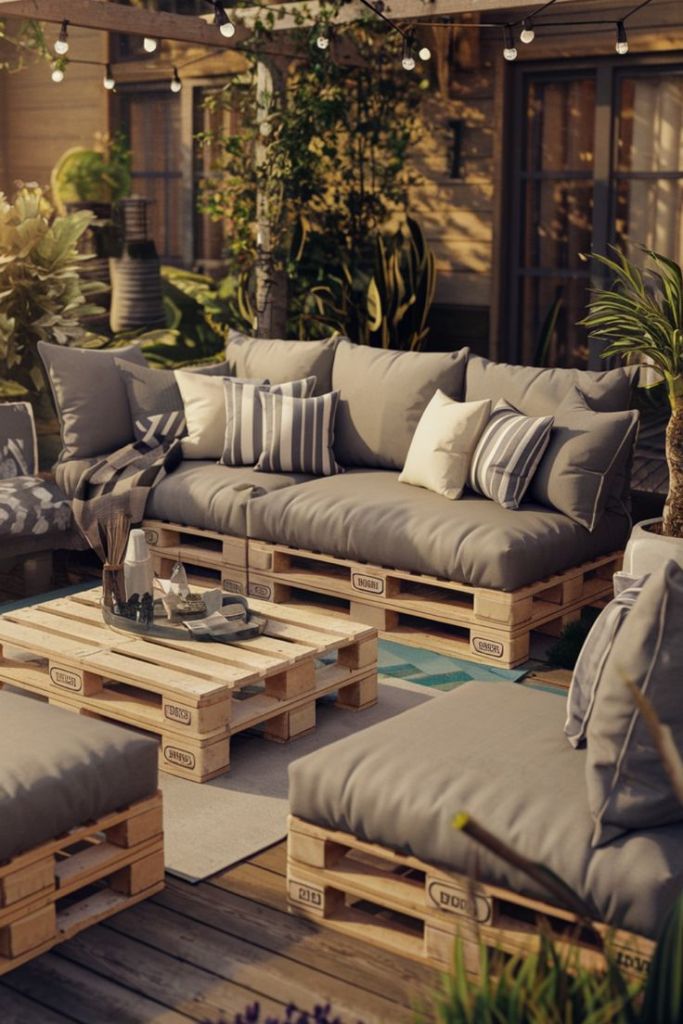
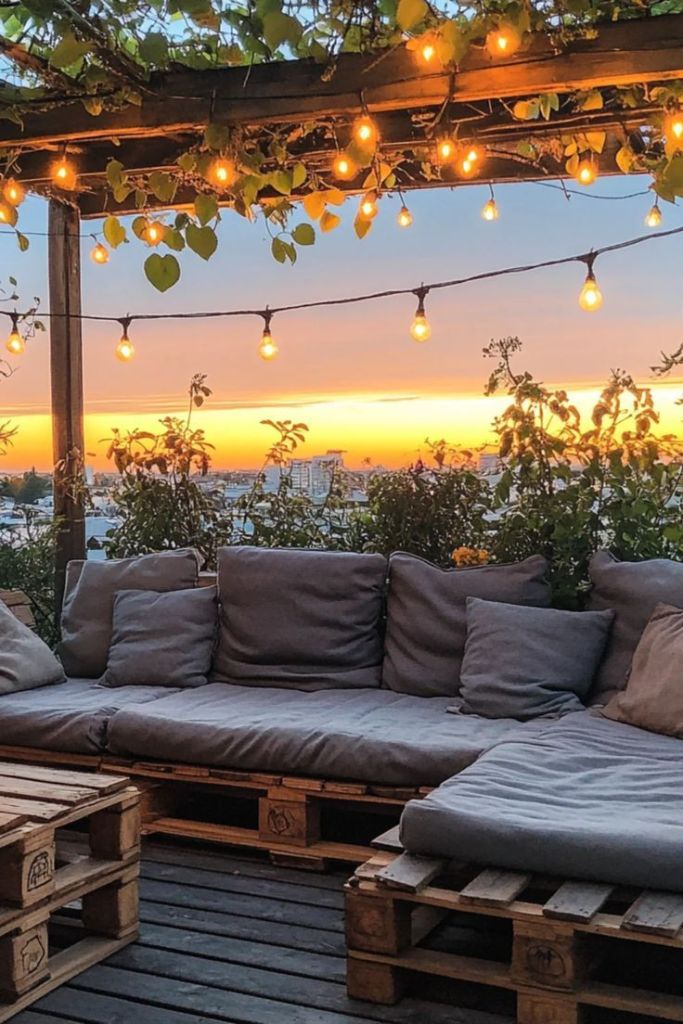
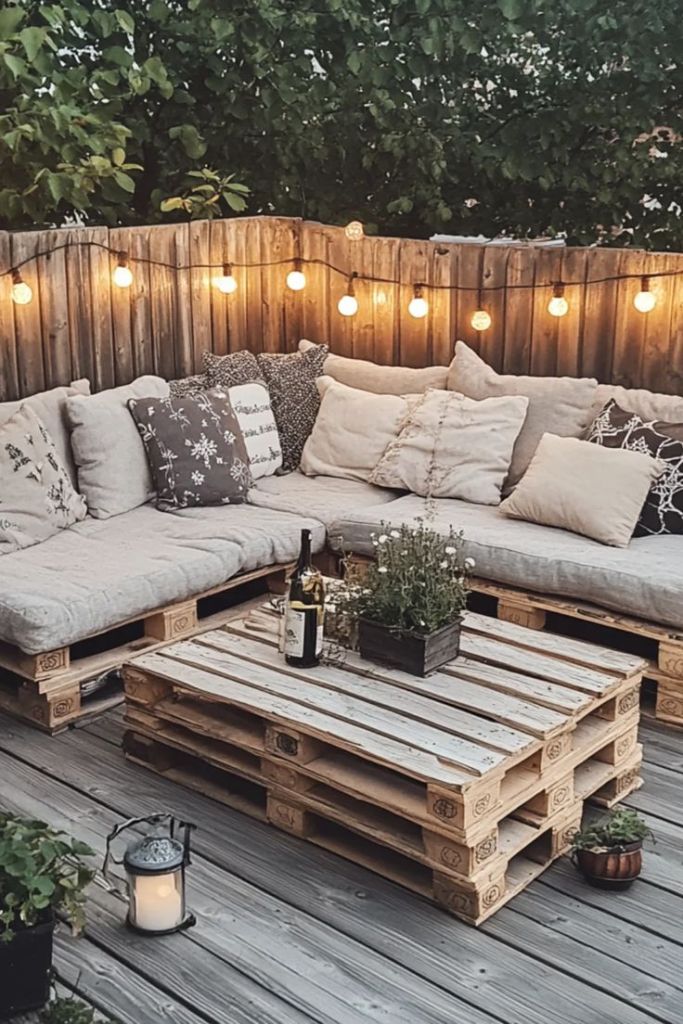
Summer is the perfect time to enjoy your outdoor space, whether it’s a sprawling backyard or a cozy patio. A stylish and functional patio set can transform your outdoor area into a haven for relaxation, barbecues, or family gatherings. But buying outdoor furniture can be expensive, and mass-produced sets often lack the charm of handmade pieces. That’s where a DIY wooden pallet patio set comes in—a budget-friendly, customizable, and eco-conscious project that any woodworking enthusiast can tackle. In this comprehensive guide, we’ll walk you through every step of building your own wooden pallet patio set, from sourcing materials to adding the perfect finish. Whether you’re a beginner or a seasoned woodworker, this project will elevate your outdoor space for summer 2025.
With the rise of upcycling and sustainable living, wooden pallets have become a go-to material for DIY furniture projects. They’re affordable (often free), versatile, and perfect for creating rustic, modern, or bohemian-style patio furniture. This guide covers everything you need to know to build a complete patio set, including a table, chairs, and a bench, all made from reclaimed pallets. We’ll also share tips for sourcing safe pallets, essential tools, and finishing techniques to ensure your set is durable and weather-resistant. Plus, we’ll point you to resources like Ted’s Woodworking Plans for additional inspiration and detailed blueprints to expand your woodworking skills.
Let’s dive into this exciting woodworking project and create a patio set that’s as functional as it is beautiful!
Why Choose Wooden Pallets for Your Patio Set?
Before we get into the nitty-gritty of building your DIY wooden pallet patio set, let’s explore why pallets are an excellent choice for this project:
- Cost-Effective: Pallets are often free or inexpensive, available from local businesses, warehouses, or construction sites. This keeps your project budget low, leaving room for quality finishes or cushions.
- Eco-Friendly: Using reclaimed pallets reduces waste and promotes sustainability, appealing to environmentally conscious DIYers.
- Versatile Design: Pallets can be transformed into various styles—rustic, modern, or industrial—depending on how you sand, stain, or paint them.
- Beginner-Friendly: Pallet projects are forgiving for beginners, as the wood is already cut into manageable sizes, and imperfections add to the rustic charm.
- Customizable: You can tailor your patio set to fit your space, whether it’s a compact balcony or a large deck.
By choosing pallets, you’re not only saving money but also creating a unique piece that reflects your personal style. Let’s get started with the planning phase.
Step 1: Planning Your DIY Wooden Pallet Patio Set
A successful woodworking project starts with careful planning. Here’s how to prepare for building your patio set:
Determine Your Needs
Consider the size and layout of your outdoor space:
- Small Patio or Balcony: Opt for a compact set with a small table and two chairs.
- Large Deck or Backyard: Build a full set with a table, bench, and multiple chairs for entertaining.
- Seating Capacity: Decide how many people you want to seat (e.g., a family of four or a larger group for gatherings).
Choose Your Design Style
Your patio set’s aesthetic should complement your outdoor space. Popular styles include:
- Rustic: Sand lightly and use a natural stain to highlight the wood’s grain.
- Modern: Paint the pallets in bold colors like white or black for a sleek look.
- Bohemian: Add colorful cushions and eclectic patterns for a cozy vibe.
Create a Materials List
For a standard patio set (table, bench, and two chairs), you’ll need:
- Wooden Pallets: 6–8 standard pallets (48” x 40” is common). Ensure they’re heat-treated (marked “HT”) for safety.
- Tools: Hammer, pry bar, circular saw, jigsaw, drill, sander, measuring tape, level, and safety gear (gloves, goggles, mask).
- Hardware: Screws (2.5” and 3” wood screws), nails, L-brackets, and wood glue.
- Finishing Supplies: Sandpaper (80- and 120-grit), exterior wood stain or paint, sealant, and optional cushions or pillows.
- Optional Accessories: Glass tabletop for the table, outdoor cushions, or decorative hardware.
Set a Budget
Expect to spend $50–$150, depending on whether you source free pallets and already own tools. Most costs come from finishing materials and cushions. For detailed plans and inspiration, resources like Ted’s Woodworking Plans offer thousands of blueprints, including patio furniture designs, to help you refine your project (more on this later).
Step 2: Sourcing Safe Wooden Pallets
Not all pallets are safe for woodworking. Here’s how to source and prepare pallets for your patio set:
Where to Find Pallets
- Local Businesses: Contact hardware stores, garden centers, or warehouses. Many give away pallets for free to avoid disposal costs.
- Construction Sites: Ask contractors for unused pallets, but ensure they’re clean and free of chemicals.
- Online Marketplaces: Check Craigslist, Facebook Marketplace, or local “buy nothing” groups for free or low-cost pallets.
- Pallet Recycling Centers: Some cities have dedicated pallet recycling facilities with affordable options.
Safety Considerations
- Look for “HT” Markings: Heat-treated pallets are safe for indoor and outdoor use, as they’re free of harmful chemicals like methyl bromide (marked “MB”).
- Inspect for Damage: Avoid pallets with mold, rot, or excessive stains. Check for protruding nails or splintered wood.
- Clean Thoroughly: Wash pallets with a mild soap solution and let them dry completely to remove dirt or contaminants.
Preparing Pallets
Once you’ve sourced your pallets:
- Disassemble: Use a pry bar and hammer to carefully remove boards. Save intact boards for the table and chairs; use damaged ones for smaller components.
- Sand: Smooth rough edges with 80-grit sandpaper, then finish with 120-grit for a polished surface.
- Cut to Size: Use a circular saw to cut boards to your desired dimensions, keeping safety in mind.
For a detailed breakdown of pallet preparation, check out woodworking communities like Reddit’s r/woodworking, where DIYers share tips on sourcing and prepping pallets.
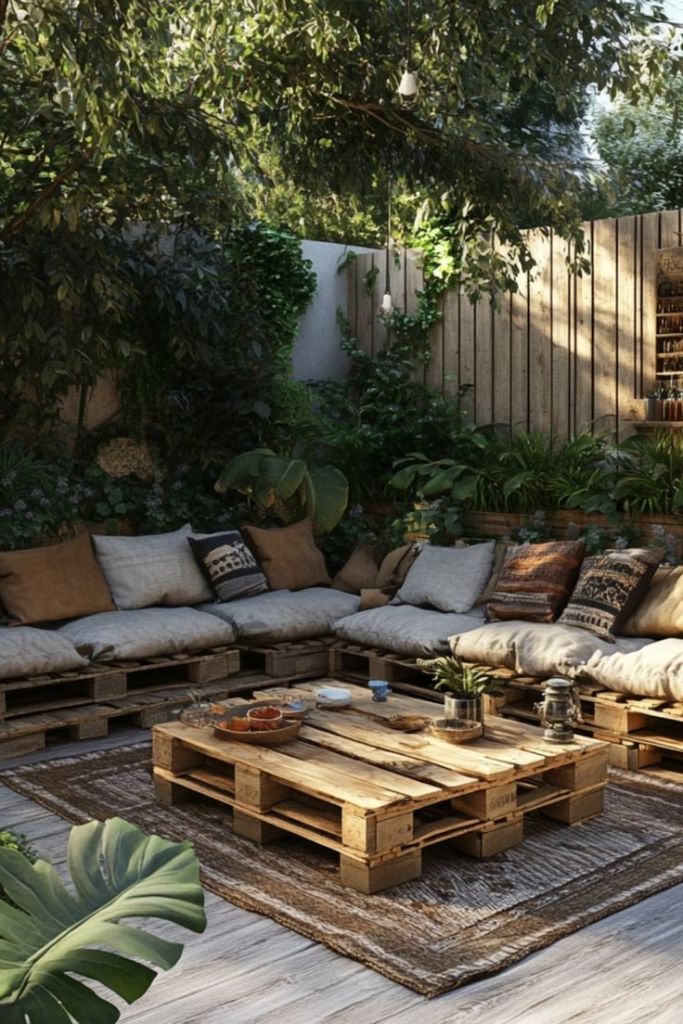
Step 3: Building the Patio Table
The table is the centerpiece of your patio set. This design is for a 48” x 36” rectangular table, but you can adjust dimensions to fit your space.
Materials Needed
- 3–4 pallets (for tabletop and frame)
- 2.5” wood screws
- L-brackets (4–6)
- Wood glue
- Sandpaper (80- and 120-grit)
- Exterior stain or paint
- Optional: Glass tabletop (custom-cut to size)
Tools Needed
- Circular saw
- Drill
- Sander
- Measuring tape
- Level
- Clamps
Step-by-Step Instructions
- Create the Tabletop:
- Select 8–10 pallet boards of equal length (48” for a standard table).
- Lay them side by side to form a flat surface. Ensure they’re flush and level.
- Secure the boards by attaching two perpendicular support boards (36” long) underneath, using wood glue and screws at each intersection.
- Reinforce with L-brackets along the edges for stability.
- Build the Frame:
- Cut four pallet boards to form a rectangular frame (48” x 36”).
- Attach the frame to the underside of the tabletop with screws and wood glue.
- Add diagonal braces (cut at 45° angles) inside the frame for extra strength.
- Add Legs:
- Cut four pallet boards to 30” for standard table height.
- Attach each leg to the frame’s corners using L-brackets and screws. Ensure the legs are plumb using a level.
- Reinforce with additional cross-braces if needed.
- Sand and Finish:
- Sand the entire table with 80-grit, then 120-grit sandpaper for smoothness.
- Apply an exterior-grade wood stain or paint to protect against weather. For a modern look, consider a white or navy finish; for rustic, use a natural stain like walnut.
- Seal with a weatherproof polyurethane sealant (apply 2–3 coats).
- Optional Glass Top:
- Order a custom-cut tempered glass top (48” x 36”) for a polished look.
- Secure with clear adhesive pads to prevent slipping.
Tips for Success
- Use a level at every step to ensure stability.
- Pre-drill holes to prevent wood from splitting.
- Test the table’s sturdiness before adding the glass top.
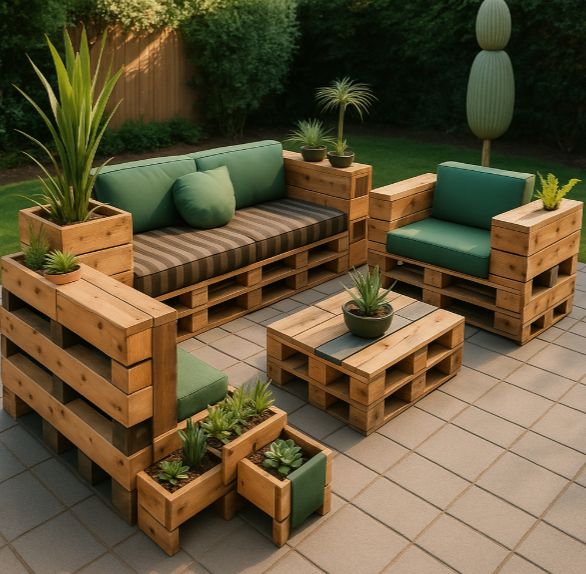
Step 4: Building the Patio Chairs
Next, let’s build two matching chairs to complement your table. These chairs will have a simple, sturdy design with a slightly reclined backrest for comfort.
Materials Needed
- 2 pallets per chair (4 total)
- 2.5” and 3” wood screws
- Wood glue
- Sandpaper
- Exterior stain or paint
- Outdoor cushions (optional)
Tools Needed
- Circular saw
- Jigsaw
- Drill
- Sander
- Measuring tape
- Clamps
Step-by-Step Instructions
- Build the Seat Frame:
- Cut four pallet boards to 24” for a square seat frame.
- Assemble into a 24” x 24” square, securing with screws and wood glue.
- Add 3–4 pallet boards across the top to form the seat, spacing them 1/4” apart for drainage.
- Create the Backrest:
- Cut two vertical supports to 36” for the backrest frame.
- Angle the top of each support at 10–15° for a comfortable recline.
- Attach 4–5 horizontal pallet boards (24” long) to form the backrest, securing with screws.
- Add Legs:
- Cut four legs to 18” for a standard seat height.
- Attach two legs to the front of the seat frame and two to the backrest supports, using L-brackets for stability.
- Reinforce with cross-braces if needed.
- Sand and Finish:
- Sand thoroughly to remove splinters.
- Apply the same stain or paint as the table for a cohesive look.
- Seal with polyurethane for weather resistance.
- Add Cushions:
- Purchase or sew 24” x 24” outdoor cushions for added comfort.
- Secure cushions with Velcro strips or ties to prevent slipping.
Tips for Success
- Ensure the backrest angle is comfortable by testing before final assembly.
- Use weather-resistant screws to prevent rust.
- Customize with armrests by adding two 24” boards to the sides (optional).
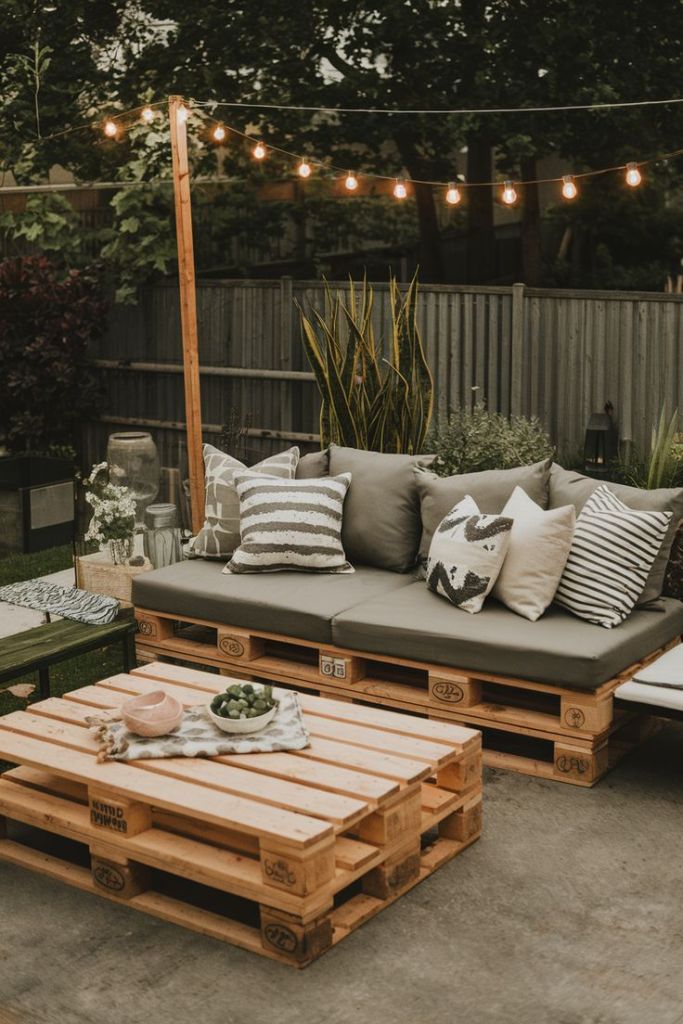
Step 5: Building the Patio Bench
A bench adds extra seating and charm to your patio set. This design is for a 48” long bench to match the table.
Materials Needed
- 2–3 pallets
- 2.5” and 3” wood screws
- Wood glue
- Sandpaper
- Exterior stain or paint
- Outdoor cushions (optional)
Tools Needed
- Circular saw
- Drill
- Sander
- Measuring tape
- Clamps
Step-by-Step Instructions
- Build the Seat Frame:
- Cut four pallet boards to 48” x 18” for a rectangular frame.
- Assemble with screws and wood glue.
- Add 5–6 pallet boards across the top, spaced 1/4” apart.
- Create the Backrest:
- Cut two vertical supports to 36” with a 10° angle at the top.
- Attach 4–5 horizontal boards (48” long) to form the backrest.
- Add Legs:
- Cut four legs to 18” for consistent seat height.
- Attach to the frame’s corners with L-brackets and screws.
- Sand and Finish:
- Sand and apply the same finish as the table and chairs.
- Seal with polyurethane for durability.
- Add Cushions:
- Use 48” x 18” outdoor cushions for comfort.
- Secure with ties or adhesive strips.
Tips for Success
- Reinforce the bench with additional braces for heavy use.
- Test stability by sitting on it before finishing.
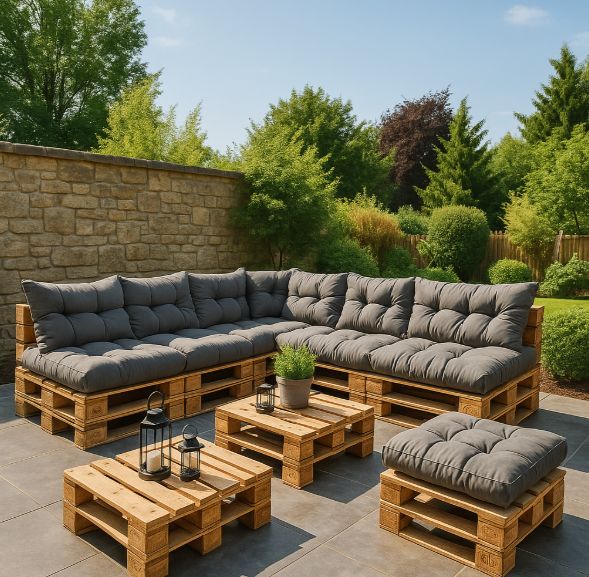
Step 6: Finishing Touches for Your Patio Set
To make your patio set stand out and withstand the elements, focus on these finishing touches:
Sanding and Smoothing
- Sand all surfaces thoroughly to remove splinters and create a professional finish.
- Focus on edges and corners, as these are prone to wear.
Choosing the Right Finish
- Stain: Use an exterior-grade stain like Minwax or Behr for a natural look. Popular colors include walnut, cedar, or gray.
- Paint: Opt for exterior latex paint for bold colors. Prime first for better adhesion.
- Sealant: Apply 2–3 coats of polyurethane or spar urethane to protect against rain, UV rays, and humidity.
Adding Comfort
- Purchase weather-resistant cushions or pillows in vibrant colors or patterns to match your style.
- Consider DIY cushion covers using outdoor fabric for a custom look.
Maintenance Tips
- Clean your patio set annually with a mild soap solution.
- Reapply sealant every 1–2 years to maintain weather resistance.
- Store cushions indoors during harsh weather to prolong their life.
Step 7: Enhancing Your Patio Set with Accessories
Take your patio set to the next level with these add-ons:
- Umbrella Holder: Drill a hole in the table for a patio umbrella.
- Built-In Planters: Attach small planter boxes to the bench or table for greenery.
- Lighting: Add solar-powered string lights or lanterns for evening ambiance.
- Storage: Incorporate hidden storage under the bench for cushions or outdoor games.
For more creative ideas, explore Ted’s Woodworking Plans, which offers over 16,000 woodworking blueprints, including outdoor furniture designs. Their detailed plans can inspire additional features or help you tackle more complex projects.
Troubleshooting Common Issues
Here are solutions to potential challenges:
- Uneven Legs: Use a level during assembly and adjust with shims if needed.
- Splitting Wood: Pre-drill holes and use the correct screw size.
- Weather Damage: Apply extra sealant coats and store furniture under a cover during winter.
- Wobbly Furniture: Reinforce joints with L-brackets or additional screws.
Safety Tips for Woodworking
- Always wear safety goggles, gloves, and a dust mask when cutting or sanding.
- Work in a well-ventilated area when applying stains or sealants.
- Double-check pallet safety (avoid “MB” pallets) to prevent chemical exposure.
- Keep tools out of reach of children and follow manufacturer guidelines.
Why This Project Is Perfect for Summer 2025
Building a DIY wooden pallet patio set is not only a rewarding woodworking project but also a timely one for summer 2025. With outdoor living trends on the rise, homeowners are seeking affordable, sustainable ways to enhance their spaces. This project aligns with those trends while showcasing your woodworking skills.
Expanding Your Woodworking Skills
If you enjoyed this project, consider exploring more advanced designs or additional outdoor furniture. Resources like Ted’s Woodworking Plans provide detailed blueprints for everything from pergolas to Adirondack chairs, helping you take your skills to the next level. Their plans are beginner-friendly yet comprehensive, making them a valuable tool for any woodworker.
Conclusion
Creating a DIY wooden pallet patio set is a fantastic way to elevate your outdoor space while honing your woodworking skills. This budget-friendly, eco-conscious project is perfect for summer 2025, offering a stylish and functional addition to your patio or backyard. By following this guide, you’ve learned how to source safe pallets, build a table, chairs, and bench, and apply durable finishes to ensure your set lasts for years. Whether you’re hosting a barbecue or enjoying a quiet evening outdoors, your handmade patio set will be the centerpiece of countless memories.
Ready to start building? Gather your pallets, tools, and creativity, and let’s make your summer patio dreams a reality. For more woodworking inspiration, check out Ted’s Woodworking Plans for thousands of project ideas to keep your workshop buzzing.
Affiliate Disclosure
This article contains affiliate links, including links to Ted’s Woodworking Plans. If you make a purchase through these links, we may earn a small commission at no additional cost to you. This helps support our blog and allows us to continue providing free, high-quality content for woodworking enthusiasts like you. Thank you for your support!
Discover more from WoodReality
Subscribe to get the latest posts sent to your email.
